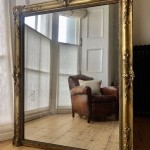
DIY Black Framed Mirror: A Comprehensive Guide
Creating a custom black framed mirror is a rewarding project that can elevate any space. This guide provides a step-by-step approach to crafting a stylish and personalized mirror, from selecting materials to achieving a professional finish.
Gathering Necessary Materials
Before embarking on the project, ensure all required materials are readily available. This preparation streamlines the building process and prevents unnecessary interruptions.
- Mirror (cut to desired dimensions)
- Wooden boards for the frame (1x2" or 1x4" recommended)
- Wood glue
- Wood screws
- Measuring tape and pencil
- Miter saw (or hand saw with miter box)
- Clamps
- Sandpaper (various grits)
- Black paint (spray paint or brush-on)
- Primer (optional)
- Mirror mastic or adhesive
- Safety glasses and gloves
Preparing the Wooden Frame
Precise measurements and cuts are crucial for a professional-looking frame. Accurate cuts ensure tight joints and a polished final product.
- Measure the mirror precisely to determine the frame's inner dimensions.
- Using the miter saw, cut the wooden boards at a 45-degree angle to create mitered corners. Ensure the lengths correspond correctly to the mirror’s dimensions.
- Dry-fit the frame pieces together to verify accurate measurements and angles before applying any adhesive.
Assembling the Frame
Assembling the frame requires precision to ensure strong, seamless joints. Proper assembly ensures the frame's longevity and structural integrity.
- Apply wood glue to the mitered edges of each frame piece.
- Join the pieces together, forming a rectangle or square, ensuring tight corners.
- Secure the joints with clamps, allowing the glue to dry completely according to the manufacturer's instructions.
- Reinforce the frame by adding small wood screws to the back of each corner joint. Pre-drilling pilot holes prevents wood splitting.
Sanding and Finishing the Frame
Sanding and finishing the frame achieve a smooth, professional appearance. This step prepares the frame for painting and enhances its aesthetic appeal.
- Sand the frame using progressively finer grits of sandpaper, starting with a coarser grit to remove any imperfections and progressing to a finer grit for a smooth surface.
- Remove any dust particles with a tack cloth or damp cloth.
- If desired, apply a coat of primer to ensure better paint adhesion and a more even finish.
- Apply several thin coats of black paint, allowing each coat to dry thoroughly before applying the next. This technique prevents drips and ensures a uniform finish.
Attaching the Mirror to the Frame
Properly attaching the mirror requires a suitable adhesive and careful application. This process secures the mirror within the frame and completes the overall design.
- Lay the frame face down on a clean, protected surface.
- Apply mirror mastic or adhesive to the back of the frame, following the manufacturer’s instructions. Ensure even coverage to prevent the mirror from shifting or detaching.
- Carefully place the mirror onto the adhesive, centering it within the frame.
- Apply gentle pressure to ensure proper adhesion. Allow the adhesive to cure completely according to the manufacturer’s recommendations.
Adding Hanging Hardware (Optional)
Adding hanging hardware allows for easy display of the finished mirror. This final touch completes the project and prepares the mirror for mounting.
- Choose appropriate hanging hardware based on the mirror's size and weight, such as D-rings or wire hangers.
- Attach the hardware securely to the back of the frame, ensuring it is evenly spaced and level.
Choosing the Right Mirror
Selecting the appropriate mirror is the foundational step in this DIY project. The mirror's dimensions and shape are crucial for the desired aesthetic.
- Consider the space where the mirror will be placed and choose a size and shape that complements the existing décor.
- Standard mirrors are readily available, or custom shapes and sizes can be ordered from glass suppliers.
- Inspect the mirror for any imperfections or scratches before purchase.
Exploring Frame Design Options
While this guide focuses on a simple, sleek design, consider exploring various frame styles and embellishments to add a personal touch to your project. This allows for a unique and custom finish.
- Experiment with different frame widths and profiles to create unique looks.
- Consider adding decorative elements such as molding or carving for an ornate design.
- Research various paint finishes, such as distressed or metallic, to complement the surrounding decor.

Diy Fabric Framed Mirror Confessions Of A Serial Do It Yourselfer Frame Frames

Avery Black Mirror Frame Kit Self Adhesive My

Diy Custom Modern Bathroom Mirror Frame On A Budget

Diy Black Industrial Mirror In 2024 Frame Dining Room Framed Wall

Diy Framed Mirror

Diy Cedar Framed Mirror Noting Grace

Spray Painted Gold Yard Mirror How To Paint A Frame

Mirror Frame Diy How To Update A Basic Bathroom Our Faux Farmhouse

20 Creative Diy Mirror Frame Ideas To Inspire Your Next Project Bathroom Mirrors Makeover

Mirrorchic Black Smoke 3 60 In X 36 Diy Mirror Frame Not Included E866 330 013 The Home Depot