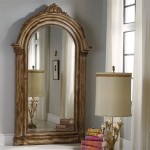
Building a Frame Around a Bathroom Mirror
A bathroom mirror is a vital element of any bathroom, serving both functional and aesthetic purposes. While many bathroom mirrors come with pre-installed frames, there are times when you might desire a custom frame to enhance the overall design of your bathroom. Building a frame around a bathroom mirror can be a rewarding DIY project that allows you to personalize your space with a touch of your unique style.
This article will guide you through the process of building a frame around a bathroom mirror, covering essential materials, tools, and techniques. We will explore different frame styles to inspire your creativity and provide practical tips for achieving a polished and professional finish.
Choosing Materials and Tools
The first step in building a frame around a bathroom mirror is selecting the appropriate materials. The choice of materials will depend on the style and aesthetic of your bathroom and your desired level of complexity. Here are some popular choices:
- Wood: A classic and versatile material, wood offers endless possibilities for style and finish. You can choose from various wood types, including pine, oak, cherry, and walnut, each with its unique characteristics. Consider using salvaged wood for a more rustic and eco-friendly approach.
- Metal: Metal framing provides a modern and sleek look. Options include aluminum, brass, copper, and iron. Metal can be easily cut and shaped, making it suitable for intricate designs.
- Plastic: Plastic is a budget-friendly and lightweight option. It comes in various colors and finishes, offering a wide range of styling possibilities. However, consider the durability and water resistance of the plastic you choose, especially for use in a humid environment like a bathroom.
- Moulding: Pre-made moulding strips can be used to create a sleek and professional-looking frame. These are available in various materials, styles, and widths.
Once you have chosen your material, you will need the following tools:
- Measuring tape: To accurately measure the dimensions of your mirror.
- Saw: A miter saw is ideal for cutting precise angles, but a hand saw can also be used.
- Screwdriver: For attaching the frame to the mirror.
- Drill: To pre-drill holes for screws if using wood or metal materials.
- Sandpaper: To smooth out any rough edges and prepare the frame for finishing.
- Clamps: To secure the frame while assembling it.
- Level: Ensure your frame is straight and level.
Building the Frame
After gathering your materials and tools, you can start building your frame. Here are general steps, but specific details may vary depending on your chosen material and design:
- Measure and cut: Begin by carefully measuring the dimensions of your mirror. Add an allowance for the frame width to determine the overall dimensions of the frame. Cut the frame pieces to size using your chosen saw, ensuring precise angles for mitered corners.
- Join the pieces: Connect the frame pieces using wood glue, screws, or other appropriate methods depending on your material. Use clamps to secure the joint while the glue dries.
- Attach to the mirror: Once the frame is assembled, attach it to the mirror. For wood or metal frames, use screws or brads to secure the frame to the back of the mirror. For plastic or moulding frames, you can use adhesive mounting strips.
- Finish: Sand any rough edges smooth and apply a finishing coat to the frame. Choose a finish that complements the style of your bathroom and protects the material. Options include paint, stain, or varnish.
Frame Styles and Techniques
The style of the frame you choose will depend on the overall design of your bathroom and your personal taste. Here are a few popular frame styles to inspire your creativity:
- Classic: A classic frame style typically features simple lines and a traditional finish. Choose traditional materials like wood or metal with a natural or painted finish.
- Modern: Modern frames emphasize clean lines and minimalist designs. Consider using materials like metal or plastic with a sleek and polished finish.
- Rustic: A rustic frame can add a touch of warmth and character to your bathroom. Use salvaged wood or weathered materials with a natural finish.
- Geometric: Geometric frames can add a touch of visual interest to your bathroom. Consider using materials like wood or metal with a simple geometric pattern.
Here are some techniques you might use or consider:
- Mitering: Mitered corners are a classic framing technique, resulting in a polished and professional finish.
- Rabbet Joint: A rabbet joint is a strong and durable way to join two pieces of wood. It creates a groove in one piece of wood to fit the edge of the other.
- Dado Joint: A dado joint is another strong joint used in woodworking. It involves creating a groove in one piece of wood to accept the width of another piece.
- Groove Joint: A groove joint is a simple and effective way to join two pieces of wood. It involves creating a groove in one piece of wood to accept the edge of the other.
Building a frame around a bathroom mirror is a rewarding DIY project that can add a personal touch to your bathroom. By carefully choosing materials, tools, and styles, you can create a frame that complements the existing decor and enhances the overall aesthetic of your bathroom. Don't hesitate to experiment with different designs and techniques to create a frame that reflects your unique style.

Mirror Frame Diy How To Update A Basic Bathroom Our Faux Farmhouse

Diy Stick On Mirror Frame Sawdust Sisters

Diy Framed Bathroom Mirrors Living With Lady

Diy Bathroom Mirror Frame For Under 10 O Hayley Blog

Diy Bathroom Mirror Frame With Molding The Happier Homemaker

Diy Bathroom Mirror Frame Without Removing Clips Her Happy Home

Easy Diy Tutorial Adding Trim Around A Giant Mirror For Ers

How To Frame A Mirror

Mirror Frame Diy How To Update A Basic Bathroom Our Faux Farmhouse

How To Frame Out That Builder Basic Bathroom Mirror For 20 Or Less