Can You Spray Paint On a Mirror? A Comprehensive Guide
Mirrors, traditionally used for reflection and functionality, have increasingly become canvases for artistic expression and decorative enhancements. The question of whether one can effectively apply spray paint to a mirror's surface is frequently posed. The answer, while seemingly simple, requires a nuanced understanding of the materials involved, preparation techniques, and the desired aesthetic outcome. Spray painting a mirror is indeed possible, but achieving a satisfactory and durable result necessitates careful consideration of several factors.
The principal issue stems from the inherent properties of a mirror's surface. A mirror is typically composed of a glass substrate with a reflective coating, often a thin layer of silver or aluminum, adhered to the back. This coating is protected by an additional layer of paint or sealant. The front surface of the mirror, where the reflection occurs, is exceptionally smooth and non-porous. This characteristic makes it difficult for paint to properly adhere, potentially leading to peeling, chipping, or an uneven finish if the correct procedures are not followed.
Furthermore, the type of spray paint used significantly impacts the final result. Standard spray paints formulated for general purposes may not be suitable for glass surfaces. These paints often lack the necessary adhesion properties and flexibility to withstand temperature fluctuations and minor impacts, which can compromise the integrity of the painted surface over time.
Key Point 1: Preparation is Paramount
The success of spray painting a mirror hinges significantly on the preparation stage. A clean and properly prepared surface is crucial for achieving optimal paint adhesion and a professional-looking finish. The following steps are essential:
Cleaning: The mirror's surface must be thoroughly cleaned to remove any grease, dirt, dust, or fingerprints. Using a glass cleaner or a mixture of water and vinegar is recommended. The surface should be wiped down with a lint-free cloth to prevent any residue from being left behind. Multiple cleaning passes may be necessary to ensure a completely clean surface.
Masking: Areas of the mirror that are not intended to be painted must be meticulously masked off with painter's tape and paper or plastic sheeting. This includes the mirror's edges, frame (if applicable), and any sections where the reflective surface should remain visible. Precision masking is key to achieving clean lines and preventing unwanted overspray. Consider using a sharp utility knife to trim the tape for intricate designs or tight corners, ensuring the tape adheres firmly to the mirror surface to prevent paint bleed-through.
Sanding (Optional): While not always necessary, lightly sanding the mirror's surface with fine-grit sandpaper (e.g., 400-grit or higher) can improve paint adhesion. The goal is not to completely remove the reflective surface, but rather to create a slightly abraded texture that provides a better grip for the paint. If sanding is undertaken, it is imperative to clean the surface again thoroughly after sanding to remove any dust particles.
Priming (Recommended): Applying a primer specifically designed for glass surfaces is highly recommended. A primer acts as a bonding agent, creating an intermediate layer that enhances the adhesion between the mirror and the paint. Opt for a clear or tinted primer that is compatible with the chosen spray paint. Allow the primer to dry completely according to the manufacturer's instructions before proceeding with the painting process.
Key Point 2: Selecting the Right Spray Paint
Choosing the appropriate spray paint is as crucial as the preparation phase. Not all spray paints are created equal, and selecting a product specifically formulated for use on glass or multi-surfaces will significantly improve the outcome. Consider the following factors when selecting your spray paint:
Adhesion Properties: Look for spray paints that explicitly state their ability to adhere to glass or slick surfaces. These paints often contain additives that promote bonding and prevent peeling. Check the product label for keywords such as "adhesion promoter," "bonds to glass," or "multi-surface paint."
Type of Paint: Acrylic-based spray paints are generally preferred for glass applications due to their flexibility, durability, and resistance to chipping. Enamel-based paints can also be used, but they tend to be less flexible and may be more prone to cracking over time. Experimenting with a small, inconspicuous area is advisable before committing to painting the entire mirror.
Finish: The desired aesthetic will dictate the appropriate paint finish. Options include matte, satin, gloss, and metallic. Matte finishes offer a non-reflective appearance, while gloss finishes provide a shiny, reflective surface. Satin finishes fall somewhere in between, offering a subtle sheen. Metallic finishes add a touch of shimmer and glamour. Consider how the finish will complement the surrounding décor and lighting conditions.
Specialty Paints: Specialty spray paints, such as those formulated for creating a frosted or etched glass effect, can also be used to decorate mirrors. These paints provide a unique and decorative look, allowing for creative customization. Follow the manufacturer's instructions carefully when using specialty paints, as their application techniques may differ from standard spray paints.
Key Point 3: Application Techniques for a Smooth and Durable Finish
Proper application techniques are essential for achieving a smooth, even, and durable finish. Rushing the painting process or neglecting proper spraying techniques can result in runs, drips, and an uneven texture. The following guidelines should be followed:
Ventilation: Spray painting should always be performed in a well-ventilated area. This minimizes the risk of inhaling harmful fumes and ensures proper drying of the paint. Outdoor painting is ideal, but if that is not possible, open windows and doors and use a fan to circulate air.
Distance and Angle: Hold the spray paint can approximately 8-12 inches away from the mirror's surface. Maintain a consistent distance and angle throughout the painting process to ensure even coverage. Avoid spraying too close to the surface, as this can lead to runs and drips. Spray at a 90-degree angle to the surface for optimal paint distribution.
Thin, Even Coats: Apply thin, even coats of paint, allowing each coat to dry completely before applying the next. Multiple thin coats are preferable to one thick coat, as they are less likely to run or drip and will result in a smoother finish. Refer to the paint manufacturer's instructions for recommended drying times between coats.
Overlapping Strokes: Use a smooth, sweeping motion to apply the paint, overlapping each stroke slightly to ensure complete coverage. Avoid starting and stopping the spray nozzle directly on the mirror's surface, as this can create uneven patches of paint. Instead, begin spraying just before reaching the edge of the mirror and continue spraying past the opposite edge.
Preventing Runs and Drips: If runs or drips occur, do not attempt to wipe them away immediately. Allow the paint to dry completely, and then sand the affected area smooth with fine-grit sandpaper. Reapply a thin coat of paint to blend the repaired area with the surrounding surface.
Drying and Curing: After the final coat of paint has been applied, allow the mirror to dry completely according to the manufacturer's instructions. Some paints may require a curing period of several days or even weeks to reach their full hardness and durability. Avoid touching or handling the painted mirror during the drying and curing process to prevent smudging or scratching.
Beyond the technical considerations, the creative possibilities of spray painting a mirror are vast. Stencils can be used to create intricate designs, patterns, or personalized messages. Ombre effects can be achieved by gradually blending different colors. Texture can be added by using textured spray paints or by applying paint with a sponge or brush. The artistic potential is limited only by imagination.
Ultimately, spray painting a mirror is a feasible and cost-effective way to transform its appearance and add a personalized touch to any space. By carefully considering the factors outlined above and adhering to proper preparation and application techniques, one can achieve a professional-looking and durable finish that enhances the aesthetic appeal of the mirror for years to come.

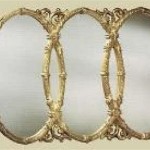
How To Spray Paint A Mirror Frame Perfect Beginner Diy Project Design Morsels

How To Spray Paint A Mirror Step By Guide

Spray Painted Gold Yard Mirror How To Paint A Frame

How To Spray Paint A Mirror Frame Perfect Beginner Diy Project Design Morsels

Diy Mirror Effect How To Do Aged Tutorial Old Maple Home

How To Paint A Mirror Frame We Moved Visit Ashleyburk Com

Spray Painted Rainbow Mirror Makeover Colorshot Paint

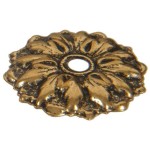
How To Paint A Mirror Frame Gold Easily In Two Steps

How To Spray Paint A Mirror Frame Perfect Beginner Diy Project Design Morsels

Pottery Barn Inspired Mirror Krylon Looking Glass Spray Paint Dorsey Designs