Can You Tile On A Mirror? Exploring the Possibilities and Challenges
The question of whether it is possible to tile directly onto a mirror is a valid consideration for interior design projects aiming for a unique aesthetic. While seemingly straightforward, the process involves several factors related to adhesion, weight, and potential damage to the mirror itself. A careful assessment of these factors, along with appropriate surface preparation and the use of compatible materials, is crucial for a successful outcome. Direct tiling onto a mirror presents both opportunities and limitations that must be thoroughly understood before commencing the project.
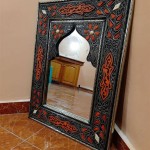
Many design concepts involve incorporating mirrors as part of a larger tiled surface. This could range from creating a feature wall in a bathroom to adding reflective accents in a kitchen backsplash. The appeal lies in the ability to amplify light, create the illusion of expanded space, and introduce a touch of elegance. However, achieving this effect requires navigating the inherent challenges associated with adhering tiles to a non-porous, often fragile surface like glass.
Understanding the Challenges of Tiling on Mirror
The primary challenge in tiling a mirror arises from the inherent properties of glass. Unlike porous surfaces like concrete or drywall, glass is non-absorbent. This means that traditional tile adhesives, which rely on penetration and mechanical bonding, are less effective. The smooth surface also provides minimal texture for the adhesive to grip onto, leading to a potentially weak bond that could result in tiles detaching over time. Furthermore, the mirror backing, typically a thin layer of reflective material, is vulnerable to damage from excessive pressure or the use of overly aggressive adhesives. This damage can manifest as discoloration, delamination, or even shattering of the mirror.
Another significant factor is the weight of the tiles. Most mirrors are not designed to bear significant loads. Adding the weight of tiles, especially larger or heavier ones, can stress the mirror and its mounting hardware. This can lead to cracking, warping, or even the mirror detaching from the wall. Therefore, careful consideration must be given to the type and size of tiles used, as well as the structural integrity of the mirror and its support system.
Temperature fluctuations and humidity levels can also impact the adhesion of tiles to a mirror. Differential rates of expansion and contraction between the glass, the adhesive, and the tiles can create stress points that weaken the bond. High humidity levels can also affect the curing process of some adhesives, compromising their ability to properly adhere to the non-porous surface. These environmental factors necessitate the selection of adhesives that are specifically formulated for use with glass and that can withstand varying temperature and humidity conditions.
Preparatory Steps for Tiling on Mirrors
Proper preparation is paramount to achieve a successful and long-lasting tile installation on a mirror. The first step is to thoroughly clean the mirror surface to remove any dirt, grease, or residue that could hinder adhesion. A suitable glass cleaner, followed by a wipe-down with isopropyl alcohol, is recommended. Avoid using abrasive cleaners or scouring pads, as these can scratch the mirror surface.
After cleaning, it is often beneficial to lightly abrade the surface of the mirror. This can be achieved using fine-grit sandpaper (220-grit or higher) or a scouring pad designed for delicate surfaces. The goal is not to create deep scratches but rather to provide a slightly textured surface that the adhesive can grip onto. This step should be performed gently and evenly, ensuring not to damage the reflective backing of the mirror. It is essential to thoroughly clean the mirror again after abrasion to remove any dust particles.
The choice of adhesive is critical. Standard tile mortar or thin-set mortar are generally not suitable for use on glass. Instead, a specialized adhesive designed for bonding to non-porous surfaces, such as a mirror mastic or a high-quality epoxy adhesive, should be used. These adhesives are formulated to provide a strong and flexible bond that can withstand the stresses associated with tiling on glass. Always follow the manufacturer's instructions regarding mixing ratios, application techniques, and curing times.
Furthermore, consider applying a primer specifically designed for use on glass. These primers create a chemical bond with the glass surface, providing a more receptive surface for the adhesive to adhere to. The use of a primer can significantly improve the overall adhesion and longevity of the tile installation. Ensure the primer is fully dry before proceeding with the tile application.
Choosing the Right Materials and Techniques
Selecting the appropriate tiles is crucial for minimizing stress and maximizing the chances of success. Lightweight tiles, such as glass tiles or thin ceramic tiles, are generally preferable to heavier options like natural stone. Smaller tiles also tend to be less stressful on the mirror surface compared to larger format tiles. The overall weight of the tiled area should be carefully calculated to ensure that the mirror and its mounting hardware can adequately support the load.
When applying the adhesive, use a notched trowel to create even ridges on the back of the tiles. This helps to distribute the adhesive evenly and create channels for air to escape, preventing trapped air bubbles that can weaken the bond. Press each tile firmly into place, ensuring full contact with the adhesive. Use tile spacers to maintain consistent grout lines and prevent tiles from shifting during the curing process.
Grouting is an essential step in completing the tile installation. Choose a grout that is compatible with both the tiles and the adhesive. Epoxy grout is often a good choice for wet areas, as it is waterproof and resistant to staining. Carefully apply the grout, ensuring that it fills all the grout lines completely. Wipe away any excess grout from the tile surfaces using a damp sponge. Allow the grout to cure fully according to the manufacturer's instructions before exposing the tiled area to moisture.
Reinforcing the mirror's support system is often necessary when tiling. This may involve adding additional mounting brackets or using a stronger adhesive to secure the mirror to the wall. For larger mirror installations, consider using a backing board made of plywood or cement board to provide additional support and stability. The backing board can be attached to the wall first, and then the mirror can be adhered to the backing board. This helps to distribute the weight of the tiles evenly and prevent stress on the mirror itself.
Finally, always test a small, inconspicuous area of the mirror before proceeding with the entire project. This allows you to assess the adhesion of the adhesive and the compatibility of the materials without risking damage to the entire mirror. If any problems are encountered during the test, adjust the materials or techniques accordingly before continuing with the installation.

How To Hang Mirrors On Tile 3 Ways A Bonus The Palette Muse

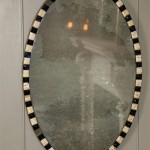
How To Mosaic Tile A Mirror Caffeine And Cabernet

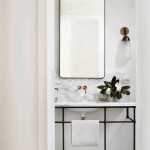
How To Hang A Mirror On Tile Wall Remington Avenue

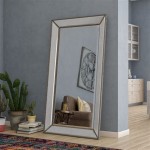
Tiles Around Bathroom Mirror Design Ideas

How To Make A Custom Tiled Mirror The Stonybrook House

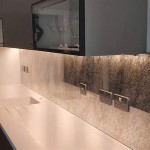
28 Bathroom Mirror Backsplash Elegant Ideas

Can You Tile And Grout Mirrors Hometalk

Diy Mosaic Tile Bathroom Mirror

Simple Ways To Make A Framed Bathroom Mirror Hometalk
:strip_icc()/cdn.cliqueinc.com__cache__posts__230027__bathroom-mirror-ideas-230027-1500425355802-image.700x0c-8c7db2bbe310464283bd40da23fefa61.jpg?strip=all "24 Best Bathroom Mirror Ideas")
24 Best Bathroom Mirror Ideas