Cheval Jewelry Mirror Assembly Instructions
Cheval jewelry mirrors are stylish and functional additions to any bedroom or dressing area. Their elegant design, often featuring a full-length mirror and storage compartments for jewelry, make them a popular choice. However, assembling these mirrors can sometimes seem daunting, especially for those unfamiliar with assembly instructions. This article will provide a comprehensive guide to assembling your Cheval jewelry mirror, ensuring a smooth and successful process.
1. Gather Essential Tools and Materials
Before beginning the assembly process, it's crucial to gather all the necessary tools and materials. This will streamline the process and prevent any delays. The following items are typically required for assembling a Cheval jewelry mirror:
- Phillips Head Screwdriver: Used to secure screws throughout the assembly process.
- Allen Wrench Set: May be necessary for specific models that use Allen screws.
- Level: Ensures the mirror is perfectly straight and balanced.
- Hammer: For carefully tapping components into place.
- Protective Gloves: To safeguard hands during the process.
- Assembly Instructions: Essential for understanding the correct steps and component placement.
- Optional: A helper can be beneficial for larger or more complex mirrors.
2. Preparing the Components
Once the tools are assembled, the next step is to carefully unpack the mirror components. Inspect each piece for any damage or missing parts. This is a good time to refer to the assembly instructions provided with the mirror. The instructions typically include detailed diagrams and step-by-step guidance. While carefully reviewing the instructions, identify the specific components and their corresponding locations. This will aid in the smooth assembly process.
Some Cheval jewelry mirrors may come with pre-assembled parts, such as the mirror itself or the storage compartment. This can simplify the assembly process. However, even if some parts are pre-assembled, it's important to carefully examine them for any potential issues. Ensuring all parts are in good condition before assembly will prevent any complications later on.
3. Assembling the Mirror Base
The mirror base is typically the foundation of the Cheval jewelry mirror. This step often involves attaching the legs or supports to the base. Refer to the assembly instructions for the specific sequence of steps and the appropriate screws or fasteners. Use the Phillips Head screwdriver or Allen wrench, depending on the type of screws used, to secure the legs or supports to the base.
While tightening the screws, ensure that they are evenly distributed and not overtightened. Overtightening can damage the components and lead to instability. Once the legs or supports are securely attached, it's important to check for stability. Gently rock the base to ensure that it is sturdy and won't easily tip over.
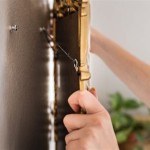
4. Attaching the Mirror to the Base
The next step is to attach the mirror to the base. This may involve sliding or attaching the mirror to a pre-installed bracket or hinge system. Refer to the assembly instructions for the precise method and any specific tools required. It may be necessary to position the mirror carefully and align it with the base before securing it with the appropriate screws or fasteners. As with the base, ensure that the screws are evenly secured and not overtightened.
It's crucial to use the level to ensure the mirror is perfectly straight. Adjust the mirror's position until it is level, then secure it firmly to the base. This step is critical for both aesthetic and functional reasons. A level mirror ensures a proper reflection and prevents the Cheval jewelry mirror from tilting or becoming unstable.
5. Finishing Touches and Cleaning
Once the mirror is securely attached to the base, the assembly process is almost complete. Add any remaining components, such as decorative accents, hooks, or storage compartments. Refer to the assembly instructions for their specific placement and attachment method.
Finally, wipe down the mirror and base with a soft cloth to remove any dust or fingerprints accumulated during the assembly process. It's also a good idea to check for any loose parts or screws that might need re-tightening. After completing these steps, your Cheval jewelry mirror is ready to be enjoyed.

Radiant Modern Jewelry Furniture Lockable With Led Lights Mirror Border For Bedroom Inspiredhome Com

Inspired Home Shimmer Royal Champagne Crystal Border Cheval Mirror Jewelry Armoire 57 5 In X 18 1 14 With Led Lights Jf36 07be Hd The Depot

Inspired Home Shimmer Classic Silver Crystal Border Cheval Mirror Jewelry Armoire 57 5 In X 18 1 14 With Led Lights Jf36 07sr Hd The Depot

Real Living Cheval Espresso Mirror Armoire Big Lots

Hives Honey Daisy Cheval Pinboard Walnut Jewelry Mirror 6006 761 The Home Depot

Inspired Home Shimmer Pristine White Crystal Border Cheval Mirror Jewelry Armoire 57 5 In X 18 1 14 With Led Lights Jf36 07we Hd The Depot

Hives Honey Daisy Cheval Pinboard Walnut Jewelry Mirror 6006 761 The Home Depot

Chic Home Finesse Modern Contemporary Crystal Bordered Rectangular Jewelry Armoire Cheval Mirror Full Length Classic Silver Com

Hives Honey Daisy Cheval Pinboard Walnut Jewelry Mirror 6006 761 The Home Depot

Chocolate Cheval Mirror Jewelry Armoire In The Armoires Department At Com