Decorative Molding for Mirrors
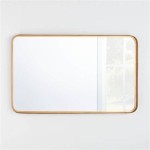
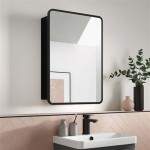
Decorative molding offers a simple yet effective way to elevate the aesthetic appeal of mirrors in any space. From understated elegance to ornate grandeur, the right molding can transform a plain mirror into a captivating focal point. This article explores the various aspects of decorative molding for mirrors, including material choices, style considerations, installation techniques, and maintenance tips.
Choosing the Right Material
The material of the molding plays a crucial role in both the visual impact and the longevity of the enhancement. Wood, perhaps the most traditional choice, offers a timeless appeal and can be carved into intricate designs. Its versatility allows it to be painted or stained to match existing décor. Polyurethane, a synthetic alternative, provides durability and resistance to moisture, making it ideal for bathrooms and other humid environments. Its lightweight nature also simplifies installation. Metal moldings, such as aluminum or brass, offer a sleek, modern look and can be finished in various metallic tones or vibrant colors.
Style Considerations
The style of the molding should complement the overall design aesthetic of the room and the mirror itself. For contemporary spaces, clean lines and simple geometric shapes create a sophisticated look. Traditional interiors often benefit from more ornate moldings with intricate details, such as scrolls, leaves, or floral patterns. The size of the mirror also influences the choice of molding. Large mirrors can accommodate wider, more substantial moldings, while smaller mirrors are better suited to thinner, more delicate frames.
Measuring and Cutting
Accurate measurement is essential for a seamless fit. Measure the outer edges of the mirror precisely to determine the length of molding required. When working with corners, miter cuts are typically used to create clean, angled joints. Specialized miter saws or miter boxes ensure accurate angles for professional-looking results. For curved mirrors, flexible molding materials, such as flexible polyurethane, offer a solution. These can be bent to follow the contours of the mirror's shape.
Adhesive Options
Several adhesive options are available for securing the molding to the mirror. Construction adhesive provides a strong bond and is suitable for most materials. For lighter moldings, mirror mastic, a specialized adhesive designed for use with mirrors, offers sufficient hold. Double-sided tape can be used for quick and easy installation, particularly for lightweight moldings on smaller mirrors. When choosing an adhesive, consider the weight of the molding and the material of both the molding and the mirror surface.
Installation Techniques
Before applying adhesive, ensure both the mirror surface and the back of the molding are clean and dry. Apply the adhesive evenly to the back of the molding, following the manufacturer's instructions. Carefully position the molding onto the mirror, ensuring a tight fit against the edges. Apply consistent pressure for the recommended time to allow the adhesive to bond securely. Clamps or weights can be used to hold the molding in place while the adhesive dries. Remove any excess adhesive promptly with a damp cloth.
Finishing Touches
Once the adhesive has fully cured, finishing touches can enhance the overall appearance. Wood moldings can be painted or stained to match or complement the surrounding décor. Caulk can be used to fill any small gaps between the molding and the mirror, creating a seamless finish. After the caulk dries, paint it to match the molding for a polished look. For metallic moldings, polishing compounds can restore shine and remove any fingerprints or smudges.
Maintenance and Care
Regular cleaning helps maintain the beauty of the decorative molding. Dust the molding regularly with a soft cloth or duster. For more thorough cleaning, use a damp cloth and a mild cleaning solution appropriate for the molding material. Avoid abrasive cleaners or scouring pads, as these can scratch the surface of the molding. In humid environments, ensure proper ventilation to prevent moisture buildup, which can damage wood moldings.
Addressing Common Challenges
Certain challenges may arise during the installation process. Dealing with uneven surfaces requires careful planning and potentially the use of shims to create a level surface for the molding. Intricate cuts, particularly for curved mirrors, can be complex and may require specialized tools or professional assistance. Selecting the appropriate adhesive for different material combinations is crucial for achieving a strong and lasting bond. Addressing these challenges proactively ensures a successful and aesthetically pleasing outcome.

Mirror Molding The Easy Upgrade To Boring Bathrooms Mirrorchic

Bathroom Mirror Framed With Crown Molding Large Mirrors Frame Makeover

Easy Diy Tutorial Adding Trim Around A Giant Mirror For Ers

Crafty Again
How To Upgrade Your Builder Grade Mirror Frame It

How To Frame A Mirror Sand And Sisal

How To Frame A Bathroom Mirror

Crafty Again

Mirror Trim Ideas For Your Bathroom Mirrormate

How To Frame A Mirror For Dramatic Upscale Look

