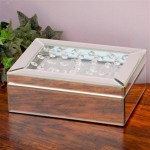
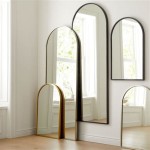
DIY Antique Mercury Mirror Glass
The allure of antique mercury glass mirrors lies in their unique, aged appearance. Characterized by a slightly distressed, reflective surface with sporadic spotting and a subtle antique charm, these mirrors can add a touch of vintage elegance to any space. While authentic antique mercury glass mirrors can be expensive and difficult to find, achieving a similar look through DIY methods is surprisingly accessible.
Authentic mercury glass refers to a specific historical manufacturing process involving applying a silvering solution containing mercury to the back of a piece of glass. This process is no longer employed due to the toxicity of mercury. Modern "mercury glass" refers to the visual aesthetic achieved through various mimicking techniques. This article will explore how to create this visually appealing antique mercury glass effect.
Before beginning any DIY project, gathering the necessary materials is crucial. For this project, a few key items are required: a glass surface (picture frame, mirror tile, or any other suitable glass object), mirror effect spray paint, a spray bottle filled with water, white vinegar, and paper towels. Gloves and a well-ventilated workspace are also highly recommended for safety and comfort.
The first step in achieving the aged mercury glass look involves preparing the glass surface. Thoroughly cleaning the glass with a glass cleaner and ensuring it is completely dry is essential. Any dust or fingerprints can interfere with the paint adhesion and the overall final effect. Once cleaned, the glass should be placed on a protected surface in a well-ventilated area.
Next, apply a light, even coat of mirror-effect spray paint to the back of the glass. This paint contains metallic particles that simulate the reflective qualities of traditional mercury glass. It's important not to apply the paint too thickly, as this can obscure the desired aged effect. Allow the paint to dry completely according to the manufacturer's instructions.
Once the mirror paint is dry, the antiquing process begins. Fill a spray bottle with a mixture of equal parts water and white vinegar. Lightly mist the back of the painted glass with this solution. The acidity of the vinegar will react with the mirror paint, causing it to tarnish and create the characteristic spotting of aged mercury glass.
Immediately after misting, gently dab the surface with a paper towel. This blotting action removes some of the paint, further enhancing the aged appearance and revealing glimpses of the clear glass underneath. The amount of dabbing will determine the intensity of the antiquing effect; more dabbing leads to a more distressed look.
Experimentation is key during this stage. If the desired level of antiquing is not achieved with the first application, repeat the misting and dabbing process until satisfied. It is always better to build the effect gradually than to overdo it in a single application. This allows for greater control over the final outcome.
After achieving the desired level of antiquing, allow the piece to dry thoroughly. Once dry, a protective sealant can be applied to the back of the glass to preserve the finish and increase durability. This sealant will also help protect the mirrored finish from further oxidation and damage.
Variations in technique can also be utilized to achieve different looks. Using different colors of spray paint, such as antique gold or copper, can create unique and interesting effects. Experimenting with different ratios of water and vinegar in the spray bottle can also alter the intensity of the antiquing. Furthermore, using crumpled newspaper instead of paper towels for dabbing can produce a distinctly textured appearance.
Creating DIY antique mercury glass offers a cost-effective and creatively satisfying way to incorporate vintage charm into any décor. By following these steps and experimenting with various techniques, one can create personalized pieces with a unique, aged appearance, adding a touch of history and elegance to their surroundings.
Safety precautions should always be a priority. Working in a well-ventilated area and wearing gloves are essential when handling spray paints and chemicals. Always refer to the manufacturer's instructions on the products used for specific safety recommendations and application guidelines. Proper disposal of used materials is also crucial for environmental responsibility.
The beauty of this DIY project lies in its flexibility and potential for customization. Whether used for decorative mirrors, picture frames, or other glass surfaces, the antique mercury glass effect creates a timeless and elegant aesthetic. The process is relatively simple, allowing even beginners to achieve professional-looking results.

Diy Mercury Glass Gilded Mirror Made From Old Photo Frames

Beautiful Easy Faux Mercury Glass Diy Mirror Tutorial This Life

Diy Mercury Glass Gilded Mirror Made From Old Photo Frames

Beautiful Easy Faux Mercury Glass Diy Mirror Tutorial This Life

How To Create Mercury Glass Jennifer Rizzo

Window Pane Mirror With Faux Antique Mercury Glass Diy

Diy Mercury Glass Gilded Mirror Made From Old Photo Frames

Diy How To Make Vintage Mirrors Or Mercury Glass By Orly Shani

Diy Mercury Glass Gilded Mirror Made From Old Photo Frames

Diy Mercury Glass Antiqued Mirror Upcycled Coffee Table Mid Century Modern