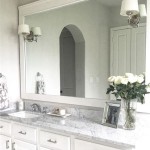
DIY Broadway Lighted Vanity Mirror: A Comprehensive Guide
A Broadway-style lighted vanity mirror, also known as a Hollywood mirror, is a highly desirable item for makeup enthusiasts, performers, and anyone who appreciates a well-lit and functional dressing space. These mirrors provide even lighting, eliminating shadows and ensuring accurate color representation, which is crucial for applying makeup flawlessly. While commercially available lighted vanity mirrors can be quite expensive, constructing one oneself offers a cost-effective alternative and allows for customization to suit individual needs and preferences. This article will provide a comprehensive guide to building a DIY Broadway lighted vanity mirror, covering materials, tools, construction steps, and safety considerations.
Key Point 1: Planning and Material Acquisition
The first step in creating a DIY Broadway lighted vanity mirror involves careful planning and the acquisition of necessary materials. The size and style of the mirror should be determined based on the available space and intended use. Consider the overall dimensions of the mirror, the number of lights needed, and the framing design. A sketch or digital design can be helpful in visualizing the final product and ensuring accurate material calculations.
Essential materials include: a plain mirror of the desired size, wood for the frame (MDF, plywood, or solid wood are common choices), light sockets (E26 or E27 are standard), incandescent or LED light bulbs, electrical wire (18 or 20 gauge is generally sufficient), a power cord with a plug, wire connectors, screws, wood glue, primer, paint, and optionally, a dimmer switch. The choice of materials will influence the overall aesthetic and durability of the mirror.
The selection of wood is important. MDF (Medium-Density Fiberboard) is a cost-effective option that is smooth and easy to paint, but it is susceptible to moisture damage. Plywood is more durable and resistant to moisture, but it may require more sanding to achieve a smooth finish. Solid wood offers the highest quality and aesthetic appeal, but it is also the most expensive and may require more advanced woodworking skills. The frame's dimensions should be calculated to accommodate the mirror and the light sockets, leaving adequate space for wiring and bulb installation.
Light sockets should be chosen based on the type of bulbs to be used. E26 and E27 are standard sizes that accommodate a wide range of incandescent and LED bulbs. LED bulbs are generally preferred for their energy efficiency, longer lifespan, and lower heat output. The number of light sockets should be determined based on the size of the mirror and the desired level of illumination. A spacing of 4-6 inches between bulbs is generally recommended.
Electrical wire should be chosen based on the voltage and current requirements of the light bulbs. 18 or 20 gauge wire is typically sufficient for residential lighting applications. A power cord with a plug is needed to connect the mirror to a power outlet. Wire connectors are used to safely join electrical wires and should be chosen based on the wire gauge.
Primer and paint are essential for finishing the frame and protecting it from moisture and damage. Choose a primer and paint that are compatible with the chosen wood material. A dimmer switch can be added to control the brightness of the lights, providing greater flexibility and energy savings. Safety glasses, a dust mask, and gloves should be worn when working with power tools and finishing materials.
Key Point 2: Construction Process
The construction process involves several steps, starting with cutting the wood for the frame. Use a saw to cut the wood pieces according to the desired dimensions. Ensure the cuts are accurate and square to create a professional-looking frame. A miter saw is ideal for making precise angled cuts for the corners of the frame.
Next, assemble the frame using wood glue and screws. Apply wood glue to the edges of the wood pieces and clamp them together until the glue dries. Reinforce the joints with screws for added strength. Ensure the frame is square and level before proceeding to the next step. A carpenter's square can be used to verify the accuracy of the corners.
Drill holes for the light sockets. The diameter of the holes should be slightly larger than the diameter of the light sockets. Space the holes evenly around the frame, ensuring adequate clearance between the sockets. A drill press can be used to create precise and consistent holes. Use a hole saw bit of the correct size. Be sure to position the holes carefully to ensure even illumination.
Install the light sockets into the drilled holes. Secure the sockets with screws or glue, depending on the type of socket. Ensure the sockets are firmly attached to the frame. Thread the electrical wire through the sockets, leaving enough slack for connections. The wires should be carefully routed to avoid interference with the mirror or other components.
Wire the light sockets together in parallel. Connect one wire from each socket to the power cord using wire connectors. Ensure the connections are secure and insulated to prevent electrical shorts. Use a wire stripper to remove the insulation from the ends of the wires. Use wire nuts or other approved connectors to join the wires together. Be sure to follow a wiring diagram to ensure proper connections.
Mount the mirror into the frame. Secure the mirror with clips, glue, or a combination of both. Ensure the mirror is properly supported and will not fall out of the frame. Use mirror mastic adhesive for secure bonding of the mirror to the frame. Allow the adhesive to cure completely before handling the mirror.
Finally, prime and paint the frame. Apply a coat of primer to seal the wood and provide a smooth surface for painting. Apply two or more coats of paint, allowing each coat to dry completely before applying the next. Choose a paint color that complements the mirror and the surrounding decor. Sand the frame lightly between coats of paint for a smoother finish.
Key Point 3: Electrical Safety and Testing
Electrical safety is paramount when building a DIY lighted vanity mirror. Before commencing any electrical work, ensure the power is disconnected from the circuit. Double-check that the power cord is unplugged from the outlet. Use a voltage tester to confirm that the circuit is de-energized.
When wiring the light sockets, exercise caution to avoid creating short circuits or electrical hazards. Ensure all connections are secure and insulated. Use wire connectors to properly join the wires. Avoid exposing bare wires, as this can create a shock hazard. Consult a wiring diagram to ensure proper connections.
Grounding the mirror is recommended to prevent electrical shock. Connect a ground wire from the metal frame to a grounding point, such as a grounding screw on the electrical outlet. This will provide a path for electricity to flow in the event of a fault, reducing the risk of shock. Use a multimeter to verify that the ground connection is working properly.
After completing the wiring, carefully inspect all connections to ensure they are secure and properly insulated. Double-check that there are no exposed wires or loose connections. Use a flashlight to examine the wiring closely. Correct any issues before proceeding to the next step.
Before plugging the mirror into the power outlet, test the wiring with a multimeter. Check for continuity between the hot and neutral wires, as well as between the hot and ground wires. If there is continuity between any of these wires, it indicates a short circuit and the wiring needs to be corrected. Use a multimeter to measure the voltage and current flowing through the circuit. This will help to identify any potential problems.
Once the wiring has been thoroughly inspected and tested, plug the mirror into the power outlet and turn it on. Observe the lights to ensure they are working properly. Check for any signs of overheating or electrical arcing. If there are any issues, disconnect the power immediately and troubleshoot the wiring. Use a non-contact voltage tester to check for the presence of voltage on the frame of the mirror. If voltage is detected, it indicates a potential electrical hazard and the wiring needs to be corrected.
If a dimmer switch is installed, test it to ensure it is functioning properly. Adjust the brightness of the lights and observe the behavior of the switch. If the switch is not working properly, it may need to be replaced. Dimmer switches should be compatible with the type of light bulbs being used. Consult the dimmer switch manufacturer's instructions for proper installation and operation.
Proper ventilation is important to prevent overheating of the light bulbs. Ensure there is adequate space around the bulbs for air to circulate. Avoid using light bulbs that are too powerful for the sockets, as this can create a fire hazard. Use LED bulbs, which generate less heat than incandescent bulbs. Inspect the wiring and light sockets regularly for signs of damage or wear. Replace any damaged components to prevent electrical hazards.

Broadway Lighted Table Top Vanity Mirror Makeup With Lights Diy

Broadway Lighted Table Top Vanity Mirror With Lights Light Bulbs

A Full Length Dressing Mirror With Lights Ers Diy

Hollywood Mirrors The Ultimate Find Dressing Room Mirror Bulb

Beauty Fashion And Lifestyle Blog Diy Lighted Makeup Mirror Broadway Style Vanity

Smoked Glass Dressing Table Mirror With 9 Dimmable Led Light Bulbs Picture Perfect Home

Broadway Silver Sparkle Mirror Reflections Of Me

Broadway Lighted Vanity Makeup Mirror Desk Set By Girl Hollywood

Vanity Girl Hollywood Lighted Broadway Mirror Review

Broadway Lighted Vanity Makeup Mirror Desk Set By Girl Hollywood