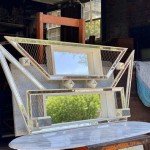
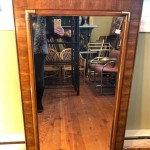
DIY Distressed Wood Mirror Frame
A distressed wood mirror frame can add a touch of rustic charm and vintage elegance to any room. This DIY project allows you to personalize your décor and create a unique piece that reflects your style. By understanding the basics of distressing wood and following a few simple steps, you can transform a plain mirror into a beautiful statement piece.
Choosing Your Materials
The first step is to gather the necessary materials. You will need a mirror, a piece of wood that is slightly larger than the mirror, wood stain or paint, sandpaper in various grits, a paintbrush, a hammer, nails or screws, and a protective sealant. The wood type should complement your existing furniture and style. For a rustic look, consider using reclaimed wood or a knotty pine board. If you prefer a more modern aesthetic, opt for a smooth-grained hardwood like maple or cherry.
The size of the wood board depends on the size of your mirror and the desired thickness of the frame. Measure the mirror and add an extra inch or two on each side to allow for the frame's width. You can also use multiple wood pieces to create a thicker frame. For example, you can use two boards stacked on top of each other to create a wider frame effect.
Preparing the Wood
Once you have your wood board, prepare it for the distressing process. This involves sanding the wood to create a smooth surface and removing any imperfections. Start by sanding the wood with a coarse-grit sandpaper to remove any rough edges or splinters. Follow this with a medium-grit sandpaper for a smoother finish. Finally, use a fine-grit sandpaper to polish the surface and create a uniform texture.
After sanding, consider applying a wood stain to give the wood a desired color and enhance its natural grain. Choose a stain color that complements the overall theme of your room or the color of your mirror. Applying a thin coat of stain using a brush or cloth will allow the wood's natural grain to show through while adding a touch of color. Allow the stain to dry completely before moving on to the next step.
Creating the Distressed Effect
The distressing process involves creating intentional marks and imperfections on the wood surface to give it a weathered and aged appearance. This can be achieved using several techniques, depending on the desired level of distressing.
One technique is to use sandpaper to create scratches and abrasions. Begin by sanding the edges of the wood board with a medium-grit sandpaper. You can also use a sanding block to create more intentional scratches. For a more subtle effect, use a fine-grit sandpaper to create a distressed look without removing too much wood.
Another technique involves using a hammer and nail to create dents and chips. Gently tap a nail into the wood to create small indentations. Alternatively, you can use a chisel to create larger chips and cracks. Be mindful not to overdo it, as too many dents can detract from the overall look.
For a more dramatic distressed effect, consider using a paint scraper or wire brush to remove some layers of the wood's surface. This will expose the underlying wood grain and give the frame an authentically aged look. Just be careful not to remove too much wood, as this can compromise the integrity of the frame.
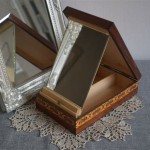
Finishing Touches
After distressing the wood, you can apply a protective sealant to prevent scratches and stains. A clear sealant will maintain the natural look of the wood while adding a layer of protection. You can also use a tinted sealant to add a subtle color to the wood or enhance its natural tones.
Once the sealant is dry, attach the mirror to the frame. Use nails or screws to securely fasten the mirror to the wood board. Be sure to center the mirror and use enough fasteners to ensure a sturdy attachment.
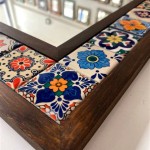
You can further personalize your distressed wood mirror frame by adding decorative elements. You could use wood glue to attach small pieces of wood or metal to the frame for a unique look. Alternatively, you could add a piece of fabric or rope to the frame for a more eclectic touch.
Hanging Your New Mirror
Once the frame is complete, you can hang it on your wall using D-rings or sawtooth hangers. You can use a level to ensure that the mirror is straight and even.
By following these steps, you can create a unique and stunning distressed wood mirror frame that will add a touch of charm to your home decor. This project is a great way to express your creativity and personalize your space.

Diy Reclaimed Wood Frames The Space Between

Diy Reclaimed Wood Frames The Space Between Mirror Bathroom Rustic Mirrors

Stunning Diy Bedroom Projects

Diy Wood Frame Mirror Makeover With Hooks Funky Junk Interiors

Diy Rustic Wood Frame Mirror Amanda Katherine

Diy Reclaimed Wood Frames The Space Between

Diy Farmhouse Wood Frame Mirror She Gave It A Go

Diy Rustic Wood Frame Mirror Amanda Katherine

How To Build A Diy Wood Mirror Frame The Holtz House

Modern Diy Rustic Mirror Frame H2obungalow