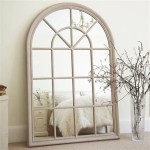
DIY Frame a Mirror With Wood: A Step-by-Step Guide
Framing a mirror with wood can elevate its aesthetic and transform it into a statement piece. It's a relatively simple DIY project that allows for a wide range of creative expression, from sleek and modern to rustic and farmhouse-inspired. This guide offers a detailed walkthrough of the process, helping you create a unique and personalized mirror frame.
1. Planning and Gathering Materials
Before embarking on the project, careful planning is essential. Decide on the desired style, size, and material for the frame. Consider the existing décor and choose a frame that complements it harmoniously. Once you have a clear vision, gather the necessary materials. Here's a comprehensive list:
- Mirror: Select the size and shape of the mirror that best suits your needs.
- Wood: Choose the type of wood that aligns with your aesthetic preference and desired finish. Some popular choices include pine, oak, maple, or reclaimed wood. Consider the thickness of the wood based on the desired frame width.
- Wood glue: Opt for a high-quality wood glue for a strong and durable bond.
- Wood screws: Select screws that are appropriate for the thickness of the wood and the size of the mirror.
- Finishing nails: These are used to secure the frame to the mirror.
- Wood filler: Use wood filler to seamlessly cover any gaps or imperfections in the frame.
- Sandpaper (various grits): Use sandpaper to smooth the wood and prepare it for painting or staining.
- Paint or stain: Choose a paint or stain that complements the mirror and your overall décor.
- Primer (optional): A primer can enhance the adherence of paint, especially on bare wood.
- Measuring tape, pencil, and ruler: These tools are essential for accurate measurements and marking.
- Saw: A saw is necessary to cut the wood to the desired dimensions.
- Clamps: Clamps help secure the frame while the glue dries.
- Miter saw (optional): A miter saw ensures precise angled cuts for a professional finish.
- Safety glasses and gloves: These are essential for protecting your eyes and hands during the project.
2. Measuring and Cutting the Wood
Accurate measurements are crucial for a well-fitting frame. Begin by measuring the mirror's dimensions carefully. Add the desired frame width to each side to determine the overall frame size. Using a ruler or measuring tape, transfer these measurements to the wood. Mark the wood with a pencil, ensuring clear and accurate lines. Employ a saw to cut the wood pieces to the desired lengths. If using a miter saw, set the angle to 45 degrees for mitered corners. If using a handsaw, utilize a miter box to ensure precise 45-degree angles.
3. Assembling the Frame
With the wood pieces cut to size, it's time to assemble the frame. Apply a generous amount of wood glue to the edges of the pieces that will be joined. Carefully align the pieces, ensuring the corners are flush and the frame is square. Use clamps to hold the pieces together while the glue dries. Alternatively, you can use a nail gun or finish nails to secure the pieces together. For extra stability, consider drilling pilot holes before driving in screws or nails. If using screws, be sure to countersink the heads so they are flush with the wood. Once the glue is completely dry, remove the clamps. This is a good time to use wood filler to fill any gaps or imperfections in the joints.
4. Finishing Touches
After the frame is assembled, it's time to add the finishing touches. Use sandpaper to smooth out any rough edges or imperfections. Start with a coarse grit sandpaper to remove any major imperfections, then finish with a fine grit sandpaper for a smooth, even finish. If painting the frame, apply a primer and allow it to dry before applying the desired paint color. For staining, apply the stain according to the manufacturer's instructions. Allow the paint or stain to dry thoroughly before proceeding to attach the mirror.
5. Attaching the Mirror to the Frame
With the frame finished, it's time to attach the mirror. This step requires a bit of care to ensure the mirror is securely and evenly mounted. Using finishing nails, carefully attach the frame to the mirror, making sure to drive the nails through the frame and into the backing of the mirror. Use a hammer to tap the nails in gently, avoiding any impact that could crack the mirror. You may want to use a nail set to drive the nails flush with the surface of the frame. For added security, you can apply a thin bead of construction adhesive to the back of the mirror before attaching the frame, ensuring a firm bond.
Framing a mirror with wood is a rewarding project. By following this step-by-step guide, you can create a unique and personalized piece of art that enhances your space. Remember to experiment, explore different styles, and most importantly, have fun!

Diy Farmhouse Wood Frame Mirror She Gave It A Go

Easy Driftwood Mirror The Wood Grain Cottage
Diy Wood Frame Mirror Farmhouse Industrial Bathroom Joyfully Treasured

Wood Mirror Diy Shanty 2 Chic

How Build A Wooden Diy Mirror Frame For Entryway Thediyplan

Diy Farmhouse Wood Frame Mirror She Gave It A Go

Diy Wood Framed Bathroom Mirror Christina Maria Blog

Diy Rustic Wood Frame Mirror Amanda Katherine

Mirror Frame Diy How To Update A Basic Bathroom Our Faux Farmhouse

Diy Wood Mirror Frame Framed

