DIY Pallet Wood Mirror Frame: A Rustic Touch for Your Home
Adding a rustic touch to home decor is a popular trend, and using reclaimed materials like pallet wood is an economical and environmentally friendly way to achieve this look. Creating a DIY pallet wood mirror frame offers a unique opportunity to personalize a space while showcasing creativity and resourcefulness. This article will guide readers through the steps of constructing a beautiful and functional pallet wood mirror frame.
Gathering Materials and Tools
Before beginning the project, ensure all necessary materials and tools are readily available. This preparation will streamline the construction process and prevent unnecessary delays. The following items will be required:
- Pallet wood (amount depends on mirror size)
- Measuring tape
- Pencil
- Saw (hand saw or circular saw)
- Safety glasses
- Hammer
- Nails (finish nails recommended)
- Wood glue
- Sandpaper (various grits)
- Wood stain (optional)
- Polyurethane sealant (optional)
- Mirror
- Mirror clips or adhesive
Preparing the Pallet Wood
Pallet wood often requires preparation before use. Careful attention should be paid to cleaning and dismantling the pallet safely and efficiently. This process ensures a smooth and splinter-free finished product.
- Carefully dismantle the pallet using a pry bar and hammer, minimizing wood damage.
- Remove any nails or staples from the reclaimed wood.
- Clean the wood thoroughly with a brush and soapy water, removing dirt and debris.
- Allow the wood to dry completely before proceeding.
Measuring and Cutting the Wood
Accurate measurements are crucial for a well-fitting frame. Precise cutting ensures a professional and aesthetically pleasing result. Double-checking measurements before cutting is highly recommended.
- Measure the dimensions of the mirror accurately.
- Calculate the desired width of the frame.
- Mark the measurements on the pallet wood using a pencil and measuring tape.
- Cut the wood pieces to the correct lengths and angles using a saw. A 45-degree angle at the corners will create a standard frame join.
Assembling the Frame
Assembling the frame requires precision and care. A strong and stable frame is essential for securely holding the mirror. Proper assembly techniques ensure the longevity of the finished product.
- Apply wood glue to the cut edges of the frame pieces.
- Join the pieces together, ensuring tight corners and a square frame. Use clamps to hold the pieces together while the glue dries.
- Reinforce the joints by hammering finish nails into the corners. Countersink the nails and fill the holes with wood filler for a smoother finish (optional).
Finishing the Frame
The finishing process enhances the appearance and durability of the frame. Sanding creates a smooth surface, while staining and sealing protect the wood and enhance its natural beauty.
- Sand the frame thoroughly using progressively finer grits of sandpaper, starting with a coarser grit to remove imperfections and ending with a finer grit for a smooth finish.
- Apply wood stain (optional) to achieve the desired color. Follow the manufacturer's instructions for application and drying time.
- Apply a coat of polyurethane sealant (optional) to protect the wood from moisture and damage. Allow the sealant to dry completely between coats.
Attaching the Mirror
Securing the mirror to the frame requires careful handling. Proper attachment methods ensure the mirror remains safely in place. Choosing the right method depends on the frame design and mirror size.
- Place the mirror centrally on the back of the frame.
- Secure the mirror using mirror clips or strong adhesive. Follow the manufacturer’s instructions for application and ensure proper weight distribution for larger mirrors.
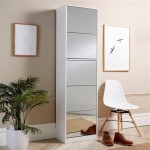
Displaying the Finished Product
Once the mirror is securely attached, the finished product is ready to be displayed. Choosing the right location enhances the aesthetic impact of the piece. Consider the room’s décor and lighting when selecting a location.
- Hang the mirror on a wall using appropriate hanging hardware, ensuring it is securely fastened.
- Alternatively, the framed mirror can be placed on a shelf or mantelpiece for a different display option.

Framing A Bathroom Mirror With Pallets Diy Frame Vanity Dresser

Diy Pallet Framed Mirror

Rustic Mirror Made From Reclaimed Pallet Wood Bathroom Mirrors Pallets

Diy Rustic Farmhouse Pallet Wood Round Mirror

Rachel Schultz Framing A Bathroom Mirror With Pallets

How To Build A Mirror Frame With Pallets Diy Tutorial 10 Steps Homify

Pallet Wood Mirror Makeover Knockoffdecor Com

Stunning Diy Bedroom Projects

Rustic Mirror Frame Out Of Pallets

Rachel Schultz Framing A Bathroom Mirror With Pallets