DIY Recessed Medicine Cabinet with Mirror: A Comprehensive Guide
A recessed medicine cabinet with a mirror offers a functional and space-saving solution for bathroom storage. By integrating the cabinet into the wall, it minimizes protrusion, creating a cleaner and more streamlined aesthetic while maximizing usable space, especially in smaller bathrooms. This article provides a comprehensive guide to constructing and installing a recessed medicine cabinet with a mirrored door, outlining the necessary materials, tools, and procedures involved in this do-it-yourself project.
Before embarking on this project, careful planning is crucial. This includes determining the desired size of the cabinet, assessing the wall's structural integrity, and understanding the presence of any hidden plumbing or electrical wiring. Accuracy in measurements and adherence to safety precautions are paramount to ensure a successful and long-lasting installation.
Planning and Preparation
The initial phase of constructing a recessed medicine cabinet revolves around meticulous planning and thorough preparation. This stage significantly influences the final outcome and the ease of installation. Key considerations at this point include sizing, location, and structural assessment.
Determining the appropriate size for the medicine cabinet is paramount. This decision should be guided by the available wall space and the desired storage capacity. Consider the depth of the cabinet, ensuring it does not interfere with any plumbing or electrical infrastructure behind the wall. Standard medicine cabinet depths typically range from 3.5 to 5 inches. Height and width should be chosen based on the mirror size and the overall aesthetic desired. A drawing of the planned cabinet with accurate dimensions will prove invaluable during the construction process.
Selecting the optimal location for the recessed medicine cabinet is equally important. Ideally, the cabinet should be centered above the sink, providing convenient access to frequently used toiletries. Before commencing any cutting, confirm the absence of pipes or wires concealed within the wall. A stud finder equipped with an AC wire detector is essential for this task. Mark the location clearly on the wall and ensure the chosen spot is free of obstructions.
Assessing the structural integrity of the wall is a critical safety measure. Recessed cabinets are typically installed between wall studs, which are vertical framing members that provide structural support. Identify the location of the studs using a stud finder. The width between these studs will dictate the maximum width of the cabinet. If the desired width exceeds the space between two studs, it may be necessary to cut into a stud, potentially requiring reinforcement of the surrounding wall structure with headers and supports. This step is best left to experienced individuals or professionals.
Once the above steps are complete, gather the necessary materials. The primary materials include lumber for the cabinet box (typically plywood or MDF), a mirrored door, hinges, screws, wood glue, sandpaper, paint or stain, and finishing materials. Select high-quality lumber and hinges for durability and long-term performance. Ensure that the mirror is of appropriate size and thickness and is equipped with mounting hardware appropriate for attaching to the cabinet door.
Finally, collect the required tools. Essential tools include a measuring tape, pencil, level, stud finder, drywall saw or utility knife, drill, screwdriver, wood saw (circular saw or hand saw), sandpaper, paintbrush or sprayer, safety glasses, and dust mask. Ensure all power tools are in good working condition and that appropriate safety gear is worn throughout the construction process.
Construction of the Cabinet Box
The construction of the cabinet box forms the core of the project. This phase requires precision and careful attention to detail to ensure a structurally sound and aesthetically pleasing final product.
Begin by cutting the lumber according to the dimensions determined during the planning phase. The lumber should be cut into pieces for the top, bottom, sides, and back of the cabinet. Precise cuts are crucial for creating a square and even cabinet. Use a circular saw or hand saw for straight cuts, ensuring the blade is sharp and the lumber is securely held in place.
Assemble the cabinet box using wood glue and screws. Apply wood glue to the edges of the lumber pieces and clamp them together. Then, drive screws through the joints to secure the pieces. Pre-drilling pilot holes before driving the screws will prevent the wood from splitting. Ensure the screws are countersunk so they are flush with the surface of the wood. Use a level to verify the cabinet is square during assembly.
Once the cabinet box is assembled, attach the back panel. The back panel provides additional support and helps to keep the cabinet square. The back panel can be made from plywood or hardboard. Attach the back panel using wood glue and screws, ensuring it is flush with the edges of the cabinet box.
After the back panel is secured, sand the entire cabinet box to create a smooth surface for painting or staining. Use progressively finer grits of sandpaper, starting with a coarser grit to remove any imperfections and ending with a finer grit for a smooth finish. Wipe away any dust with a tack cloth before proceeding to the next step.
Apply the desired finish to the cabinet box. This can be paint or stain, depending on the desired aesthetic. If painting, apply a primer coat first to ensure proper adhesion of the paint. Apply multiple thin coats of paint or stain, allowing each coat to dry completely before applying the next. Sand lightly between coats for a smoother finish. Protect the finished cabinet box with a clear coat of polyurethane or varnish for added durability.
Installation and Mirror Attachment
The final stage involves installing the cabinet into the wall and attaching the mirrored door. This phase requires careful measurements and attention to detail to ensure a secure and functional installation.
Prepare the wall opening by cutting through the drywall or plaster along the marked lines. Use a drywall saw or utility knife for this task. Cut carefully to avoid damaging any hidden pipes or wires. Once the opening is cut, clear away any debris and inspect the inside of the wall cavity.
Insert the cabinet box into the wall opening. Ensure the cabinet fits snugly into the opening. If necessary, shim the cabinet to ensure it is level and plumb. Secure the cabinet to the wall studs using screws. Drive the screws through the cabinet box and into the studs, ensuring the cabinet is firmly attached to the wall. Use shims as needed to maintain a level and plumb installation.
Attach the mirrored door to the cabinet box using hinges. Align the door with the cabinet box and mark the location of the hinges. Pre-drill pilot holes for the hinge screws to prevent the wood from splitting. Attach the hinges to the cabinet box and then to the door, ensuring the door opens and closes smoothly. Adjust the hinges as needed to ensure the door is properly aligned.
Conceal the edges of the cabinet box where it meets the wall by applying trim or caulk. Trim can be used to create a more finished look and to hide any gaps between the cabinet and the wall. Caulk can be used to seal any gaps and to prevent moisture from entering the wall cavity. Apply the trim or caulk carefully, ensuring a clean and professional finish.
Finally, install any shelves or other internal storage components inside the cabinet. Shelves can be made from plywood, glass, or other materials. Attach the shelves using shelf supports or screws. Arrange the shelves to maximize storage space and to accommodate frequently used toiletries. Clean the mirror and the surrounding area to complete the installation. The recessed medicine cabinet with mirror is now ready for use.
This detailed guide provides a comprehensive overview of the process involved in constructing and installing a DIY recessed medicine cabinet with a mirrored door. By following these steps and adhering to safety precautions, homeowners can create a functional and aesthetically pleasing storage solution for their bathrooms.

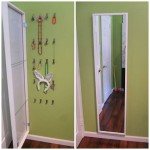
How To Turn A Mirror Into Medicine Cabinet Diy Bathroom

How To Turn A Mirror Into Medicine Cabinet Diy Bathroom

How To Turn A Mirror Into Medicine Cabinet Diy Bathroom

Diy Bath Remodel Medicine Cabinet

Diy Medicine Cabinet With Mirror Shanty 2 Chic

I Made A Recessed Medicine Cabinet Behind Sliding Mirror Idea Stolen From U Zealotnic On R Diy Bathroom Mirrors Cabinets Makeover

How To Turn A Mirror Into Medicine Cabinet Diy Bathroom

Diy Bathroom Mirror Storage Case Shanty 2 Chic

Inspiration For Our Diy Medicine Cabinet Victoria Elizabeth Barnes

Recessed Medicine Cabinet Her Tool Belt
