Floor Mirror With Lights DIY: A Step-by-Step Guide
A floor mirror with lights can be a stunning addition to any room, adding both functionality and visual appeal. Not only does it provide ample light for getting ready in the morning or applying makeup, but it also creates a sense of spaciousness and dimension in the room. While purchasing such a mirror can be expensive, building your own DIY version is a budget-friendly and rewarding project. This guide will provide you with a step-by-step process to create a beautiful floor mirror with lights that complements your space.
Choosing Materials and Tools
The first step is to gather the necessary materials and tools. You will need:
- A large, full-length mirror (consider getting a mirror with a frame for a more polished look)
- A wooden frame (choose a frame that complements the mirror and your desired style)
- Wood glue or construction adhesive
- Wood screws
- A drill
- A saw (if you need to cut the frame to size)
- Sandpaper
- Primer
- Paint (matching your room decor or desired style)
- LED light strip (flexible and waterproof, with adhesive backing)
- A power supply for the LED light strip
- Electrical tape
- A level
- A measuring tape
- A pencil
Consider the size of the mirror and the amount of light you require when choosing the length of the LED light strip. You can also choose between warm white, cool white, or a color-changing light strip to suit your preference.
Assembling the Mirror Frame
Once you have gathered your materials, start by preparing the frame. If necessary, cut the frame to fit the mirror using a saw. Sand the frame to smooth out any rough edges or imperfections. Next, apply wood glue or construction adhesive to the back of the frame and carefully attach it to the mirror. Secure the frame with wood screws, ensuring that the screws are long enough to go through both the frame and the mirror.
Once the frame is attached, allow the adhesive to dry completely before proceeding. Ideally, follow the drying time recommendations provided by the manufacturer of your glue or adhesive.
Painting and Finishing
After the adhesive has dried thoroughly, you can paint the frame. Start by applying primer to the frame, which will help the paint adhere better and ensure a smooth finish. Once the primer has dried, apply your chosen paint color in thin, even coats. Allow each coat to dry completely before applying the next. You can use a brush, roller, or spray paint for this step, depending on your personal preference.
After the paint has dried completely, you can sand the frame lightly if needed to achieve a smooth and even finish. This step is particularly useful if you are using a brush to apply paint, as brushstrokes can sometimes leave visible marks.
Installing the LED Lights
Now, it is time to install the LED light strip. Measure the length of the frame where you want to place the lights. Cut the LED light strip to the desired length, ensuring you cut at a designated cut point marked on the strip. Remove the adhesive backing from the LED light strip and press it onto the back of the frame, ensuring it is placed evenly and securely. You can adjust the position of the LED strip until you achieve the desired look.
Connect the power supply to the LED strip, ensuring that the wiring is done safely and according to the manufacturer's instructions. If you are unsure about electrical wiring, consult a professional electrician.
Finishing Touches
Once the LED light strip is installed and wired, you can add additional decorative touches to your floor mirror. You can consider attaching decorative elements, such as embellishments or trim, to the frame to enhance its aesthetic appeal. If you are planning to use the mirror in a bathroom, ensure that any decorative elements are waterproof and suitable for the environment.
After you are satisfied with the look of your mirror, you can find a suitable place for it in your room. Position the mirror where it will receive sufficient light for optimal reflection and illumination. You can use a level to ensure that the mirror is hanging straight and securely.
This DIY project allows you to create a unique and personalized floor mirror with lights that complements your decor and enhances the ambiance of your room. Remember to exercise caution and follow all safety precautions when working with electrical components and sharp tools.

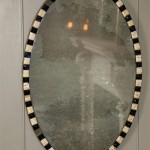
A Full Length Dressing Mirror With Lights Ers Diy Vanity Floor

10 Budget Friendly Diy Vanity Mirror Ideas With Led Lights Bathroom Small Simple Espejos De Piso Para Habitacion Decoracion

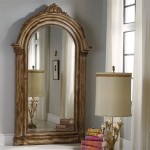
Framed Floor Mirror Love Grows Wild

Pin On Apartment Ideas

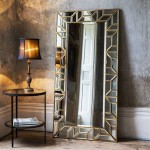
Diy Lighted Leaning Mirror

Full Length Mirror Rogue Engineer

Pin On Projects To Try Furniture

Full Length Curvy Floor Mirror With Led Lights

Easy Diy Anthropologie Mirror Dupe Make It For A Lot Less Design To Build

Diy Floor Mirror Liz Marie Blog