Crafting a Statement Piece: A DIY Guide to Frame Wall Mirrors
Wall mirrors serve both functional and aesthetic purposes within a living space. They can enhance the natural light, create an illusion of spaciousness, and act as decorative focal points. While commercially available framed mirrors offer a variety of styles, undertaking a DIY project allows for complete customization, tailoring the piece to specific design preferences and budget constraints. This guide provides a comprehensive overview of constructing a framed wall mirror, covering material selection, construction techniques, and finishing touches.
Choosing the Right Materials
The success of a DIY framed mirror hinges on selecting appropriate materials. The primary components include the mirror itself, the frame material, backing support, and necessary adhesives and hardware. Each element contributes to the overall durability and aesthetic appeal of the finished product.
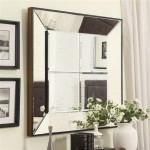
The Mirror: Selecting a high-quality mirror is paramount. Raw mirror sheets can be purchased from glass suppliers or hardware stores. Consider the desired size, shape, and thickness. Thicker mirrors offer greater stability and are less prone to distortion. Beveled edges can add a touch of elegance, while a plain edge provides a more minimalist look. Ensure the mirror surface is free from scratches or imperfections before proceeding.
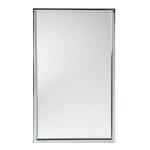
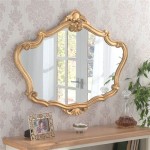
Frame Material: The choice of frame material significantly impacts the mirror's style. Wood is a popular option, offering versatility in design and finishing. Pine is an affordable and readily available softwood, suitable for painting or staining. Hardwoods like oak, maple, or walnut provide greater durability and a richer aesthetic. MDF (Medium-Density Fiberboard) is a cost-effective alternative, particularly for painted finishes. Metal frames offer a more modern and industrial look. Aluminum or steel profiles can be cut and joined using appropriate welding or joining techniques. Consider the weight of the frame material, especially for larger mirrors, as it will impact the hanging hardware requirements.
Backing Support: A solid backing provides structural integrity and prevents the mirror from flexing or breaking. Plywood or MDF are common choices. The backing should be slightly smaller than the mirror to allow for proper seating within the frame. Ensure the backing is clean and free from dust or debris before attaching the mirror.
Adhesives and Hardware: Mirror adhesive is specifically formulated to bond mirrors to various surfaces without damaging the reflective coating. Construction adhesive can also be used in conjunction with mechanical fasteners. Wood glue is essential for joining wooden frame components. Hanging hardware, such as D-rings, wire, or mounting brackets, should be selected based on the weight and size of the mirror. Consider using wall anchors for added security, especially when mounting heavy mirrors on drywall.
Construction Techniques: Building the Frame
Constructing a sturdy and aesthetically pleasing frame requires careful planning and execution. Accurate measurements, precise cuts, and secure joinery are essential for a professional-looking result.
Measuring and Cutting: Begin by accurately measuring the mirror's dimensions. Add the desired width of the frame to each side to determine the overall frame dimensions. For example, if the mirror is 24 inches by 36 inches, and you want a 2-inch wide frame, the outer dimensions of the frame will be 28 inches by 40 inches. Cut the frame material to the required lengths using a miter saw or hand saw. Mitering the corners at a 45-degree angle creates a clean, professional-looking joint. Ensure the cuts are precise and square to create a seamless frame. If using a metal frame, use a metal cutting saw or grinder with a cutting disc. Deburr any sharp edges after cutting.
Joining the Frame: Several methods can be used to join the frame components. For wooden frames, wood glue and clamps are the most common approach. Apply wood glue to the mitered edges and clamp the frame together until the glue dries completely. Consider using corner clamps to ensure the corners are square. Reinforce the joints with brad nails or screws for added strength. For metal frames, welding or using corner brackets are common joining methods. Welding requires specialized equipment and skills, while corner brackets offer a simpler alternative. Ensure the brackets are securely fastened to the frame components.
Preparing the Frame for the Mirror: Once the frame is assembled, create a rabbet (a recessed groove) along the inner edge to accommodate the mirror and backing. A router with a rabbeting bit is the most efficient way to create the rabbet. Alternatively, a table saw or hand tools can be used. The rabbet should be deep enough to accommodate the mirror, backing, and any necessary adhesive. Ensure the rabbet is clean and free from splinters or debris.
Assembly and Finishing: Completing the Project
The final stages involve securing the mirror within the frame, attaching the backing, and applying any desired finishes. A meticulous approach ensures a professional-looking and durable finished product.
Securing the Mirror: Apply mirror adhesive to the back of the mirror in thin, vertical beads. Avoid applying adhesive to the very edges of the mirror, as it may squeeze out when pressed into the frame. Carefully place the mirror into the rabbet, ensuring it is centered within the frame. Gently press the mirror against the frame to ensure good adhesion. Use shims or spacers to hold the mirror in place while the adhesive cures. Allow the adhesive to cure completely according to the manufacturer's instructions.
Attaching the Backing: Once the adhesive has cured, attach the backing to the frame. Apply construction adhesive to the back of the mirror and the inside of the frame. Place the backing over the mirror, ensuring it is centered and flush with the frame. Secure the backing with screws or brad nails. Ensure the screws or nails are not too long, as they could penetrate the mirror. The backing should provide a solid and stable support for the mirror.
Finishing Touches: The final step involves applying any desired finishes to the frame. For wooden frames, sanding the frame smooth and applying paint, stain, or varnish can enhance the aesthetic appeal. Apply multiple coats for a durable and professional-looking finish. For metal frames, polishing or applying a protective coating can prevent corrosion and enhance the appearance. Attach the hanging hardware to the back of the frame. Position the hardware appropriately based on the weight and size of the mirror. Ensure the hardware is securely fastened to the frame. Clean the mirror surface with a glass cleaner to remove any fingerprints or smudges.
By following these steps, individuals can create a custom-framed wall mirror that reflects their personal style and enhances their living space. Attention to detail and careful execution are key to achieving a professional and lasting result.

Mirror Frame Diy How To Update A Basic Bathroom Our Faux Farmhouse
:max_bytes(150000):strip_icc()/bloomingdiyer-372b1cae2a6c43af917f3bea506c11da.jpg?strip=all "20 Diy Mirror Frame Ideas To Inspire Your Next Project")
20 Diy Mirror Frame Ideas To Inspire Your Next Project

How To Frame A Mirror

Diy Wood Mirror Frame For Bathroom Vanity Tidbits

30 Diy Mirror Projects That Are Fun And Easy To Make

30 Diy Mirror Frames Frame Easy

Diy Wood Frame Mirror Farmhouse Industrial Bathroom Joyfully Treasured

Mirror Frame Diy How To Update A Basic Bathroom Our Faux Farmhouse

Diy Stick On Mirror Frame Sawdust Sisters

Build A Wood Mirror Frame With This Easy Diy Building Bluebird