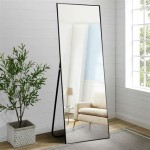
Framing Bathroom Mirrors With Crown Molding
Adding crown molding around a bathroom mirror elevates the space, creating a polished and sophisticated look. This relatively simple DIY project can significantly impact the overall aesthetic, adding architectural detail and visual interest. Whether undertaking a full bathroom remodel or seeking a quick weekend upgrade, framing a mirror with crown molding offers a high-impact return on investment.
Choosing the Right Molding
Selecting the appropriate crown molding profile is crucial for achieving the desired look. Consider the existing bathroom style and the scale of the mirror. Intricate, ornate moldings complement traditional bathrooms, while simpler, cleaner lines suit modern spaces. For smaller mirrors, choose a narrower molding to avoid overwhelming the frame, whereas larger mirrors can accommodate wider, more substantial profiles. Various materials are available, including wood, MDF (medium-density fiberboard), and PVC (polyvinyl chloride). Wood offers a classic look but requires more maintenance, while MDF and PVC are more moisture-resistant and easier to work with, making them ideal for bathroom environments.
Preparing the Mirror and Wall
Before installation, proper preparation is essential. Thoroughly clean the mirror surface and the surrounding wall area to ensure optimal adhesion. If the existing paint is glossy, lightly sanding the area will help the adhesive bond effectively. Measure the mirror precisely to determine the required molding lengths. Accurate measurements are critical for achieving clean, professional-looking mitered corners.
Cutting the Molding
Cutting the molding accurately is one of the most challenging aspects of this project. A miter saw is the recommended tool for achieving precise 45-degree angles for the corners. For outside corners, the molding pieces are mitered so that the longest edges meet. For inside corners, the molding is mitered so that the shortest edges meet. Practice on scrap pieces of molding to ensure accuracy and avoid wasting material. A coping saw can be used to fine-tune inside corners for a perfect fit.
Attaching the Molding
Once the molding pieces are cut, they can be attached to the mirror and the wall. Construction adhesive is commonly used for this purpose. Apply a bead of adhesive to the back of the molding and carefully position it against the mirror and wall. Use painter's tape to secure the molding in place while the adhesive dries. For added security, small finishing nails can be used, particularly with heavier wood moldings. Countersink the nails and fill the holes with wood putty for a seamless finish.
Caulking and Finishing
Caulking is a crucial step for achieving a professional, polished look. Apply a thin bead of paintable caulk along the seams where the molding meets the mirror and the wall. This seals any gaps, prevents moisture intrusion, and creates a smooth, cohesive appearance. Smooth the caulk with a damp finger or a caulking tool for a clean finish. Once the caulk is dry, the molding can be painted or stained to match the existing bathroom décor.
Adding Decorative Elements
While crown molding alone adds significant visual interest, consider incorporating additional decorative elements for a truly custom look. Small decorative appliqués can be added to the corners or along the length of the molding for enhanced detail. A contrasting paint color can also highlight the molding and create a dramatic focal point. For a more subtle approach, choose a paint color that complements the existing wall color but is slightly darker or lighter to create depth and dimension.
Lighting Considerations
The addition of crown molding can impact the lighting around the mirror. If the molding casts shadows, consider adding supplemental lighting, such as sconces flanking the mirror, to ensure adequate illumination. Alternatively, strategically placed LED strip lights can be installed behind the molding to create a subtle backlighting effect, adding ambiance and functionality to the bathroom.

Bathroom Mirror Framed With Crown Molding Large Mirrors Frame Makeover

Bathroom Mirror Framed With Crown Molding Frame Mirrors Diy Large

Mirror Molding Framing A With Crown Mirrormate

Crafty Again

How To Upgrade Your Builder Grade Mirror Frame It

Simple Ways To Make A Framed Bathroom Mirror Hometalk

Diy Bathroom Mirror Upgrade Tutorial Use Mdf Trim And Crown Molding To Build A Frame Around The Home Decor Remodeling

How To Frame A Bathroom Mirror Nest For Less

Mirror Molding The Easy Upgrade To Boring Bathrooms Mirrorchic

Love This Mirror Idea Budget Bathroom Remodel Bathrooms