Full-Length Mirror Frame DIY: A Comprehensive Guide
A full-length mirror is a functional and aesthetic addition to any home. Beyond its practical use for self-assessment, it can enhance a room's perceived size and brightness. Framing a full-length mirror elevates its visual appeal, transforming it from a simple utility into a decorative statement piece. This article provides a comprehensive guide to creating a DIY full-length mirror frame, covering material selection, construction techniques, and finishing options.
Key Point 1: Material Selection for Your Mirror Frame
The choice of materials significantly impacts the overall aesthetic and durability of the mirror frame. Several factors influence this decision, including budget, desired style, and skill level. The most common materials include wood, metal, and even repurposed items.
Wood: Wood is a versatile and readily available material for framing. It offers a wide range of species, each with its own unique grain pattern, color, and hardness. Softwoods like pine are cost-effective and easy to work with, making them suitable for beginners. Hardwoods such as oak, maple, and walnut provide greater durability and a more refined appearance, but they require more advanced woodworking skills and tools. When selecting wood, ensure it is straight, free from knots or imperfections, and properly dried to prevent warping or cracking.
Consider the wood's natural color and grain when choosing a stain or paint. If you intend to stain the frame, opt for a wood with an attractive grain pattern. If you plan to paint the frame, the wood species is less critical, focusing more on its structural integrity and ease of finishing.
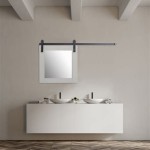
Metal: Metal frames offer a sleek and modern aesthetic. Aluminum, steel, and wrought iron are common choices. Metal frames require specialized tools and skills for cutting, welding, and finishing. Aluminum is lightweight and resistant to corrosion, making it a good option for humid environments. Steel is stronger and more durable but can be susceptible to rust if not properly treated. Wrought iron offers a classic and ornate look, but it is heavier and more challenging to work with.
When working with metal, safety is paramount. Wear appropriate protective gear, including gloves, safety glasses, and a respirator, especially during cutting and welding operations. Consider the weight of the finished frame, as it may require specialized mounting hardware.
Repurposed Materials: For environmentally conscious and budget-friendly options, consider repurposing materials like reclaimed wood, pallets, or even old picture frames. Reclaimed wood adds character and a rustic charm to the mirror frame. Pallets can be disassembled and used to create a unique and textured frame. Old picture frames can be modified or combined to create a larger frame for the full-length mirror. When using repurposed materials, ensure they are clean, structurally sound, and free from pests or contaminants.
Repurposed materials often require additional preparation, such as sanding, cleaning, and sealing, to ensure a smooth and durable finish. Creativity and imagination are key when working with repurposed materials, allowing you to create a one-of-a-kind mirror frame.
Key Point 2: Construction Techniques and Frame Assembly
The construction technique employed depends on the chosen material, skill level, and desired design. Common construction methods include using mitered corners, butt joints, or rabbet joints. The assembly process involves cutting the frame pieces, joining them securely, and attaching the mirror.
Cutting Frame Pieces: Accurate measurements and precise cuts are crucial for a well-fitting frame. Use a measuring tape, square, and pencil to mark the dimensions of each frame piece. For wood, a miter saw or hand saw can be used to make accurate cuts. For metal, a metal cutting saw or angle grinder is necessary. Ensure that the cuts are clean and square, especially for mitered corners, which require precise 45-degree angles.
Double-check the measurements before cutting to avoid errors and material waste. A small discrepancy in the cut can result in a noticeable gap or misalignment in the finished frame. Use clamps or a vise to secure the material during cutting to prevent movement and ensure accuracy.
Joining Frame Pieces: Several methods can be used to join the frame pieces, each with its advantages and disadvantages. Mitered corners offer a clean and professional look but require precise cuts and strong joinery. Butt joints are simpler to execute but may require additional reinforcement. Rabbet joints provide a strong and visually appealing joint, but they require more advanced woodworking skills.
For wood frames, wood glue and screws or nails are commonly used to join the pieces. Apply wood glue liberally to the mating surfaces and clamp the pieces together until the glue dries. Use screws or nails to provide additional reinforcement. For metal frames, welding is the most common method of joining the pieces. Welding requires specialized equipment and skills to create strong and durable joints.
Attaching the Mirror: Once the frame is assembled, the mirror needs to be securely attached. Several methods can be used, including using mirror clips, adhesive, or a combination of both. Mirror clips are small metal or plastic fasteners that hold the mirror in place. They are easy to install and allow for easy removal of the mirror if necessary. Mirror adhesive is a specially formulated adhesive that bonds the mirror to the frame. It provides a strong and permanent bond but can be difficult to remove the mirror without damaging it.
Before attaching the mirror, ensure the frame is clean and free from dust or debris. Apply mirror adhesive to the back of the mirror in a zigzag pattern and press it firmly against the frame. Use mirror clips to provide temporary support while the adhesive cures. Allow the adhesive to cure completely before removing the clips or moving the mirror.
Key Point 3: Finishing and Enhancements
The finishing touches significantly impact the overall appearance and durability of the mirror frame. Finishing options include painting, staining, varnishing, and adding decorative elements.
Painting and Staining: Painting and staining are common methods for enhancing the appearance of wood frames. Painting provides a uniform color and protects the wood from moisture and wear. Staining enhances the natural grain pattern of the wood and provides a warm and inviting look. Choose a high-quality paint or stain that is suitable for the type of wood used. Prepare the surface by sanding it smooth and applying a primer or wood conditioner before painting or staining.
Apply several thin coats of paint or stain, allowing each coat to dry completely before applying the next. Use a brush, roller, or spray gun to apply the finish. Sand lightly between coats to remove any imperfections and ensure a smooth finish. Consider using a clear coat of varnish or lacquer to protect the paint or stain and enhance its durability.
Varnishing and Sealing: Varnishing and sealing provide a protective layer over the frame, protecting it from moisture, scratches, and UV damage. Varnish is a clear, hard finish that is available in various sheens, including gloss, satin, and matte. Sealer is a penetrating finish that seals the wood pores and prevents it from absorbing moisture. Choose a varnish or sealer that is compatible with the paint or stain used.
Apply several thin coats of varnish or sealer, allowing each coat to dry completely before applying the next. Sand lightly between coats to remove any imperfections and ensure a smooth finish. Use a brush or spray gun to apply the finish. Ensure that the frame is completely dry before hanging it in a humid environment.
Decorative Elements: Adding decorative elements can enhance the visual appeal of the mirror frame and personalize it to match your style. Decorative elements include molding, trim, carvings, and embellishments. Molding and trim can be added to the frame to create a more ornate and detailed look. Carvings can be added to the frame to create a unique and artistic design. Embellishments, such as beads, rhinestones, or metal accents, can be added to the frame to add sparkle and glamour.
When adding decorative elements, ensure they are securely attached to the frame using glue, nails, or screws. Choose decorative elements that complement the style of the frame and the surrounding decor. Consider the weight of the decorative elements, as they may require additional support or reinforcement.
By carefully considering these materials, techniques, and finishing options, anyone can create a unique and stylish full-length mirror frame that enhances the aesthetic of their home. The process encourages creativity and provides a rewarding sense of accomplishment.

Full Length Mirror Rogue Engineer

Full Length Mirror Diy Frame 1905 Farmhouse

Diy Full Length Mirror Frame

Full Length Mirror Rogue Engineer

Diy Full Length Mirror

Full Length Mirror Diy Frame 1905 Farmhouse

Diy Wooden Farmhouse Full Length Mirror Simplylifewithallison

Diy Full Length Mirror Shanty 2 Chic

Antique Diy Mirror Frame Arinsolangeathome

Diy Framed Full Length Mirror Under 20