Hollywood Mirror Vanity DIY: A Comprehensive Guide to Creating Your Own Glamorous Setup
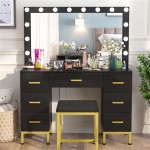
The allure of a Hollywood mirror vanity is undeniable. Its bright, even lighting and classic aesthetic have made it a staple in professional makeup studios and a sought-after feature for personal grooming spaces. While commercially available Hollywood mirrors can be quite expensive, constructing one yourself is a viable and often more affordable option. This article provides a detailed guide on how to create a DIY Hollywood mirror vanity, covering essential materials, tools, assembly instructions, and customization options.
Before embarking on the construction, careful planning and preparation are crucial. This involves determining the desired size and style of the mirror, selecting appropriate materials, and gathering the necessary tools. A well-defined plan will not only streamline the building process but also minimize potential errors and ensure a professional-looking finished product.
Key Point 1: Planning and Material Selection
The foundation of any successful DIY project lies in meticulous planning. Begin by determining the dimensions of your vanity mirror. Consider the available space in your room and the desired overall aesthetic. A larger mirror offers more reflective surface area and enhanced illumination, while a smaller mirror is more suitable for compact spaces. Sketching a design with precise measurements is highly recommended.
Next, consider the style of your Hollywood mirror. Do you prefer a classic rectangular shape or a more modern, minimalist design? Oval or arched mirrors can add a touch of elegance, while frameless mirrors offer a sleek and contemporary look. Browse online resources and home decor magazines for inspiration.
Material selection is equally important. Here's a breakdown of the essential components:
*Mirror:
Choose a high-quality glass mirror of the desired size and shape. Consider the thickness of the mirror; thicker mirrors are generally more durable. Local glass suppliers can cut mirrors to specific dimensions. *Wood (for Frame):
Select suitable wood for the frame. Pine is a cost-effective and easily workable option. Alternatively, consider MDF (Medium-Density Fiberboard) for a smooth and paintable surface. Choose a wood thickness that provides adequate support for the mirror and lighting fixtures. *Light Bulbs:
Opt for LED light bulbs for their energy efficiency, long lifespan, and minimal heat output. Choose bulbs with a color temperature that complements your makeup application style. Daylight bulbs (around 5000-6500K) are generally preferred for their accurate color representation. Consider the wattage of the bulbs; lower wattage bulbs are suitable for smaller mirrors, while higher wattage bulbs provide more intense illumination. *Light Sockets:
Purchase light sockets that are compatible with your chosen light bulbs. Ensure the sockets are rated for the appropriate voltage and wattage. *Wiring:
Select appropriate electrical wiring for connecting the light sockets. Use UL-listed wiring for safety. *Power Cord:
Choose a power cord with the appropriate voltage and amperage rating. Ensure the cord is long enough to reach a power outlet comfortably. *Hardware:
Gather screws, nails, wood glue, and other hardware necessary for assembling the frame and attaching the light sockets and wiring. *Finishing Materials:
Select paint, stain, or other finishing materials to enhance the aesthetic appeal of the frame. Consider using a primer to ensure proper adhesion of the finishing coat.After selecting the materials, compile the necessary tools. The following list includes essential tools for constructing a Hollywood mirror vanity:
*Measuring Tape:
For accurate measurements. *Pencil:
For marking cut lines. *Saw (Circular Saw or Hand Saw):
For cutting the wood for the frame. *Drill:
For drilling pilot holes and attaching screws. *Screwdriver:
For driving screws. *Wire Strippers:
For stripping insulation from electrical wires. *Wire Connectors:
For connecting electrical wires safely. *Sandpaper:
For smoothing the wood surface. *Paintbrush or Roller:
For applying paint or stain. *Safety Glasses:
For protecting your eyes from debris. *Work Gloves:
For protecting your hands.Proper preparation of the materials is crucial for a professional finish. Sand the wood frame to remove any rough edges and ensure a smooth surface. Apply a primer to the wood to seal the pores and create a uniform base for the paint or stain. Pre-drill pilot holes for the screws to prevent the wood from splitting.
Key Point 2: Assembling the Frame and Installing the Lights
With the materials and tools prepared, the next step involves assembling the frame and installing the light fixtures. This requires careful attention to detail and adherence to safety precautions.
Begin by cutting the wood frame pieces according to your predetermined measurements. Ensure the cuts are accurate and square to create a seamless frame. Assemble the frame using wood glue and screws. Clamp the pieces together while the glue dries to ensure a strong and durable bond. Reinforce the corners of the frame with corner braces for added stability.
Once the frame is assembled, mark the locations for the light sockets. Space the sockets evenly around the perimeter of the mirror, ensuring adequate distance between each socket. Drill holes for the light sockets using a drill bit that is slightly smaller than the diameter of the socket base. This will create a snug fit and prevent the sockets from moving.
Carefully wire the light sockets according to the manufacturer's instructions. Ensure the wires are properly connected and secured. Use wire connectors to join the wires safely and prevent short circuits. Connect the light sockets to the power cord, ensuring the correct polarity. If unsure about electrical wiring, consult a qualified electrician.
Test the wiring before mounting the mirror. Plug in the power cord and switch on the lights to ensure they are functioning correctly. If any issues arise, immediately disconnect the power and troubleshoot the wiring.
After verifying the wiring, securely mount the mirror to the frame. Use mirror clips or adhesive to attach the mirror to the back of the frame. Ensure the mirror is properly aligned and centered before securing it in place.
Key Point 3: Finishing and Customization
The final step involves finishing the frame and customizing the vanity to suit your personal style. This is an opportunity to add a personal touch and create a truly unique piece.
Apply the chosen finish to the frame. Use a paintbrush or roller to apply paint, stain, or other finishing materials. Apply several thin coats for a smooth and even finish. Allow each coat to dry completely before applying the next one. Consider using a clear coat to protect the finish and enhance its durability.
Consider adding decorative elements to the frame to enhance its aesthetic appeal. Use decorative trim, molding, or appliques to add visual interest. Apply metallic paint or gilding to create a glamorous look. Add fabric or wallpaper to the back of the frame to create a unique backdrop.
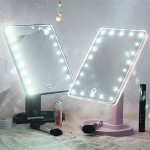
Customize the lighting to suit your specific needs. Use dimmable light bulbs to adjust the brightness of the lights. Install a dimmer switch to further control the lighting levels. Consider using different colored light bulbs to create a mood lighting effect.
Add accessories to enhance the functionality of the vanity. Install a shelf or drawer to store makeup and other grooming supplies. Add a magnifying mirror for detailed makeup application. Install a Bluetooth speaker to play music while you get ready.
Finally, consider the placement of your Hollywood mirror vanity. Position it in a well-lit area with access to a power outlet. Ensure there is sufficient space around the vanity for comfortable movement. Adjust the height of the vanity to ensure it is at a comfortable level for applying makeup and grooming.
By following these detailed instructions, it is possible to create a stunning and functional Hollywood mirror vanity that enhances your personal grooming space and adds a touch of glamour to your home.

Diy Light Up Vanity Mirrors You Can Make Ohmeohmy Blog

10 Diy Vanity Mirror Projects That Show You In A Diffe Light

Dyi Large Hollywood Mirror Diy Vanity Home Decor

10 Diy Vanity Mirror Projects That Show You In A Diffe Light

Diy Rustic Hollywood Mirror Design Asylum Blog By Kellie Smith Vanity Bathroom Decor

How To Make A Diy Hollywood Style Mirror Sarah Thain

How To Make A Hollywood Mirror For Under 50 Paula S Projects

Diy Light Up Vanity Mirrors You Can Make Ohmeohmy Blog

10 Diy Vanity Mirror Projects That Show You In A Diffe Light

Marilyn Hollywood Vanity Mirror With Led Lights Diy At B Q
