Hollywood Mirror With Lights DIY: A Comprehensive Guide
Creating a Hollywood-style mirror with lights is a popular DIY project that adds a touch of glamour to any space. This guide provides a step-by-step approach to constructing a personalized illuminated mirror, from selecting the right materials to the final wiring process.
Materials Required: The foundation of a successful DIY project lies in gathering the necessary materials. For this project, one will need a frameless mirror, LED light strips, a power supply, wiring, mounting hardware, a dimmer switch (optional), and tools such as a measuring tape, drill, wire strippers, and a screwdriver.
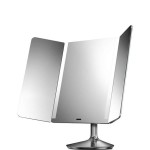
Choosing the Right Mirror: The mirror serves as the centerpiece of the project. Selecting the correct size and shape is crucial. Consider the available space and desired aesthetic when making this choice. Frameless mirrors are ideal for this project as they provide a clean, modern look and simplify the installation process of the light strips.
Selecting LED Light Strips: LED light strips are energy-efficient and offer consistent illumination. They are available in various color temperatures, ranging from warm white to cool white. Consider the desired ambiance when selecting the color temperature. Warm white creates a cozy atmosphere, while cool white provides a brighter, more vibrant feel. Additionally, addressable LED strips offer color-changing capabilities and can be controlled via a smartphone app or remote.
Power Supply and Wiring: The power supply should be compatible with the chosen LED light strips. Ensure the voltage and amperage ratings match to avoid damaging the lights. Wiring should be of adequate gauge to handle the current draw of the LED strips. Low-voltage wiring is typically used for this type of project.
Planning the Layout: Before beginning the installation process, carefully plan the placement of the lights. Measure the perimeter of the mirror and mark the desired locations for the LED strips. Ensure even spacing between the lights for a balanced and professional look. Consider the reflection of the lights in the mirror and adjust the spacing accordingly to avoid glare.
Mounting the LED Strips: Most LED light strips come with an adhesive backing. Clean the mirror surface thoroughly with isopropyl alcohol to ensure proper adhesion. Peel back the protective layer from the adhesive backing and carefully apply the LED strips to the marked locations on the mirror. Press firmly along the length of the strip to secure it in place.
Wiring the Lights: Connect the LED strips to the power supply according to the manufacturer's instructions. Use wire connectors to secure the connections and ensure proper polarity. If incorporating a dimmer switch, connect it in line with the power supply. Test the lights to ensure they are functioning correctly before proceeding to the next step.
Mounting the Mirror: Choose appropriate mounting hardware based on the weight of the mirror and the wall material. Follow the manufacturer's instructions for installing the mounting hardware. Carefully hang the mirror on the wall, ensuring it is securely fastened. Conceal the wiring behind the mirror or within the wall, if possible.
Adding a Dimmer Switch (Optional): A dimmer switch allows for adjustable brightness levels, creating customizable ambiance. Install the dimmer switch according to the manufacturer's instructions, typically in line with the power supply. This provides control over the intensity of the lights based on individual preferences and lighting needs.
Safety Precautions: Always disconnect the power supply before working with electrical components. Use appropriate safety equipment, such as gloves and eye protection. If unsure about any aspect of the wiring process, consult a qualified electrician. Proper safety measures are essential to prevent accidents and ensure a successful outcome.
Customization Options: The basic design can be further customized to match individual preferences. Adding a frame around the mirror enhances the aesthetic appeal. Different frame materials, such as wood or metal, can complement various interior design styles. Experimenting with different LED strip colors and patterns adds a unique touch. Addressable LED strips can further customize lighting effects.
Maintenance and Troubleshooting: Regularly dust the mirror and LED strips to maintain optimal brightness and appearance. If the lights flicker or fail to illuminate, check the connections and power supply. Replace any faulty components as needed. Troubleshooting common issues ensures the longevity and functionality of the Hollywood mirror.
Constructing a DIY Hollywood mirror with lights is a rewarding project that enhances any space with a touch of glamour. By following these steps and paying attention to detail, individuals can create a personalized illuminated mirror that meets their specific needs and aesthetic preferences.

Diy Light Up Vanity Mirrors You Can Make Ohmeohmy Blog

How To Make A Diy Hollywood Style Mirror Sarah Thain

Diy Make Up Mirror With Lights Instructables

Diy Vanity Mirror With Lights Under 150

Dyi Large Hollywood Mirror Diy Vanity Home Decor

Diy Vanity Mirror With Lights Only 40
:max_bytes(150000):strip_icc()/makesandmunchies-c136f898cca640faa72b6209012230cb.jpg?strip=all "7 Diy Lighted Mirror Ideas To Add A Little Extra Shine Your Space")
7 Diy Lighted Mirror Ideas To Add A Little Extra Shine Your Space

10 Diy Vanity Mirror Projects That Show You In A Diffe Light

Diy Hollywood Lighted Makeup Vanity Mirror Dimmable Lights For Stick On Led Light Kit Set Plug In Bathroom Wall Bulb Only

Amazing Diy Hollywood Vanity Mirror With Lights Woodworking Wood Burning