How to Add Trim Around a Mirror: A Comprehensive Guide
Adding trim around a mirror is a straightforward home improvement project that can significantly enhance the aesthetic appeal of any room. Whether it's a bathroom, bedroom, or hallway, framing a mirror with trim creates a polished and custom look. This guide provides a detailed walkthrough of the process, from selecting the appropriate materials and tools to the final installation, ensuring a professional-looking result.
The choice of trim can dramatically influence the style of the mirror. Consider the existing décor of the room and the desired aesthetic before making a selection. Options range from simple, minimalist profiles to ornate, decorative moldings. Wood is a popular choice due to its versatility and ease of painting or staining. MDF (Medium-Density Fiberboard) is another cost-effective option, particularly suitable for painted trim. For areas prone to moisture, such as bathrooms, PVC trim is an excellent choice due to its resistance to water damage.
Before commencing the project, gather all the necessary tools and materials. A miter saw is essential for making precise angled cuts for the corners of the frame. A measuring tape, pencil, and level are crucial for accurate measurements and alignment. Construction adhesive, painter's caulk, and finishing nails will secure the trim to the mirror and the wall. Safety glasses are also essential to protect your eyes during cutting and nailing.
Key Point 1: Planning and Preparation
Proper planning is paramount for a successful mirror framing project. Begin by carefully measuring the mirror. Measure the length and width of the mirror precisely. These measurements will be used to determine the dimensions of the frame. It is crucial to account for the overlap of the trim onto the mirror surface. Typically, a ¼ to ½ inch overlap on each side is sufficient, providing a secure and aesthetically pleasing fit. Add twice the overlap measurement to both the length and width of the mirror to calculate the outer dimensions of the frame.
Once the outer dimensions of the frame are determined, calculate the length of each piece of trim. For a rectangular or square mirror, two pieces will be cut to the length of the mirror plus twice the overlap, and the other two pieces will be cut to the width of the mirror plus twice the overlap. Remember to account for the mitered corners; the outer edge of the trim should match the calculated outer dimensions of the frame.
Choosing the right trim profile is a critical decision. Consider the style of the room and the desired overall look. For a modern aesthetic, opt for a simple, clean-lined trim. For a more traditional look, choose a decorative molding with intricate details. The width and thickness of the trim should also be considered. A wider trim will create a bolder statement, while a thinner trim will be more subtle. Ensure the trim is thick enough to allow for proper adhesion to the mirror and wall.
Preparation of the mirror surface is also important. Clean the mirror thoroughly with a glass cleaner to remove any dirt, grime, or fingerprints. A clean surface will ensure better adhesion of the construction adhesive. If the mirror has any existing blemishes or imperfections, consider addressing them before installing the trim. Minor scratches can sometimes be polished out with a glass polishing compound.
Key Point 2: Cutting and Assembling the Frame
Accurate cutting is crucial for a professional-looking frame. Use a miter saw to make precise 45-degree angle cuts at the ends of each piece of trim. The miter saw allows for consistent and accurate cuts, ensuring that the corners of the frame will fit together seamlessly. Before cutting, double-check the measurements and mark the cutting lines clearly on the trim. Use a sharp pencil or marker to ensure accurate marking.
When cutting the trim, take extra care to avoid splintering or chipping the wood. Use a fine-tooth blade on the miter saw and cut slowly and steadily. If the trim is prone to splintering, consider using a backer board to support the wood during cutting. A backer board is a piece of scrap wood that is placed behind the trim to prevent it from splintering.
After cutting the trim, dry-fit the pieces together to ensure a proper fit. This step is essential for identifying any discrepancies or errors before applying adhesive. Place the mitered corners together and check for gaps or misalignments. If necessary, make minor adjustments to the cuts to achieve a perfect fit. This can be done using a block plane or sandpaper.
Once the fit is satisfactory, apply construction adhesive to the back of each piece of trim. Use a high-quality construction adhesive that is specifically designed for bonding wood to glass. Apply the adhesive in a thin, even bead along the entire length of the trim. Avoid applying excessive adhesive, as this can cause it to squeeze out from the edges of the frame.
Carefully position the trim pieces around the mirror, ensuring that the mitered corners are aligned and the trim is overlapping the mirror by the desired amount. Press the trim firmly against the mirror to ensure good adhesion. Use painter's tape to hold the trim in place while the adhesive dries. Apply strips of painter's tape across the corners and along the length of the trim to provide consistent pressure.
Key Point 3: Securing and Finishing the Trim
In addition to construction adhesive, finishing nails can be used to further secure the trim to the wall, especially if the mirror is already mounted. Use a nail gun or hammer and finishing nails to drive nails through the trim and into the wall studs. Ensure the nails are countersunk to avoid protruding from the surface of the trim.
If using a hammer, use a nail set to countersink the nails. A nail set is a small metal tool that is used to drive the nail head below the surface of the wood without damaging the surrounding area. Place the nail set over the nail head and tap it gently with a hammer until the nail is flush with the surface of the trim.
After the adhesive has dried and the nails are in place, remove the painter's tape. Inspect the frame for any gaps or imperfections. Use painter's caulk to fill any gaps between the trim and the mirror or the wall. Apply a thin bead of caulk along the edges of the trim and smooth it out with a wet finger or a caulk smoothing tool.
Once the caulk has dried, sand the trim lightly to create a smooth surface for painting or staining. Use fine-grit sandpaper to avoid scratching the wood. If the trim is unfinished, apply a primer before painting or staining. Primer will help to seal the wood and provide a better surface for the paint or stain to adhere to.
Apply the desired finish to the trim. If painting, use a high-quality paint that is suitable for wood. Apply two coats of paint, allowing each coat to dry completely before applying the next. If staining, use a stain that complements the existing décor of the room. Apply the stain evenly and wipe off any excess with a clean cloth.
Finally, inspect the finished frame and touch up any areas as needed. Clean the mirror with a glass cleaner to remove any fingerprints or smudges. The framed mirror will now add a touch of elegance and sophistication to the room.

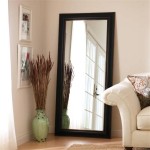
Easy Diy Tutorial Adding Trim Around A Giant Mirror For Ers

The Kids Bathroom Mirror Gets Framed House Of Hepworths

How To Frame A Bathroom Mirror

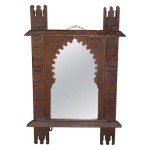
How To Frame A Mirror

Getting Creative With Oversized Mirrors And Diy Framework

Timeless And Treasured My Three Girls How To Frame A Bathroom Mirror

My Cottage Charm How To Add Molding Mirrors Bathroom Mirror Makeover Bathrooms Remodel

How To Add Trim A Builder Grade Mirror Dells Daily Dish

Diy Mirror Frame Remodelaholic

Love This Mirror Idea Budget Bathroom Remodel Bathrooms