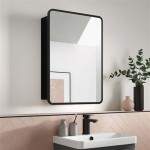
How to Change a Bathroom Mirror: A Comprehensive Guide
Replacing a bathroom mirror can dramatically update the room's aesthetic. This seemingly complex task is achievable with the right tools, preparation, and careful execution. This guide provides a step-by-step approach to changing a bathroom mirror safely and effectively.
1. Assessing the Existing Mirror and Planning the Replacement
Before beginning, carefully examine the current mirror setup. Note its dimensions, mounting method (adhesive, clips, or frame), and any surrounding fixtures like lighting or medicine cabinets. These factors will influence the choice of replacement mirror and the necessary removal process. Measure the space accurately to ensure the new mirror fits seamlessly. Choosing a mirror with the same mounting system as the old one can simplify the installation process.
2. Gathering the Necessary Tools and Materials
Having the right tools on hand streamlines the process and minimizes potential complications. Essential tools include a putty knife or scraper, safety glasses, work gloves, a hammer, a pry bar (if needed), masking tape, a pencil, a measuring tape, and a screwdriver. Depending on the mounting method, additional materials such as mirror adhesive, mirror clips, screws, and wall anchors may be required. For heavier mirrors, a suction cup mirror lifter can be a valuable aid.
3. Preparing the Work Area for Mirror Removal
Protecting the surrounding surfaces is crucial. Cover the vanity, sink, and floor with drop cloths or old towels to prevent damage from falling glass or debris. Masking tape can be used to protect adjacent wall areas. Turning off the bathroom light fixture connected to the mirror circuit ensures electrical safety during removal.
4. Safely Removing the Old Bathroom Mirror
The removal method depends on how the mirror is attached. For adhesive-mounted mirrors, carefully insert a putty knife or scraper behind the mirror, working slowly and gently to loosen the adhesive. Applying heat with a hairdryer can soften stubborn adhesive. For clip-mounted mirrors, locate and unscrew the clips holding the mirror in place. Frame-mounted mirrors may require removing the frame first before accessing the mounting hardware. Throughout the removal process, prioritize safety, wearing gloves and safety glasses to protect against sharp edges and broken glass. If the mirror is large or particularly difficult to remove, consider seeking professional assistance.
5. Preparing the Wall Surface for the New Mirror
Once the old mirror is removed, inspect the wall for any damage or irregularities. Fill any holes with spackle and allow it to dry completely. Sand the patched areas smooth and clean the entire wall surface to ensure proper adhesion for the new mirror. If changing to a different mounting system, prepare the wall accordingly. For example, if switching from adhesive to clips, mark and pre-drill holes for the clips.
6. Installing the New Bathroom Mirror: Adhesive Method
If using mirror adhesive, apply it to the back of the new mirror according to the manufacturer’s instructions. Typically, the adhesive is applied in vertical lines or a grid pattern. Carefully position the mirror on the wall, ensuring it’s level and aligned correctly. Apply firm, even pressure for the recommended time to ensure a secure bond. Use painter's tape to support the mirror until the adhesive fully cures.
7. Installing the New Bathroom Mirror: Clip Method
For clip-mounted mirrors, position the clips on the wall according to the mirror’s dimensions and screw them securely into place. Ensure the clips are level and evenly spaced. Carefully insert the mirror into the clips, ensuring it's snugly fitted. Some clip systems may require additional screws to secure the mirror to the clips.
8. Installing the New Bathroom Mirror: Framed Method
Framed mirrors often have mounting hardware attached to the frame itself. Position the frame against the wall, mark the location of the mounting holes, and pre-drill the holes. Insert wall anchors if necessary. Secure the frame to the wall using appropriate screws, ensuring it’s level and firmly attached.
9. Final Touches and Safety Checks
Once the mirror is installed, remove any painter's tape used for support. Clean the mirror surface with a glass cleaner. Inspect the surrounding area for any debris and clean it up. Perform a final check to ensure the mirror is securely mounted and stable. If using a lighting fixture connected to the mirror, carefully re-establish the electrical connection. Ensure proper grounding and test the fixture to confirm functionality.

How To Remove A Bathroom Mirror Lowe S

How To Safely And Easily Remove A Large Bathroom Builder Mirror From The Wall Site Title

How To Remove Bathroom Mirror From Wall Easily Safely Makeover On A Budget Ep 4

How To Safely And Easily Remove A Large Bathroom Builder Mirror From The Wall Site Title

How To Remove A Bathroom Mirror Lowe S

Mirror Frame Diy How To Update A Basic Bathroom Our Faux Farmhouse

Easy Diy Tutorial Adding Trim Around A Giant Mirror For Ers

Diy Bathroom Mirror Frame For Under 10 O Hayley Blog

Diy Bathroom Mirror Frame For Under 10 O Hayley Blog

Diy Bathroom Mirror Frame For Under 10 O Hayley Blog