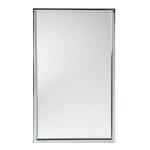
How to Connect a Decoraport LED Mirror: A Comprehensive Guide
Decoraport LED mirrors offer a blend of functionality and aesthetics, enhancing bathroom spaces with their integrated lighting and sleek designs. Correctly connecting a Decoraport LED mirror is crucial not only for its proper operation but also for ensuring safety and longevity. This article provides a comprehensive guide to connecting a Decoraport LED mirror, covering essential preparations, step-by-step instructions, and troubleshooting tips.
Preparation is Key: Gathering Tools and Understanding Wiring
Before initiating the installation process, meticulous preparation is essential. This involves gathering the necessary tools and thoroughly understanding the relevant electrical wiring. Rushing into the installation without proper preparation can lead to complications and potentially hazardous situations.
The first step is to assemble the required tools. This typically includes a voltage tester, wire strippers, wire connectors (such as wire nuts or Wago connectors), a screwdriver set (including Phillips and flathead screwdrivers), electrical tape, a drill (if mounting hardware needs to be installed), a level, a measuring tape, and safety glasses. Having all these tools readily available streamlines the installation process and minimizes interruptions.
Understanding the wiring is equally important. Typically, the mirror will have three wires: a live wire (usually black), a neutral wire (usually white), and a ground wire (usually green or bare copper). These wires will need to be connected to corresponding wires from the electrical circuit in the wall. It is crucial to identify these wires correctly using a voltage tester to ensure accurate connections and prevent electrical shock.
Always prioritize safety by turning off the power to the circuit at the breaker box before beginning any electrical work. Confirm that the power is off using the voltage tester on the wires in the wall. This step is non-negotiable and significantly reduces the risk of electrical hazards.
Furthermore, it is advisable to consult the Decoraport LED mirror’s user manual. The manual provides specific instructions and diagrams relevant to the particular model, which can be invaluable during the installation process. Ignoring the manufacturer's instructions could lead to improper installation and void the warranty.
Step-by-Step Installation: Connecting the Wires and Mounting the Mirror
The installation process involves several key steps, beginning with connecting the wires, followed by testing the connection, and finally, mounting the mirror securely to the wall. Each step requires careful attention to detail to ensure a safe and functional installation.
After confirming that the power is off, the next step is to connect the wires. Using wire strippers, carefully remove a small amount of insulation from the ends of the wires from both the mirror and the wall. Avoid stripping too much insulation, as this can expose excessive wire and potentially cause a short circuit. Conversely, stripping too little insulation can result in a poor connection.
Connect the live wire (black) from the mirror to the live wire from the wall, the neutral wire (white) from the mirror to the neutral wire from the wall, and the ground wire (green or bare copper) from the mirror to the ground wire from the wall. Use wire connectors (wire nuts or Wago connectors) to securely join the wires. Twist the wires together firmly and then screw on the wire connector, ensuring a tight and secure connection. If using Wago connectors, simply insert the stripped ends of the wires into the designated slots.
After connecting the wires, wrap each connection with electrical tape to provide an additional layer of insulation and security. This helps to prevent accidental contact between the wires and reduces the risk of electrical hazards. The electrical tape should be applied tightly and neatly around the wire connectors.
Before mounting the mirror, it is essential to test the connection. Turn the power back on at the breaker box and carefully check if the LED lights on the mirror are functioning correctly. If the lights do not turn on, immediately turn the power off again and re-examine the wiring connections. Ensure that all wires are securely connected and that there are no loose strands of wire.
Once the connection is verified, turn the power off again at the breaker box. Now, proceed with mounting the mirror to the wall according to the manufacturer's instructions. Typically, this involves using mounting brackets or screws provided with the mirror. Use a level to ensure that the mirror is mounted straight and securely. Mark the desired location on the wall and drill pilot holes if necessary. Install the mounting hardware and carefully hang the mirror onto the brackets or screws.
Ensure that the mirror is firmly attached to the wall and that there is no risk of it falling. Double-check the stability of the mounting by gently pushing and pulling on the mirror. Once satisfied with the stability, the installation process is complete.
Troubleshooting Common Issues: Addressing Problems and Seeking Professional Help
Even with careful preparation and execution, issues can sometimes arise during the installation process. Understanding common problems and knowing how to address them is crucial for a successful installation. In some cases, seeking professional help may be necessary.
One common issue is the LED lights not turning on after the installation. This could be due to several reasons, including a loose wire connection, a blown fuse, or a faulty LED driver. First, double-check all wire connections to ensure they are secure. If the connections appear to be in order, check the circuit breaker to see if it has tripped. If the breaker has tripped, reset it. If the problem persists, the LED driver might be faulty, requiring replacement.
Another potential problem is flickering lights. This could be caused by voltage fluctuations, a loose wire connection, or a faulty LED driver. Check the voltage supply to the circuit and ensure it is stable. Inspect the wire connections for any looseness and tighten them as needed. If the flickering continues, consider replacing the LED driver.
In some cases, the mirror may not sit flush against the wall after installation. This could be due to uneven wall surfaces or improperly installed mounting hardware. Use shims to compensate for uneven wall surfaces and ensure that the mounting hardware is securely attached to the wall studs. Double-check that the mirror is properly aligned with the mounting brackets or screws.
If encountering difficulties that are beyond one's expertise or comfort level, it is always advisable to seek professional help from a qualified electrician. Electrical work can be dangerous, and improper installation can lead to serious consequences. A professional electrician has the knowledge, skills, and tools to safely and correctly install the Decoraport LED mirror, ensuring its proper functioning and longevity.
Furthermore, it is important to consult the Decoraport warranty information. If the mirror is still under warranty, attempting to repair it oneself may void the warranty. Contact Decoraport customer service for assistance or to arrange for a qualified technician to perform the installation or repairs.
By following these instructions and taking appropriate precautions, installing a Decoraport LED mirror can be a straightforward process that enhances the aesthetic appeal and functionality of the bathroom. Always prioritize safety and consult with a professional when necessary.
Proper disposal of any packaging and old mirrors is environmentally responsible. Check local regulations for proper disposal methods for electronic components and glass materials.
Regular cleaning and maintenance will ensure that the Decoraport LED mirror continues to function optimally and maintain its aesthetic appeal for years to come. Use a soft, damp cloth to wipe the surface of the mirror regularly, avoiding harsh chemicals or abrasive cleaners that can damage the finish.

Decoraport W60b1nwd Led Mirror User Manual

Decoraport 55 X 36 Inch Led Bathroom Mirror With Touch On Anti Fog Dimmable Bluetooth Speakers Vertical Horizontal Mount D322 5536a

Decoraport 55 X 36 Inch Led Bathroom Mirror With Touch On Anti Fog Dimmable Bluetooth Speakers Vertical Horizontal Mount D121 5536a

Decoraport 48 X 36 Inch Led Bathroom Mirror With Touch On Anti Fog Dimmable Bluetooth Speakers Vertical Horizontal Mount D222 4836a Usa

Decoraport 60 X 36 Inch Led Bathroom Mirror With Touch On Anti Fog Dimmable Bluetooth Speakers Vertical Horizontal Mount D321 6036a Usa

Decoraport 24 X 32 In Led Bathroom Mirror With Touch On Dimmable Vertical Horizontal Mount Ck160 2432

Decoraport 40 X 24 Inch Led Bathroom Mirror With Touch On Anti Fog Dimmable Vertical Horizontal Mount D211 4024 Usa

Decoraport W60b1nwd Led Mirror User Manual

Decoraport 36 X Inch Led Bathroom Mirror W Touch On Anti Fog Com

Decoraport 55 X 36 Inch Led Bathroom Mirror With Touch On Anti Fog Dimmable Vertical Horizontal Mount D205 5536 Usa