How To Decorate a Vintage Mirror Frame
Vintage mirror frames possess an inherent charm and character that can elevate the aesthetic of any space. These frames, often imbued with intricate details, aged patinas, and a sense of history, offer a unique canvas for creative embellishment. Decorating a vintage mirror frame is a rewarding endeavor that allows one to personalize an existing piece, integrate it seamlessly into a specific interior design scheme, or breathe new life into a forgotten treasure. The following details various approaches and techniques for enhancing a vintage mirror frame, ensuring a result that complements both the frame's original beauty and the surrounding environment.
Before embarking on any decorative project, a thorough assessment of the vintage mirror frame is crucial. This involves evaluating its structural integrity, identifying any existing damage (such as cracks, chips, or loose joints), and determining the type of material from which the frame is constructed. The material composition (wood, metal, plaster, etc.) will dictate the appropriate cleaning methods and decorative materials to utilize. Furthermore, an understanding of the frame's existing finish (varnish, paint, gilding) is essential for selecting compatible decorative elements and avoiding incompatibility issues that could compromise the frame's integrity or appearance.
Once the assessment is complete, proper cleaning and preparation are paramount. Dust, grime, and accumulated debris can obscure the frame's details and impede the adhesion of decorative materials. A gentle cleaning solution, appropriate for the frame's material and finish, should be applied with a soft cloth or brush. For delicate finishes like gilding, a dry brush or specialized gilding cleaning products are recommended to prevent damage. Any loose or flaking finish should be carefully removed, and minor repairs to cracks or chips can be addressed using wood filler or other suitable repair compounds. A light sanding may be necessary to create a smooth surface for subsequent decorative applications.
Key Point 1: Enhancing with Paint and Finishes
Paint remains a classic and versatile option for decorating a vintage mirror frame. Selecting the right type of paint is critical. Acrylic paints are generally a good choice due to their durability, water-based composition (making them easy to clean up), and wide range of colors and finishes. Oil-based paints offer exceptional durability and a rich, glossy finish, but they require more specialized cleaning solvents and longer drying times. Chalk paint is also popular for its matte finish and ability to be easily distressed, lending a rustic or farmhouse-chic aesthetic.
The application technique is equally important. Multiple thin coats of paint are generally preferable to a single thick coat, as this minimizes the risk of drips, runs, and uneven coverage. A brush, roller, or spray gun can be used, depending on the desired finish and the complexity of the frame's details. For frames with intricate carvings or moldings, a brush is often the best option for reaching those hard-to-access areas. Spray painting can provide a smooth, even finish, but requires careful masking to protect the mirror itself and the surrounding workspace.
Beyond a simple coat of paint, various decorative painting techniques can be employed to enhance the vintage character of the frame. Distressing, for example, involves selectively removing paint to reveal the underlying layers, creating an aged and worn look. This can be achieved with sandpaper, steel wool, or specialized distressing tools. Dry brushing, another technique, involves applying a small amount of paint to a dry brush and lightly brushing it across the frame's surface, highlighting the raised areas and creating a textured effect. Glazing, applying a translucent colored coating, is a technique that enhances the carved details.
Key Point 2: Incorporating Embellishments and Decorative Elements
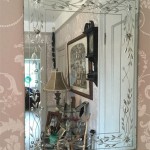
Beyond paint, a wide array of embellishments can be used to adorn a vintage mirror frame. These can range from natural elements like seashells and pebbles to manufactured items like beads, rhinestones, and metal accents. The selection of embellishments should be guided by the desired aesthetic and the overall design scheme of the space. For instance, seashells might be appropriate for a coastal-themed bathroom, while rhinestones and beads could add a touch of glamour to a vanity mirror.
Adhesive selection is paramount when attaching embellishments. A strong and reliable adhesive is necessary to ensure that the embellishments remain securely in place over time. Epoxy resins, super glues, and specialized craft glues are all viable options, depending on the size and weight of the embellishments and the material of the frame. It is essential to follow the manufacturer's instructions carefully when using any adhesive, and to allow ample drying time before handling the decorated frame. Hot glue is a less ideal adhesive for heavier items as it can be prone to failure over time, particularly in high heat or humidity environments.
The arrangement of embellishments is also a crucial consideration. A balanced and harmonious composition is generally more visually appealing than a haphazard or cluttered arrangement. Consider the symmetry of the frame and the spacing between embellishments. Experiment with different layouts and configurations before permanently attaching anything. Patterns, such as repeating motifs or geometric designs, can add visual interest and sophistication. Alternatively, a more organic and asymmetrical arrangement can create a more natural and free-flowing aesthetic. Consider attaching small lightweight elements with glue, and using small nails or screws for larger, heavier, or more ornate items like metal corner pieces or appliques.
Key Point 3: Integrating Mixed Media and Unique Textures
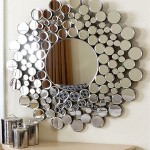
The integration of mixed media and unique textures can add depth and visual interest to a vintage mirror frame. This involves combining different materials and techniques to create a multi-dimensional and tactile surface. For example, fabric scraps, lace, and ribbons can be incorporated to add a soft and feminine touch. Decoupage, the art of adhering paper cutouts to a surface and sealing them with varnish, can be used to create intricate and personalized collages. Mosaic tiles, either glass or ceramic, can add a vibrant and textured element.
Textural elements can be incorporated in various ways. Faux finishes, such as crackle paint or textured plaster, can mimic the look of aged or weathered surfaces. Sand, pebbles, and other granular materials can be adhered to the frame to create a rustic or beachy aesthetic. Natural fibers, such as jute, twine, or burlap, can be wrapped around the frame to add a touch of rustic charm. Using joint compound to create a raised, textured surface, then painting over it, is another option that makes the mirror frame a unique piece of art.
When working with mixed media, it is important to consider the overall color palette and the compatibility of the different materials. A cohesive color scheme will help to unify the different elements and create a harmonious composition. Different materials may require different adhesives or application techniques. For example, fabric scraps may be best adhered with fabric glue, while mosaic tiles may require tile adhesive or grout. Experimentation and careful planning are key to achieving a successful and visually appealing mixed media decoration.
Ensuring the longevity of the decorated vintage mirror frame requires careful attention to detail. A protective sealant or varnish should be applied to the finished piece to protect the paint, embellishments, and other decorative elements from damage. This will also help to prevent fading, chipping, and other forms of wear and tear. The type of sealant should be appropriate for the materials used and the desired finish (matte, satin, or gloss). Several thin coats of sealant are generally preferable to a single thick coat.
Proper maintenance is also essential for preserving the beauty of the decorated frame. Regular dusting with a soft cloth will help to prevent the accumulation of dirt and grime. Avoid using harsh chemicals or abrasive cleaners, as these can damage the finish or the embellishments. For delicate finishes, such as gilding or faux finishes, specialized cleaning products may be required. If the frame is exposed to direct sunlight, consider using a UV-protective sealant to prevent fading. By following these guidelines, one can ensure that the decorated vintage mirror frame remains a cherished and beautiful addition to the home for years to come.
:max_bytes(150000):strip_icc()/alahome1-a879d69e31be4a9a9ae522028c12926d.jpg?strip=all "26 Diy Mirror Frame Ideas To Inspire Your Next Project")
26 Diy Mirror Frame Ideas To Inspire Your Next Project

Painting A Mirror Frame Easy Yet Stunning Ideas Girl In The Garage

Painting A Mirror Frame Easy Yet Stunning Ideas Girl In The Garage

From Drab To Fab In 10 Minutes Vintage Mirror Frame Makeover Zle Design

Painting A Mirror Frame Easy Yet Stunning Ideas Girl In The Garage

Ideas For Decorating With Antique Frames Sweet Pea

Painting A Mirror Frame Easy Yet Stunning Ideas Girl In The Garage

Diy Repurposed Mirror Frame With Vintage Tin Lora Bloomquist Create Ponder

Painting A Mirror Frame Easy Yet Stunning Ideas Girl In The Garage

Vintage Flea Market Decorating Decor Diy Make An Embellished Frame With Mirror Frames