How To Frame A Bathroom Medicine Cabinet Mirror
Framing a bathroom medicine cabinet mirror elevates the aesthetic of the entire bathroom. This seemingly small upgrade offers a significant visual impact, adding a touch of elegance and custom design. This article outlines the process of framing a medicine cabinet mirror, offering detailed steps and material considerations.
Assessing the Existing Medicine Cabinet
Before beginning the framing process, careful assessment of the existing medicine cabinet is crucial. This assessment informs material choices and ensures the frame integrates seamlessly with the cabinet and the overall bathroom design.
Key Points:
- Measure the medicine cabinet's dimensions precisely.
- Note the cabinet's depth and the existing mirror's inset.
- Consider the cabinet's material (wood, metal, etc.) and its finish.
- Evaluate the bathroom's existing décor and color scheme to choose a complementary frame style.
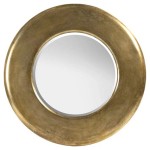
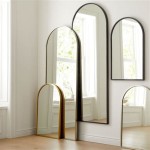
Selecting the Frame Material
The choice of framing material impacts the frame's durability, appearance, and installation process. Various materials, each with unique characteristics, are suitable for framing a bathroom mirror.
Key Points:
- Wood: Offers a classic look, can be stained or painted, and is relatively easy to work with.
- MDF (Medium-Density Fiberboard): A cost-effective and versatile option that can be painted or finished to resemble wood.
- PVC (Polyvinyl Chloride): A water-resistant and durable choice, particularly suitable for humid bathroom environments.
- Metal: Provides a sleek, modern look; aluminum or stainless steel are recommended for their resistance to corrosion.
Taking Accurate Measurements
Precision in measurement is paramount for creating a well-fitting frame. Inaccurate measurements can lead to gaps or overlaps, compromising the finished appearance.
Key Points:
- Measure the outer dimensions of the mirror precisely.
- Double-check all measurements to ensure accuracy.
- Account for the desired frame width when calculating the final dimensions of the frame pieces.
Cutting and Assembling the Frame
The frame pieces need to be cut precisely and assembled securely to create a stable and aesthetically pleasing frame.
Key Points:
- Use a miter saw or a miter box and saw to cut the frame pieces at 45-degree angles for clean, professional-looking corners.
- Apply wood glue to the mitered edges and clamp the pieces together until the glue dries.
- Reinforce the joints with brad nails or finishing nails for added stability.
- Fill any nail holes with wood filler and sand smooth for a seamless finish.
Finishing the Frame
The finishing process protects the frame and enhances its appearance, integrating it seamlessly with the bathroom decor.
Key Points:
- Apply a primer to the frame to prepare the surface for paint or stain.
- Paint or stain the frame according to the desired aesthetic, applying multiple coats if necessary.
- Seal the frame with a protective sealant, particularly important in a humid bathroom environment. Choose a sealant appropriate for the chosen frame material and finish.
Attaching the Frame to the Medicine Cabinet
Careful attachment of the frame ensures a secure and lasting installation.
Key Points:
- Apply a strong adhesive suitable for both the frame material and the medicine cabinet material to the back of the frame.
- Carefully position the frame over the mirror, ensuring it is centered and aligned with the edges of the cabinet.
- Apply firm and even pressure to the frame to ensure a strong bond with the cabinet.
- Use painter's tape to secure the frame in place while the adhesive dries completely.
Considerations for Different Cabinet Types
Different types of medicine cabinets might require slight modifications to the framing process.
Key Points:
- Surface-mounted cabinets: Framing is generally straightforward, with the frame attaching directly to the cabinet face.
- Recessed cabinets: The frame needs to account for the inset of the mirror and the surrounding wall material.
- Cabinets with unusual shapes or features: Adjustments to the frame design and cutting process may be necessary.
Choosing the Right Adhesive
Selecting the correct adhesive is essential for a secure and lasting bond between the frame and the medicine cabinet.
Key Points:
- Consider the materials of both the frame and the cabinet when selecting an adhesive.
- Choose an adhesive specifically designed for use in bathrooms to ensure it can withstand humidity and temperature fluctuations.
- Test the adhesive on a small, inconspicuous area before applying it to the entire frame to ensure compatibility and adhesion.

Diy Mirrored Medicine Cabinet Frame Little Red Window

Diy Mirrored Medicine Cabinet Frame Little Red Window

Diy Medicine Cabinet At Home With Ashley

Beautify Your Medicine Cabinet In 5 Simple Steps Homejelly

Frame Update To Medicine Cabinet Atop Serenity Hill

Medicine Cabinet Frame Update Atop Serenity Hill

Mirror Medicine Cabinet Amazing Ideas For Your Bathroom

24 In W X 30 H Small Black Metal Frame Wall Mount Or Recessed Bathroom Medicine Cabinet With Mirror Mediccabin5 The Home Depot

How To Remove A Medicine Cabinet Kay S Place

Champagne Silver Beaded Framed Medicine Cabinet Wall Mirror Headwestmirror Com