How to Frame a Wall Mirror
A wall mirror can instantly add dimension, light, and style to any room. Choosing the right frame can make a world of difference in how a mirror looks and complements its surroundings. Whether you're working with a vintage find or a brand new mirror, framing it properly can be a rewarding undertaking. This guide will walk you through the essential steps and considerations for framing a wall mirror, equipping you with the knowledge to achieve a beautiful and professional-looking result.
1. Assessing the Mirror and Choosing the Right Frame
Before you begin framing, it's crucial to carefully assess the mirror itself. Consider its size, shape, style, and overall aesthetic. This will help guide your frame selection process.
Here are some important factors to consider:
- Mirror Size and Shape: A small mirror might look overwhelmed by a large, ornate frame, while a large mirror can disappear into an overly simplistic or narrow frame. Balance matters here. Consider the proportions of the mirror and the space it will occupy.
- Mirror Style: The style of the mirror should influence your frame choice. A vintage mirror might pair well with an antique-inspired frame, while a modern mirror might benefit from a minimalist, sleek frame.
- Room Theme: The theme of the room where the mirror will be hung is essential. Consider the overall color scheme, furniture style, and architectural details of the room to ensure the frame complements the existing decor.
Once you have a good understanding of the mirror and its intended location, you're ready to start exploring framing options. There are countless frame styles available, each with its own unique appeal. Here are a few examples:
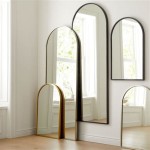
- Wood Frames: Wood frames are a classic choice, offering a wide range of finishes, styles, and price points. From rustic to modern, the choices are vast.
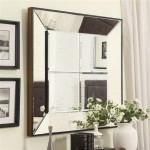
- Metal Frames: Metal frames can add a contemporary touch, and they come in various styles, including sleek, industrial, or even ornate wrought iron designs.
- Picture Molding: Picture molding is a versatile and cost-effective option, offering a wide variety of profiles, from simple to intricate.
- Custom Frames: For a unique and personalized touch, consider having a custom frame made for your mirror. This allows for precise dimensions and unique design elements.
2. Preparing the Mirror and Material
Once you've selected your frame, it's time to get ready for the framing process itself. This involves preparing the mirror and gathering the necessary materials.
Here are the steps for prepping the mirror:
- Clean the Mirror: Thoroughly clean the mirror to remove any dust, debris, or fingerprints. Use a gentle glass cleaner and a soft cloth to ensure a pristine surface before applying the frame.
- Remove Existing Framing (if applicable): If your mirror is already framed, carefully remove the existing frame using a flathead screwdriver or a putty knife. Be mindful of the adhesive or clips used to secure the previous frame.
- Protect the Mirror: Cover the surface of the mirror with a sheet of craft paper or a thin cloth to protect it from scratches or damage during the framing process.
Next, gather the necessary materials for framing. This may include:
- Frame: You've already selected your frame, ensuring it's the right size for your mirror. Make sure it's in good condition and free of any cracks or warping.
- Adhesive: Depending on your framing method, you might need adhesives such as framing glue, double-sided tape, or picture hanging strips. Choose adhesives appropriate for your frame material.
- Mirror Clips: Some frames come equipped with clips designed specifically for holding mirrors. These clips can provide a secure and invisible attachment point.
- Tools: You'll need a screwdriver or Phillips head screwdriver, a tape measure, a pencil, and a level for precise measurements and placement.
3. Framing the Mirror: Step-by-Step Guide
Now, you're ready to frame your mirror. The following steps will guide you through the process:
- Measure and Mark: Use a tape measure to accurately determine the dimensions of your mirror. Transfer these measurements to the frame, marking the precise locations where the mirror will be placed.
- Apply Adhesive: If using adhesive, apply a bead of framing glue or double-sided tape along the inside edges of the frame, following the markings you made. Make sure the adhesive is evenly distributed.
- Position the Mirror: Carefully place the mirror onto the adhesive, ensuring it's centered within the frame and aligned with the markings. Press gently to secure the mirror in place.
- Secure with Clips (if necessary): If your frame includes clips, attach them to the back of the frame, positioning them to secure the mirror in place. Use a screwdriver to tighten the clips.
- Clean Up: Once the mirror is secure, wipe away any excess adhesive or glue residue with a damp cloth. Allow the adhesive to dry completely before handling or hanging the mirror.
Remember to be patient and meticulous during this process. Take your time to ensure a clean and professional result.

How To Frame A Mirror

How To Frame Out That Builder Basic Bathroom Mirror For 20 Or Less
:max_bytes(150000):strip_icc()/kaylasimonehome-905941da7dd04a08af07c415df2a1fd8.jpeg?strip=all "20 Diy Mirror Frame Ideas To Inspire Your Next Project")
20 Diy Mirror Frame Ideas To Inspire Your Next Project

How To Add A Wood Frame Large Wall Mirror For Under 20 Dream Design Diy

Diy Wood Mirror Frame For Bathroom Vanity Tidbits

How To Frame A Mirror

Shiplap Reclaimed Styled Wood Framed Mirror 20 Stain Colors

Deep Frame Metal Rectangle Wall Mirror 24 W X 36 H West Elm

Farmhouse Framed Wall Mirror Custom Sizes 20 Stain Colors

Woodford White Framed Wall Mirror Rectangular Vanity Multiple Sizes