```html
How To Hang A Heavy Mirror With Adhesive
Hanging a heavy mirror can be a daunting task. Traditional methods involving nails and screws often leave unsightly holes and can compromise the integrity of the wall, especially in older homes or those with plaster walls. Utilizing heavy-duty adhesive offers an alternative approach, providing a secure and less intrusive method for mounting substantial mirrors. This article will detail the process of hanging a heavy mirror with adhesive, ensuring a stable and aesthetically pleasing result.
Assessing the Mirror and Wall
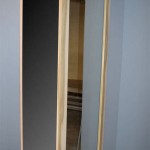
Before commencing any installation, a thorough assessment of both the mirror and the wall is crucial. The weight of the mirror is the primary factor determining the type and quantity of adhesive needed. Mirrors exceeding a certain weight threshold may require additional support, even when using high-strength adhesives. Manufacturers often provide weight ratings for their mirrors, and this information should be consulted. If the weight is unknown, it can be estimated based on the mirror's dimensions and thickness. As a general guideline, mirrors thicker than ¼ inch are considered heavy and require robust adhesive solutions coupled with potentially additional mechanical support.
The wall's composition is equally important. Smooth, non-porous surfaces like painted drywall, tile, or metal provide the best adhesion. Porous surfaces, such as bare drywall, textured walls, or wallpaper, require more preparation or may not be suitable for solely adhesive-based mounting. Applying adhesive to porous surfaces directly can lead to failure, as the adhesive may absorb into the material instead of forming a strong bond. The wall should also be structurally sound, capable of bearing the mirror's weight without crumbling or flexing. Examining the wall for pre-existing damage, such as cracks or loose plaster, is essential. These issues need to be addressed before proceeding, as they can compromise the adhesive bond.
Furthermore, the wall should be clean and free of any dust, grease, or debris. These contaminants can interfere with the adhesive's ability to bond properly. A thorough cleaning with a mild detergent and water, followed by a rinsing and drying process, is recommended. For greasy surfaces, a degreasing agent may be necessary.
Selecting the Appropriate Adhesive and Tools
Choosing the right adhesive is paramount for a successful and secure installation. Not all adhesives are created equal; selecting a product specifically designed for heavy objects and mirror applications is critical. Construction adhesives labeled as "heavy-duty" or "mirror adhesive" are generally suitable options. These adhesives are formulated to provide a strong, permanent bond and are resistant to moisture and temperature fluctuations.
A key consideration is the adhesive's weight-bearing capacity. The manufacturer's specifications will indicate the maximum weight per square inch or linear foot that the adhesive can support. This rating should be compared to the mirror's weight to ensure an adequate safety margin. It is often preferable to overestimate the amount of adhesive needed, erring on the side of caution to ensure a robust bond.
In addition to the adhesive, several other tools are required:
- A caulking gun: This is necessary for dispensing the adhesive from its tube. A high-quality caulking gun provides better control and reduces hand fatigue.
- A level: Ensures the mirror is hung straight. A bubble level or a laser level can be used.
- A measuring tape: For accurate placement of the mirror.
- A pencil: For marking the desired location on the wall.
- Painter's tape: Used to temporarily secure the mirror in place while the adhesive cures.
- A cleaning cloth: For wiping away excess adhesive.
- Safety glasses and gloves: To protect eyes and hands during the installation process.
- A support system (optional): Especially for heavier mirrors, providing temporary support while the adhesive cures is recommended. This can be achieved with wooden shims, temporary cleats, or commercially available mirror hanging kits.
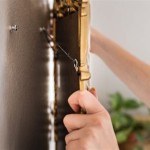
Applying the Adhesive and Hanging the Mirror
With the wall prepared and the necessary tools and adhesive gathered, the installation process can begin. Precise marking of the desired mirror location on the wall is the first step. Using a measuring tape and level, mark the top and bottom edges of the mirror's intended position with a pencil. This will serve as a guide during placement.
Next, apply the adhesive to the back of the mirror. It's generally recommended to apply the adhesive in vertical beads, spaced several inches apart. The beads should run the length of the mirror, ensuring even distribution of weight. Avoid applying adhesive too close to the edge of the mirror, as it can squeeze out and become visible after installation. The amount of adhesive applied should correspond to the mirror's weight and the adhesive's weight-bearing capacity. Refer to the manufacturer’s specifications for precise recommendations.
After applying the adhesive, carefully lift the mirror and align it with the marked location on the wall. Gently press the mirror against the wall, ensuring even contact across the entire surface. Avoid excessive force, which can damage the mirror or the wall. Once the mirror is in place, use a level to make any necessary adjustments.
Immediately after positioning the mirror, secure it with painter's tape. Apply strips of tape across the mirror's surface, adhering them to the wall above and below. The tape will provide temporary support while the adhesive cures. For heavier mirrors, additional support, such as wooden shims placed beneath the mirror, may be necessary. These supports will help prevent the mirror from sliding downwards during the curing process.
The adhesive's curing time varies depending on the product. Refer to the manufacturer's instructions for the recommended curing period, which can range from 24 to 72 hours. During this time, avoid disturbing the mirror or removing the tape and supports prematurely. Patience is essential for ensuring a strong and lasting bond.
Once the adhesive has fully cured, carefully remove the painter's tape and any temporary supports. Inspect the mirror to ensure it is securely attached to the wall. If any gaps or imperfections are visible, they can be filled with a paintable caulk. Finally, clean the mirror's surface with a glass cleaner to remove any smudges or fingerprints.
```
Using Command Strips For Hanging A Mirror The Morris Mansion

How To Hang A Heavy Mirror On Drywall Without Damaging It Or The Wall Quora

How To Hang Heavy Mirrors Frames Without Nails 3m

How To Glue A Heavy Mirror The Wall Mom Blog Society

3 Simple Ways To Hang A Mirror On Wall Without Nails Wikihow

How To Hang A Heavy Mirror The Home Depot

How To Hang A Large Or Heavy Mirror

How To Hang A Heavy Mirror Lowe S

How To Hang A Heavy Mirror In 5 Simple Steps

How To Hang A Frameless Mirror On The Wall With Pictures