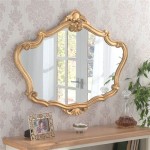
How to Hang a Mirror Flat Against the Wall
Hanging a mirror securely and flush against the wall can enhance any room's aesthetic. Whether it's a small vanity mirror or a large statement piece, proper installation is crucial for both safety and visual appeal. This guide provides a comprehensive approach to ensure successful mirror hanging.
Assessing the Mirror and Wall
Before beginning the hanging process, careful assessment of both the mirror and the wall is essential. This preliminary step helps prevent issues later and ensures a secure and aesthetically pleasing result.
- Mirror Weight: Determine the mirror's weight. This information dictates the appropriate hanging hardware and ensures the chosen method can support the load safely.
- Wall Type: Identify the wall material (drywall, plaster, concrete, etc.). Different wall types require different fasteners and installation techniques.
- Mirror Backing: Examine the mirror's backing. Some mirrors come with pre-installed hanging hardware like D-rings or wire, while others have a smooth back requiring additional hardware.
- Location Considerations: Consider the surrounding environment. Avoid placing heavy mirrors above beds or in areas prone to high traffic or vibrations.
Choosing the Right Hanging Hardware
Selecting the appropriate hanging hardware is crucial for stability and safety. The choice depends heavily on the mirror's weight and the wall type. Using inadequate hardware can lead to the mirror falling, causing damage and potential injury.
- D-Rings and Wall Hooks: For heavier mirrors, D-rings attached to the back of the mirror combined with heavy-duty wall hooks offer a robust solution.
- Wire and Picture Hangers: Lighter mirrors can be hung using wire strung across the back and secured with picture hangers. Ensure the wire is rated for the mirror's weight.
- Adhesive Hooks: For very lightweight mirrors on smooth surfaces, specialized adhesive hooks can be used. However, these are not recommended for larger or heavier mirrors.
- French Cleats: These interlocking wooden or metal brackets provide a strong and secure hanging method, especially suitable for heavy mirrors, distributing the weight evenly.
Marking and Measuring for Placement
Accurate measurements and careful marking are paramount for ensuring the mirror hangs level and in the desired location. Precision in this stage prevents crooked hanging and the need for readjustments.
- Desired Height: Determine the ideal center height for the mirror. A general guideline is to position the mirror's center at eye level.
- Marking the Wall: Use a pencil and level to mark the desired top and bottom edges of the mirror on the wall. Double-check measurements for accuracy.
- Locating Studs: If using heavy-duty hardware, locate wall studs using a stud finder for added stability. Mark their positions for reference.
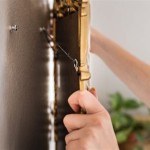
Installing the Hanging Hardware on the Wall
Once the wall is marked, the appropriate hardware can be installed. Following manufacturer’s instructions is crucial during this process for optimal performance and safety.
- Drilling Pilot Holes: When using screws, drill pilot holes slightly smaller than the screw diameter to prevent wall damage and ensure secure fastening.
- Inserting Wall Anchors: For walls without studs or when using lighter fasteners, wall anchors provide additional support and prevent the hardware from pulling out.
- Attaching Hooks or Cleats: Securely attach the chosen wall hardware, ensuring it is level and aligned with the previously marked positions.
Attaching Hardware to the Mirror (if necessary)
If the mirror doesn't have pre-installed hanging hardware, this step involves attaching D-rings, wire, or cleats to the back of the mirror. Proper placement and secure attachment are crucial for balanced hanging.
- D-Ring Placement: Position D-rings equidistant from the top edge and sides of the mirror, ensuring they are securely fastened.
- Wire Attachment: When using wire, create a taut loop that will hang securely from the picture hangers. Ensure the wire is rated for the mirror's weight.
- Cleat Attachment: If using a French cleat system, attach the corresponding cleat piece securely to the back of the mirror, aligning it with the wall-mounted cleat.
Hanging the Mirror and Making Adjustments
With the wall hardware and mirror hardware in place, the mirror can be carefully hung. Final adjustments ensure the mirror sits flush and level against the wall.
- Careful Positioning: Carefully lift the mirror and engage the hanging hardware. For D-rings, hook them onto the wall hooks. For wire, place the wire loop over the picture hangers. For French cleats, slide the mirror cleat onto the wall cleat.
- Leveling and Adjustment: Use a level to check that the mirror is hanging straight. Adjust the positioning as needed until the mirror is perfectly aligned.
- Security Check: Gently push on the mirror in various places to ensure it is securely mounted. If any movement or instability is detected, re-evaluate the hardware and installation.

How To Hang A Frameless Mirror On The Wall With Pictures

How To Hang A Frameless Mirror On The Wall With Pictures

How To Hang A Frameless Mirror On The Wall With Pictures

How To Install A Mirror Without Frame Merrypad

How To Hang A 100 Pound Mirror On Drywall Quora

How To Hang A Wall Mirror Easy Mounting Instructions

How To Hang A Heavy Mirror The Home Depot

How To Hang A Bathroom Mirror Flat Against The Wall Dengarden

How To Hang A Bathroom Mirror Flat Against The Wall Dengarden

Over The Door Hanging Mirrors A Comprehensive Guide