How To Hang a Gym Mirror On a Wall
Hanging a gym mirror on a wall is a project that requires careful planning, the right tools, and a methodical approach. A large mirror, particularly one intended for a gym setting, is heavy and can pose a safety hazard if not properly secured. This article provides a detailed guide on how to safely and effectively hang a gym mirror, ensuring both aesthetic appeal and structural integrity.
Before initiating the mirror hanging process, it is essential to thoroughly assess the wall’s suitability. Determine if the wall is load-bearing and identify the locations of wall studs. Failing to properly assess the wall can result in damage to the wall, the mirror, and potentially cause injury. Furthermore, gather all necessary tools and materials beforehand to streamline the installation process.
Key Point 1: Preparing the Wall and Gathering Materials
The first crucial step involves preparing the wall to receive the mirror. This includes locating wall studs, which are the vertical framing members within the wall that provide structural support. Studs are typically spaced 16 or 24 inches apart on center. A stud finder is an indispensable tool for accurately locating these studs. Electronic stud finders utilize sensors to detect changes in density behind the wall surface, while magnetic stud finders are attracted to the nails or screws used to secure the drywall to the studs.
Once the studs are located, mark their positions clearly on the wall with a pencil. Use a level to ensure that the marks are vertically aligned. These marks will serve as the anchoring points for the mirror mounting hardware. If the desired mirror location necessitates attaching to studs that are not perfectly aligned with the mirror's intended position, consider using a ledger board to provide a stable, level surface spanning multiple studs.
In addition to assessing the wall structure, it is equally important to gather all the necessary materials and tools. The following items are typically required:
- Gym mirror (consider the weight and dimensions)
- Stud finder
- Level (at least 4 feet long)
- Measuring tape
- Pencil
- Drill with appropriate drill bits (for pilot holes and anchor installation)
- Screws (long enough to penetrate the wall studs securely)
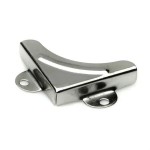
- Mirror mounting clips or J-channels
- Construction adhesive (mirror-safe adhesive is critical to prevent damage to the mirror's backing)
- Safety glasses
- Gloves
- Helper (due to the weight of the mirror)
- Clean cloths
The selection of mirror mounting clips or J-channels will depend on the mirror's size and weight, as well as personal preference. Consider using a combination of both for added security, with J-channels supporting the bottom edge and clips securing the top. The screws used should be long enough to penetrate at least 1.5 inches into the wall studs to ensure a secure hold. Always prioritize safety and wear safety glasses and gloves throughout the installation process.
Key Point 2: Installing Mounting Hardware
After preparing the wall and gathering the necessary materials, the next step involves installing the mounting hardware. This process requires precision and attention to detail to ensure the mirror is properly supported and level.
If using J-channels, begin by positioning the bottom J-channel along the marked stud locations. Use a level to ensure the J-channel is perfectly horizontal before securing it to the wall with screws. Pre-drilling pilot holes is often recommended to prevent the wood from splitting, especially when working with hardwoods or potentially fragile wall studs. The J-channel should be securely attached, capable of supporting the mirror's weight without any wobble or flex.
Next, install the mirror mounting clips along the top edge of the mirror. Determine the desired height of the mirror and mark the locations for the clips on the wall, aligning them with the wall studs. Again, use a level to ensure the clips are horizontally aligned. The spacing between the clips should be determined by the mirror's size and weight, but typically, clips are spaced every 16 to 24 inches. Secure the clips to the wall studs using screws, ensuring they are tightly fastened and capable of holding the mirror's weight.
Before proceeding further, double-check the alignment of the J-channel and the mirror mounting clips. Use a level to confirm that both are horizontal and that the distance between the J-channel and the clips is slightly less than the mirror's height. This will allow the mirror to slide into the J-channel and be secured by the clips. If necessary, make adjustments to the positioning of the hardware before continuing.
For added security and to distribute the mirror's weight, apply construction adhesive to the back of the mirror. Use a mirror-safe adhesive to avoid damaging the mirror's reflective coating. Apply the adhesive in vertical beads along the back of the mirror, spacing them evenly apart. Avoid applying adhesive too close to the edges to prevent it from squeezing out when the mirror is pressed against the wall.
Key Point 3: Hanging the Mirror and Final Adjustments
With the mounting hardware installed and the adhesive applied, the final step is to carefully hang the mirror on the wall. This step requires a helper due to the weight and size of most gym mirrors.
Carefully lift the mirror and position the bottom edge into the J-channel. Ensure the mirror is seated securely in the channel. With your helper, gently tilt the mirror upwards until the top edge aligns with the mirror mounting clips. Carefully slide the mirror into the clips, ensuring they engage properly. The mirror should now be supported by both the J-channel and the clips.
Once the mirror is in place, double-check its alignment using a level. Make any necessary adjustments to ensure the mirror is perfectly vertical. The adhesive will provide additional support, but it is crucial to ensure the mirror is properly aligned before the adhesive sets. If any adjustments are needed, carefully loosen the screws securing the mounting clips and reposition the mirror as necessary. Retighten the screws once the mirror is correctly aligned.
After the mirror is hung, inspect the installation carefully. Ensure all screws are securely tightened and that the mirror is firmly in place. There should be no movement or wobble. Wipe away any excess adhesive with a clean cloth. Allow the adhesive to cure completely according to the manufacturer's instructions before using the gym. This may take several hours or even overnight, depending on the type of adhesive used.
Following the adhesive curing period, perform a final inspection to ensure the mirror is securely mounted and properly aligned. Gently push on the mirror in several locations to check for any movement or instability. If any issues are detected, address them immediately. This may involve tightening screws, adding additional mounting hardware, or reapplying adhesive.
Consider installing safety backing to the mirror to prevent shattering in case of accidental impact. This safety backing consists of an adhesive film that is applied to the back of the mirror, holding the shards together if the mirror breaks. This is particularly important in a gym environment where there is an increased risk of accidental damage.
Regularly inspect the mirror and its mounting hardware for any signs of wear or damage. Loose screws, damaged clips, or cracks in the mirror should be addressed promptly to prevent further issues and ensure the safety of gym users. Periodic maintenance will help prolong the life of the mirror and ensure it remains securely mounted.
By following these detailed steps and taking the necessary precautions, hanging a gym mirror on a wall can be accomplished safely and effectively. Proper planning, careful execution, and ongoing maintenance are essential for ensuring the mirror remains a valuable and safe addition to the gym environment.

How To Hang A Gym Mirror With Pictures Wikihow

How To Hang A Gym Mirror With Pictures Wikihow

A Mirror Wall For Your Home Gym Dick S Rancho Glass

How To Hang A Gym Mirror With Pictures Wikihow

How To Hang A Large Wall Mirror Step By Tutorial
Home Gym Mirrors Your Essential Guide Abc Glass Mirror

Exercising At Home Add A Wall Mirror To Your Gym Alderfer Glass
Home Gym Mirrors Your Essential Guide Abc Glass Mirror

Gym Mirror Installation How To Hang Mirrors On A Wall With Glue

How To Hang A Gym Mirror With Pictures Wikihow

