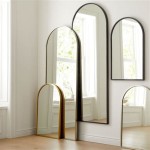
How to Install a Frameless Mirror on the Wall
Installing a frameless mirror can elevate the aesthetic of any room, adding a touch of modern elegance. While the sleek design appears simple, proper installation requires careful planning and execution. This guide provides a comprehensive walkthrough of the process, ensuring a secure and visually appealing result.
Planning and Preparation
Before beginning the installation, meticulous planning is crucial for a successful outcome. This involves assessing the wall, selecting appropriate adhesives, and gathering the necessary tools.
1.
Wall Assessment:
Determine the wall type (drywall, concrete, tile) to select the correct anchors and adhesives. Ensure the wall surface is clean, dry, and free of any debris or loose paint. 2.Mirror Dimensions and Placement:
Accurately measure the mirror's dimensions and carefully plan its placement on the wall. Consider factors such as lighting, surrounding decor, and functionality. Use a pencil and level to mark the desired position on the wall. 3.Adhesive Selection:
Choose an adhesive specifically designed for mirrors and compatible with the wall type. Consider factors such as weight capacity, curing time, and environmental conditions. 4.Tool Gathering:
Assemble the necessary tools, including a level, measuring tape, pencil, safety glasses, gloves, mirror adhesive, caulking gun, and appropriate anchors (if needed).Wall Preparation
Proper wall preparation is essential for ensuring a strong and lasting bond between the mirror and the wall. This stage addresses potential issues such as uneven surfaces and inadequate support.
1.
Surface Cleaning:
Thoroughly clean the wall surface with a suitable cleaner to remove dust, grease, and other contaminants. Allow the surface to dry completely before proceeding. 2.Addressing Imperfections:
For uneven walls, consider using shims to create a level surface for the mirror to adhere to. This prevents stress on the mirror and ensures a flush finish. 3.Anchor Installation (if required):
If the wall material requires anchors, install them according to the manufacturer's instructions. Ensure the anchors are flush with the wall surface.Applying the Adhesive
Applying the adhesive correctly is vital for a secure and long-lasting installation. Follow the manufacturer's instructions carefully for optimal results.
1.
Adhesive Preparation:
Prepare the mirror adhesive according to the manufacturer's instructions. This may involve cutting the tip of the cartridge and inserting it into a caulking gun. 2.Adhesive Application:
Apply the adhesive to the back of the mirror in a pattern recommended by the manufacturer. Common patterns include vertical lines, a grid pattern, or a perimeter bead. Ensure adequate coverage to support the mirror's weight. 3.Avoiding Over-Application:
Avoid applying excessive adhesive, as this can create a mess and make positioning the mirror difficult.Mounting the Mirror
Mounting the mirror requires precision and care to ensure proper alignment and adhesion. Working with a partner can be beneficial for larger or heavier mirrors.
1.
Careful Positioning:
Carefully position the mirror against the wall, aligning it with the marked guidelines. Use a level to ensure the mirror is perfectly straight both vertically and horizontally. 2.Applying Pressure:
Apply firm and even pressure to the mirror's surface, ensuring full contact with the adhesive. Hold the mirror in place for the time recommended by the adhesive manufacturer. 3.Supporting the Mirror:
For larger or heavier mirrors, use temporary supports (such as painter's tape or wooden blocks) to hold the mirror in place while the adhesive cures.Finishing Touches
Once the adhesive has fully cured, the final steps involve cleaning any excess adhesive and ensuring the mirror is securely in place.
1.
Adhesive Removal:
Carefully remove any excess adhesive that may have squeezed out from behind the mirror using a razor blade or other suitable tool. 2.Stability Check:
Gently check the mirror's stability to ensure it is firmly adhered to the wall. Avoid applying excessive force until the adhesive has fully cured. 3.Cleaning:
Clean the mirror surface with a glass cleaner to remove any fingerprints or smudges.Safety Precautions
Safety should always be a priority when working with mirrors and adhesives. Taking appropriate precautions can prevent accidents and ensure a smooth installation process.
1.
Eye Protection:
Wear safety glasses throughout the installation process to protect your eyes from dust, debris, and adhesive. 2.Gloves:
Wear gloves to protect your hands from adhesive and sharp edges. 3.Ventilation:
Ensure adequate ventilation in the work area, especially when working with solvent-based adhesives. 4.Heavy Mirrors:
Enlist assistance when installing large or heavy mirrors to prevent accidents and ensure proper handling.
How To Install A Mirror Without Frame Merrypad

How To Hang A Frameless Mirror On The Wall With Pictures

How To Hang A Frameless Mirror On The Wall With Pictures

How To Install A Mirror Without Frame Merrypad

How To Hang A Frameless Mirror On Wall

Oval Frameless Wall Mirror Installation Fab Glass And

How To Hang A Frameless Mirror On The Wall With Pictures

How To Hang A Frameless Mirror On Wall E Architect
:strip_icc()/DesireeBurnsInteriors1-f76d25cad90041c88fbae4a7dc10aab4.jpg?strip=all "2 Simple Ways To Hang A Frameless Mirror")
2 Simple Ways To Hang A Frameless Mirror

How To Hang A Frameless Mirror June 2024 Your Guide Hanging