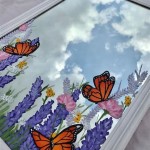
How to Make a Border for a Mirror
A mirror border can transform a simple mirror into a statement piece. It can add a touch of elegance, whimsy, or personality to any space. Whether you're looking to enhance a vintage find, create a custom piece for your home, or simply want to upgrade a plain mirror, crafting a border is a fun and rewarding project. This guide will walk you through the process, exploring different materials and techniques to help you create a border that complements your style and aesthetic.
Choosing the Right Border Material
The first step is to select the material that best suits your vision and skill level. Here are some popular options:
- Wood: A classic and versatile choice, wood offers a wide range of styles and finishes. You can use pre-cut molding, reclaimed wood, or even create your own custom shapes.
- Metal: Metal borders can add a modern or industrial touch. Consider using thin strips of metal, decorative trim, or even wire. You can also find ready-made metal frames at craft stores.
- Rope: Natural rope adds a rustic and bohemian feel. It's easy to work with and readily available in various textures and thicknesses.
- Fabric: For a softer and more decorative look, fabric borders are a great option. You can use upholstery fabric, ribbon, lace, or even old scarves or ties.
- Mosaic Tiles: Create a unique and eye-catching border with colorful mosaic tiles. This technique can be more intricate but offers endless possibilities for personalization.
Consider the size and style of your mirror, the overall decor of the room, and your personal preferences when selecting a material.
Methods for Attaching the Border
Once you've chosen your material, you need to determine how to attach it to the mirror. There are several methods, each with its own advantages and disadvantages.
Adhesive
A strong adhesive is the easiest and most versatile method. It works well with lightweight materials like rope, fabric, and thin strips of wood or metal. Use a high-quality adhesive specifically designed for mirrors and surfaces. Apply a thin, even layer to the back of your chosen material and press it firmly against the mirror, ensuring proper adhesion.
Nails or Screws
For heavier materials like thick wood or metal, nails or screws offer a more secure attachment. If using this method, pre-drill holes into the material to prevent it from cracking. Be careful not to drill too deep, as you don't want to damage the mirror. When fastening the border, use a hammer or drill to drive the nails or screws through the material and into the wall behind the mirror. Ensure the screws are firmly anchored into the wall for added support.
Glue
A strong adhesive glue can be used for attaching heavier materials, but it requires more precision and care. Apply a generous amount of glue to the back of the material and press it firmly against the mirror, ensuring even distribution. Allow the glue to dry completely before moving or handling the mirror.
Decorative Clamps
For a unique and adjustable look, consider using decorative clamps. These clamps are specifically designed to hold materials in place without damaging the mirror. They are often made of metal and come in various styles to complement different aesthetics. Simply attach the clamps to the border material and then clip them onto the mirror. You can adjust the clamps as needed to achieve the desired look and ensure a secure fit.
Creative Design Ideas
The beauty of a mirror border lies in its versatility. You can create a border that seamlessly blends with your existing decor or adds a bold statement. Here are some creative ideas to inspire your design:
Geometric Shapes
Create a modern and minimalist look with geometric shapes. Use pre-cut wood molding or metal trim to form squares, rectangles, triangles, or circles around the mirror. You can also play with different sizes and patterns to add visual interest.
Nature-Inspired Borders
Embrace the beauty of nature with organic shapes and textures. Use rope, branches, or dried flowers to create a rustic, bohemian, or coastal vibe. You can also incorporate natural elements like seashells, driftwood, or stones for a unique and textured border.
Textured Surfaces
Add depth and dimension to your mirror with textured surfaces. Use fabrics with interesting weaves, rope with different thicknesses, or mosaic tiles with varying patterns. This creates a tactile and visually appealing border.
Personalized Details
Make your mirror border truly unique by adding personalized details. Incorporate family initials, dates, or quotes into the design. You can use wood burning tools, stencils, or even paint to create these details.
Remember, the possibilities are endless when it comes to creating a mirror border. Experiment with different materials, techniques, and design ideas to find what best suits your style and vision.

How To Frame A Mirror Sand And Sisal

Diy Stick On Mirror Frame Sawdust Sisters

How To Build A Mirror Frame Simple Woodworking

3 Ways To Frame A Mirror Wikihow

How To Frame Out That Builder Basic Bathroom Mirror For 20 Or Less

Diy Bathroom Mirror Frame For Under 10 O Hayley Blog

Mirror Frame Diy How To Update A Basic Bathroom Our Faux Farmhouse

20 Fantastic Diy Mirror Frame Ideas A Cultivated Nest

Diy Bathroom Mirror Frame Without Removing Clips Her Happy Home

Mirror Frame Diy How To Update A Basic Bathroom Our Faux Farmhouse

