How to Make a Frame for a Mirror
Giving a mirror a custom frame is a great way to personalize your home decor and add a touch of sophistication to your space. While you can purchase premade frames, creating your own can be a rewarding DIY project that allows you to express your creativity and style. This guide will walk you through the steps of making a frame for your mirror, from selecting materials to assembling the frame.
Choosing Materials
The first step is to choose the materials for your frame. Consider the style of your mirror and the overall aesthetic of your room when making your decision. Here are some popular options:
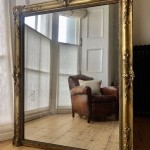
- Wood: Wood is a classic framing material that offers durability and a variety of finishes. You can find pre-cut molding at most hardware stores, or you can use reclaimed wood for a rustic look.
- Metal: Metal frames offer a modern and sleek aesthetic. Aluminum, steel, and brass are all popular choices.
- Plastic: Plastic is a budget-friendly option that is lightweight and easy to work with. There are many colors and patterns available, allowing you to create a unique frame.
- Rope or Twine: Rope or twine can be used to create a rustic or bohemian frame.
Measuring and Cutting
With your materials selected, you need to measure your mirror and cut the frame pieces to size. Here are the steps:
- Measure the mirror: Measure the length and width of the mirror. Add the desired frame width to each measurement to determine the length of each side of the frame. For example, for a 24-inch by 18-inch mirror with a 2-inch frame, you would need pieces of wood that are 28 inches and 22 inches long.
- Cut the frame pieces: Use a saw to precisely cut the frame pieces according to your measurements. Ensure the cuts are clean and straight.
- Sand the edges: If you are using wood, sand the edges of the frame pieces to create a smooth finish.
Assembling the Frame
Once all the frame pieces are cut and prepped, it's time to assemble them. Here's how:
- Join the corner pieces: Use wood glue or a miter saw to join the corner pieces of the frame. If you're using a miter saw, make sure the angles are precise.
- Secure the joints: Once the glue has dried, reinforcing the joints with screws or nails can provide additional strength.
- Attach the back piece: If desired, a back piece can be added to the frame to cover the joints and create a finished look.
Finishing Touches
Once your frame is assembled, you can personalize it with finishing touches. Here are some ideas:
- Paint or stain: You can paint the frame to match the decor of your room or stain it for a more natural look.
- Add embellishments: Beads, buttons, ribbons, or other decorative elements can be added to the frame to create a unique design.
- Attach hardware: Once you have chosen the appropriate hardware for your mirror, such as hooks or D-rings, you can attach them to the back of the frame.
Attaching the Mirror
To attach the mirror to the frame, you can use mirror clips, mirror mastic, or double-sided tape. Follow the instructions provided by the chosen method. It is essential to apply the adhesive evenly and to ensure the mirror is securely attached to the frame.

3 Ways To Frame A Mirror Wikihow

How To Build A Mirror Frame Sunshine And Rainy Days

How To Make A Simple Mirror Frame With Wood Upgrade An Old

Diy Framed Mirror Jaime Costiglio

How To Make A Diy Bathroom Mirror Frame Thediyplan

How To Build A Mirror Frame Simple Woodworking

Diy Bathroom Mirror Frame For Under 10 O Hayley Blog

How To Build A Mirror Frame Diy Ideas Glass Doctor

Diy Farmhouse Wood Frame Mirror She Gave It A Go

How To Build A Wood Frame Around Bathroom Mirror Young House Love