How To Make A Frame For Your Mirror
Creating a frame for a mirror is a rewarding do-it-yourself project that allows for customization and cost savings compared to purchasing a pre-made framed mirror. This article provides a comprehensive guide on constructing a mirror frame, covering material selection, necessary tools, step-by-step instructions, and potential design considerations.
Planning and Material Selection
The initial stage involves meticulous planning and careful material selection. The size of the mirror is the primary determinant for the frame's dimensions. Accurate measurements are crucial. Measure the mirror's length and width at several points to account for any irregularities; use the largest measurements to ensure the frame fits properly. Decide on the desired frame width, as this will impact the total amount of material required.
Wood is the most common material for mirror frames due to its versatility, availability, and ease of working with. Consider various wood types: Pine is a budget-friendly option that accepts paint and stain well. Poplar is another good choice for painting, offering a smoother surface than pine. Hardwoods like oak, maple, or cherry provide durability and aesthetic appeal but come at a higher cost and require more skill to work with. The choice depends on the desired aesthetic, budget constraints, and woodworking experience.
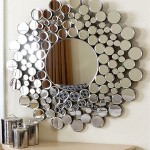
Alternative materials can be used for a more unique look. Metal frames, particularly aluminum or steel, offer a modern and industrial aesthetic. These require specialized tools and welding skills. Recycled materials, such as reclaimed wood or pallet wood, can add a rustic charm. When using recycled materials, ensure they are cleaned, sanded, and treated appropriately to prevent deterioration or infestation.
Aside from the primary framing material, additional supplies are necessary: Wood glue is essential for joining the frame pieces. Wood filler is used to conceal nail holes and imperfections. Sandpaper of varying grits (e.g., 80, 120, 220) is needed for smoothing the wood. Paint, stain, or varnish is used for finishing the frame. Small nails or brad nails are required for securing the frame pieces (if using a nail gun). Mirror clips or adhesive are needed for securing the mirror within the frame. Safety glasses are required for eye protection during cutting and sanding. Ear protection is recommended when using power tools. A dust mask is important for preventing inhalation of sawdust and paint fumes.
Tools and Preparation
The success of the project depends on having the right tools and a prepared workspace. A miter saw is highly recommended for making accurate angle cuts for the frame corners. A table saw can be used for ripping the wood to the desired width. A measuring tape is essential for accurate measurements. A carpenter's square is used to ensure the frame corners are square. Clamps are needed to hold the frame pieces together while the glue dries. A nail gun or hammer is used to secure the frame pieces (if using nails). A drill with various drill bits is needed for pre-drilling holes for screws or adding decorative elements. A sander (either a hand sander or an electric sander) is used for smoothing the wood surface. A paintbrush or sprayer is used for applying the finish. A clean workspace with adequate lighting is essential for safe and efficient work.
Before commencing construction, prepare the chosen materials. Cut the wood to the required widths using a table saw or have it pre-cut at a lumber yard. Precisely measure and cut the four frame pieces using a miter saw. For a standard rectangular frame, each corner requires a 45-degree angle cut. Ensure that the outer edge of each frame piece corresponds to the measured length and width of the mirror plus twice the width of the frame material. Sand all the wood pieces thoroughly, starting with a coarser grit (80 or 120) to remove imperfections and ending with a finer grit (220) for a smooth finish. This step is critical for achieving a professional look after finishing.
Frame Assembly and Finishing
With the materials prepared, the frame can be assembled. Apply wood glue to the mitered edges of each frame piece. Carefully align the corners and clamp them securely together. Ensure the corners are square using a carpenter's square. While the glue is still wet, use a nail gun or hammer and nails to further secure the corners. Drive the nails at an angle into the mitered joints for maximum strength. Allow the glue to dry completely according to the manufacturer's instructions, typically at least 24 hours.
After the glue has dried, remove the clamps. Fill any nail holes or imperfections with wood filler. Allow the wood filler to dry completely and then sand it smooth. This step is essential for creating a seamless finish. Wipe the entire frame with a tack cloth to remove any remaining dust particles. This ensures a clean surface for finishing.
Choose the desired finish for the frame. Paint provides a wide range of color options and can be applied with a brush, roller, or sprayer. Stain enhances the natural grain of the wood and requires a clear topcoat for protection. Varnish provides a durable and glossy finish. Apply the chosen finish according to the manufacturer's instructions, using multiple thin coats for best results. Allow each coat to dry completely before applying the next. Lightly sand between coats with fine-grit sandpaper (e.g., 320 or 400) to create a smooth surface. Once the final coat has dried, inspect the frame for any imperfections and touch up as needed.
After the finish has fully cured, it is time to insert the mirror into the frame. Clean the mirror thoroughly to remove any dust or fingerprints. Place the mirror into the frame from the back. Secure the mirror using mirror clips or adhesive. Mirror clips are small metal brackets that hold the mirror in place. They are typically screwed into the frame. Mirror adhesive is a specialized adhesive designed for securing mirrors to surfaces. Apply the adhesive to the back of the mirror, following the manufacturer's instructions. Ensure the mirror is securely attached to the frame before hanging it. Allow the adhesive to cure completely before handling the framed mirror.
Design Considerations and Customization
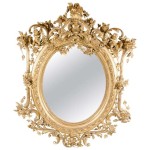
Numerous design options exist to customize the mirror frame. A distressed finish can be achieved by sanding down the paint or stain in certain areas to reveal the wood underneath. This creates a rustic and vintage look. Applying decorative molding or trim to the frame can add visual interest and texture. Consider using a variety of wood types or combining wood with other materials, such as metal or glass. Incorporating carved details or embellishments can create a unique and personalized frame. Adding a bevel to the inner edge of the frame can create a more refined look. Experiment with different paint colors, stain shades, and finishing techniques to achieve the desired aesthetic. Consider the style of the room where the mirror will be displayed and choose a frame design that complements the existing decor. Adding hardware, such as D-rings or wire, to the back of the frame allows for easy hanging.
By carefully planning, selecting the right materials and tools, and following these step-by-step instructions, a customized mirror frame can be created. This allows for a personalized touch and a cost-effective alternative to purchasing a pre-made framed mirror, reflecting both personal style and craftsmanship.

How To Build A Mirror Frame Sunshine And Rainy Days

30 Diy Mirror Frames Scratch And Stitch

Diy Expanding Foam Mirror Make A Statement Monsterscircus

How To Make An Arched Mirror Frame For Your Builder Grade Mirrors

Diy Rustic Mirror Houseful Of Handmade

Frame Your Mirror A Pretty Life In The Suburbs

Frame Your Existing Mirror With Ease Fast Glass Mirrors And More Inc

How To Make An Arched Mirror Frame For Your Builder Grade Mirrors

How To Build A Wood Frame Around Bathroom Mirror Young House Love

Diy How To Make A Squiggle Mirror City Chic Decor