How To Make A Mirror Wall: A Comprehensive Guide
A mirror wall can transform a room, creating an illusion of more space, enhancing natural light, and adding a touch of modern elegance. The process, while seemingly straightforward, requires careful planning, precise execution, and adherence to safety protocols. This article provides a detailed guide on how to construct a mirror wall, covering material selection, preparation, installation, and finishing touches.
Before embarking on this project, it is crucial to assess the suitability of the room. Factors such as wall evenness, humidity levels, and intended use of the space should be carefully considered. Uneven walls can pose significant challenges during installation, potentially leading to distorted reflections and structural instability. High humidity environments may require specialized mirror coatings and adhesives to prevent degradation and detachment over time. The intended use of the space will dictate the size, placement, and safety features of the mirror wall. For instance, a gym might necessitate shatterproof mirrors and robust mounting systems.
Key Point 1: Planning and Material Selection
The initial stage involves meticulous planning. Measurements of the wall must be accurate and documented. A detailed sketch or blueprint should be created, outlining the dimensions, layout, and placement of each mirror panel. This visual representation serves as a roadmap throughout the installation process, minimizing errors and ensuring a cohesive final product.
Once the dimensions are established, the selection of mirror type and thickness becomes paramount. Standard mirrors, typically made of float glass with a reflective backing, are suitable for most applications. However, for high-traffic areas or spaces where safety is a concern, tempered glass mirrors offer enhanced durability and shatter resistance. The thickness of the mirror, usually ranging from 1/8 inch to 1/4 inch, affects its structural integrity and reflective quality. Thicker mirrors provide a clearer, less distorted reflection and are less prone to warping or bending. Beveled edges can add a decorative touch and minimize sharp edges, enhancing safety and aesthetics.
Beyond the mirrors themselves, the selection of adhesive is critical. Mirror mastic, a specialized adhesive formulated to be compatible with mirror coatings, is essential. Standard construction adhesives can damage the reflective backing, leading to discoloration and degradation. The chosen mastic should be specifically designed for mirror installation and should be applied in accordance with the manufacturer's instructions. Consider the drying time, bonding strength, and environmental compatibility of the adhesive.
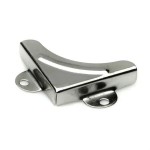
Mounting hardware, such as mirror clips or J-channels, provides additional support and security. The type and quantity of hardware required depend on the size and weight of the mirror panels. J-channels, typically made of aluminum or stainless steel, are installed along the top and bottom edges of the wall, providing a secure cradle for the mirrors. Mirror clips, which are small brackets that attach to the wall and hold the mirror in place, are often used in conjunction with adhesive for added stability. The material and finish of the mounting hardware should complement the overall aesthetic of the room.
Finally, safety equipment is indispensable. Safety glasses, gloves, and appropriate clothing are necessary to protect against cuts, splinters, and chemical exposure. A heavy-duty suction cup can aid in handling large mirror panels, reducing the risk of breakage and injury. A level, measuring tape, pencil, and utility knife are essential tools for accurate measurements and precise cuts.
Key Point 2: Wall Preparation and Adhesive Application
Proper wall preparation is fundamental to a successful mirror wall installation. The wall surface must be clean, dry, and structurally sound. Existing paint or wallpaper should be removed, and any imperfections, such as cracks or holes, should be repaired and smoothed. A primer can be applied to enhance adhesion and prevent moisture absorption. The wall should be as level and plumb as possible to ensure a uniform and distortion-free reflection. Using a long level, identify and correct any significant deviations from vertical. Shims can be used to compensate for minor irregularities.
Before applying adhesive, it is advisable to dry-fit the mirror panels to confirm proper alignment and fit. This step allows for final adjustments and ensures that the panels fit snugly against each other. Mark the locations of the mirror panels on the wall using a pencil. These markings will serve as a guide during the adhesive application process.
The application of mirror mastic requires precision and consistency. Apply the adhesive in vertical beads or ribbons on the back of the mirror panel, ensuring even distribution. Avoid applying adhesive too close to the edges, as this can cause it to squeeze out when the panel is pressed against the wall. The recommended spacing and quantity of adhesive beads should be specified by the manufacturer of the mastic. In addition to adhesive, consider using double-sided mirror tape to hold the panels in place while the adhesive cures. This tape provides temporary support and prevents the mirrors from shifting.
Once the adhesive is applied, carefully lift the mirror panel and position it against the wall, aligning it with the pencil markings. Press firmly and evenly across the entire surface of the mirror to ensure good contact with the wall. Use a clean cloth to wipe away any excess adhesive that may squeeze out. If using mirror clips, install them according to the manufacturer’s instructions, ensuring they are securely fastened to the wall and provide adequate support for the mirror panel. Repeat this process for each mirror panel, maintaining a consistent space between panels if a gapped design is desired.
Key Point 3: Installation and Finishing Touches
The installation process requires patience and attention to detail. Ensure that each mirror panel is properly aligned and securely attached to the wall. Check the level and plumb of each panel using a level, making any necessary adjustments before the adhesive fully cures. If using J-channels, ensure they are properly aligned and securely fastened to the wall. The channels should provide a snug fit for the mirror panels, preventing them from shifting or falling out.
Once all the mirror panels are installed, allow the adhesive to cure completely, according to the manufacturer's instructions. Avoid disturbing the panels during the curing process to ensure a strong and permanent bond. The curing time can vary depending on the type of adhesive used and the environmental conditions. Typically, it takes at least 24 to 48 hours for the adhesive to fully cure.
After the adhesive has cured, the finishing touches can be applied. If a gapped design is used, the spaces between the panels can be filled with a flexible sealant, such as silicone caulk. This sealant not only provides a clean and professional look but also prevents moisture from seeping behind the mirrors. Choose a sealant that is specifically designed for use with mirrors and that is paintable, if desired. Apply the sealant evenly and smoothly, using a caulking gun and a wet finger or tool to create a seamless finish.
Inspect the mirror wall carefully for any imperfections, such as scratches, smudges, or adhesive residue. Clean the surface of the mirrors with a specialized glass cleaner and a soft cloth. Avoid using abrasive cleaners or harsh chemicals, as these can damage the reflective coating. Buff the mirrors to a streak-free shine.
Finally, consider adding decorative elements to enhance the overall aesthetic of the mirror wall. Lighting, such as sconces or LED strips, can be installed to accentuate the reflective surface and create a dramatic effect. Frames or borders can be added around the perimeter of the mirror wall to provide a more finished look. The choice of decorative elements should complement the style of the room and reflect the personal preferences of the homeowner.
Adhering to these guidelines, proper material selection, wall preparation, and precise installation techniques will result in a stunning mirror wall that enhances the beauty and functionality of any space.

How To Make A Mirror Wall Step By Guide

It S A Mirror Acle 5 Ways To Make Reflecting Walls Work

How To Make A Diy Mirror Wall Under 85

The Budget Friendly Trick For Creating A Stunning Provincial Mirror Wall With Buys From 2 Daily Mail

Diy A Mirrored Wall Using Square Plates Home Studio Mirror

Modernizing A Mirrored Wall Tape To The Rescue Average But Inspired

Make A Mirror Wall Feature For Living Room

Make A Mirror Wall Feature For Living Room

How To Make A Diy Wood Frame Mirror With Mirrors Tea And Forget Me Nots

Diy Gold Industrial Mirror Tutorials Never Skip Brunch

