How to Make a Tri-Fold Mirror
A tri-fold mirror offers a versatile way to view oneself from multiple angles, proving useful for tasks like applying makeup or styling hair. Constructing a tri-fold mirror can be a rewarding DIY project. This article provides a comprehensive guide to crafting one from readily available materials.
Materials Required:
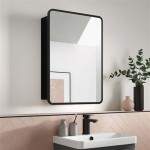
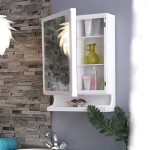
Several materials are necessary for this project. Three mirrors of equal size form the core of the tri-fold mirror. The size can be adjusted based on individual needs, but ensuring uniformity is crucial for proper folding and alignment. Plywood or MDF (Medium-Density Fiberboard) serves as a sturdy backing for the mirrors. The thickness should provide sufficient support without being overly bulky. Hinges, preferably those designed for mirrors, are essential for connecting the mirror panels. Wood glue provides a strong bond between the mirrors and the backing. Finishing materials, such as paint, stain, or veneer, contribute to the aesthetic appeal of the finished product. Finally, felt pads protect surfaces from scratches and enhance stability.
Tools Required:
Accurate measurements and precise cuts are essential for creating a functional and visually appealing tri-fold mirror. Therefore, a measuring tape and a pencil are indispensable. A saw, preferably a circular saw or jigsaw, facilitates cutting the plywood or MDF to the correct dimensions. A drill with appropriate drill bits aids in creating pilot holes for screws and securing the hinges. Safety glasses and a dust mask are crucial for protecting the eyes and respiratory system during the cutting and drilling processes. Clamps hold the mirror panels and backing securely during the gluing process. Sandpaper smooths the edges of the wood and prepares it for finishing. Finally, painting supplies, such as brushes or rollers, are needed if paint or stain is chosen as the finish.
Step-by-Step Construction:
Step 1: Measuring and Cutting the Backing: Begin by accurately measuring the dimensions of the mirrors. The plywood or MDF backing should be cut to a width equal to the width of one mirror and a length equal to three times the height of a single mirror. This creates a backing panel that can accommodate all three mirrors when fully extended.
Step 2: Dividing the Backing: Divide the backing panel into three equal sections using a pencil and measuring tape. These sections will correspond to the placement of the individual mirrors. Mark these divisions clearly to ensure accurate placement.
Step 3: Attaching the Side Mirrors: Apply wood glue to the back of the two side mirrors. Carefully position these mirrors onto the outer sections of the backing, aligning them with the marked divisions. Use clamps to secure the mirrors firmly to the backing while the glue dries. Allow ample drying time according to the glue manufacturer's instructions.
Step 4: Installing the Hinges: Once the glue has fully dried, install the hinges. Position the hinges between the side mirrors and the center section of the backing. Use a drill to create pilot holes for the screws, ensuring they are the correct size to prevent splitting the wood. Secure the hinges with screws, attaching them to both the mirrors and the backing.
Step 5: Attaching the Center Mirror: Apply wood glue to the back of the center mirror. Carefully position this mirror onto the center section of the backing, aligning it with the pre-marked divisions. Ensure the mirror aligns flush with the edges of the side mirrors when the unit is closed. Clamp the center mirror firmly to the backing and allow the glue to dry completely.
Step 6: Finishing the Mirror: After the glue has dried, sand any rough edges on the backing. Apply the chosen finish – paint, stain, or veneer – to the exposed wood surfaces. Allow the finish to dry completely according to the manufacturer's instructions.
Step 7: Adding Felt Pads: Attach felt pads to the bottom edges and corners of the backing. This prevents the mirror from scratching surfaces and provides added stability.
Safety Precautions:
Working with power tools and sharp objects requires careful attention to safety. Always wear safety glasses and a dust mask when cutting or drilling wood. Ensure adequate ventilation when using paints, stains, or adhesives. Follow the manufacturer's safety instructions for all tools and materials. Dispose of waste materials properly.

The Trifold Mirror Diy Kit

How To Make A Tri Fold Mirror And Triangular Prism Box Trifold Diy Preschool

Made A 3 Way Trifold Mirror On The So Easy Diy Vanity

Haircut System Tri Fold 3 Way Folding Mirror Easy To Hang

Trifold Mirror Tri Fold Makeup Diy Haircut Tool Led Folding

Headquarters Tri Fold Three Panel Wardrobe Mirrors

Archer Mirror Realistic Reflection Easy To Abs 360 Degree Tri Fold For Gift Ca

Large Dressing Table Trifold Mirror Diy At B Q

Haircut System Tri Fold 3 Way Folding Mirror Easy To Hang

Custom Three Panel Mirrors Framed Or Frameless Any Size