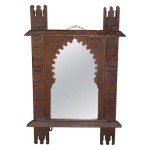
How To Make A Window Mirror
Creating a window mirror, a piece that combines the architectural charm of a window frame with the reflective properties of a mirror, adds a unique touch to any interior decor. This guide provides a detailed walkthrough of the process, ensuring a successful outcome for both novice and experienced DIY enthusiasts.
Selecting the Right Window Frame
The foundation of a successful window mirror lies in the selection of a suitable window frame. Consider a variety of factors to ensure the chosen frame will meet specific aesthetic and practical requirements. The condition of the frame is paramount. Inspect it for rot, cracks, or significant damage. While minor imperfections can often be repaired, severely damaged frames will require extensive restoration or replacement, adding to the project's complexity and cost. Preserving the original character and charm is frequently a priority, particularly when working with vintage or antique frames. However, neglecting structural integrity for the sake of preserving aesthetic details is inadvisable.
The size and style of the window frame should complement the intended placement of the mirror. Larger frames are suitable for creating a statement piece in living rooms or hallways, while smaller frames may be better suited for bathrooms or bedrooms. The design motifs, such as gothic arches, Victorian detailing, or minimalist straight lines, should align with the overall design scheme of the space. Moreover, consider the dimensions of the mirror insert required for the frame, ensuring that a standard mirror size can be accommodated or that custom cutting can be sourced affordably.
The material of the window frame also impacts the overall look and durability. Wood frames offer a classic and versatile aesthetic, easily painted or stained to match any color palette. Metal frames, often found in industrial-style settings, provide a sleek and modern appearance. Choose a material that best suits the environment. For instance, in moisture-prone areas like bathrooms, selecting rot-resistant wood or a metal frame treated for rust prevention is essential. The texture and finish of the frame contribute to its overall appeal. Smooth, painted finishes offer a contemporary touch, while distressed or weathered finishes impart a rustic charm. The frame’s surface should be compatible with the chosen adhesive and protective coatings used later in the project.
Preparing the Window Frame
Proper preparation of the window frame is crucial for ensuring the longevity and aesthetic appeal of the finished mirror. This stage involves cleaning, repairing, and refinishing the frame to create a solid and visually appealing base for the reflective glass.
Begin by thoroughly cleaning the window frame to remove any dirt, dust, grime, or old paint. Use a mild detergent and water solution, along with a scrub brush, to gently clean the surface. For stubborn stains or mildew, a specialized cleaner designed for the frame material may be necessary. Rinse the frame thoroughly with clean water and allow it to dry completely. Avoid using harsh chemicals that could damage the frame or leave behind residue that could interfere with subsequent finishing steps. Consider using a vacuum cleaner with a brush attachment to remove loose debris from crevices and intricate details.
Once the frame is clean, inspect it for any damage, such as cracks, chips, or rot. Small cracks can be filled with wood filler or epoxy, depending on the material of the frame. Large cracks may require more extensive repairs, such as reinforcing the frame with wood supports or replacing damaged sections. If the frame has any loose or wobbly joints, re-glue them with wood glue and clamp them together until the glue dries completely. For metal frames, welding or soldering may be necessary to repair any structural damage. Ensure all repairs are flush with the surrounding surface to create a smooth and even base for the final finish. Sanding after repairs is typically required to blend the repaired areas seamlessly with the rest of the frame.
After cleaning and repairing the frame, decide on the desired finish. This may involve painting, staining, or applying a protective coating. If painting, begin by priming the frame with a suitable primer to improve adhesion and prevent the paint from soaking into the wood. Apply two or more coats of paint, allowing each coat to dry completely before applying the next. For a stained finish, sand the frame smooth and apply the stain evenly with a brush or rag. Wipe off any excess stain and allow it to dry completely. Seal the stained finish with a clear coat of varnish or polyurethane to protect it from moisture and wear. If opting for a natural finish, apply a protective coating of oil or wax to enhance the wood's natural beauty and protect it from the elements. Regardless of the chosen finish, ensure it is applied evenly and consistently for a professional-looking result.
Installing the Mirror and Finishing Touches
The final stage involves the careful installation of the mirror into the prepared frame and the addition of finishing touches to ensure a secure and aesthetically pleasing result. The quality of this installation is critical for both the safety and the longevity of the window mirror.
Begin by measuring the inside dimensions of the window frame precisely. These measurements will dictate the size of the mirror needed. Subtract a small fraction of an inch (approximately 1/8 to 1/4 inch) from each dimension to allow for a slight gap between the mirror and the frame. This gap helps to prevent the mirror from cracking or binding within the frame due to expansion and contraction caused by temperature and humidity changes. Order a custom-cut mirror from a glass supplier, specifying the exact dimensions and any finishing details, such as polished edges. Polished edges reduce the risk of cuts during handling and add a refined look to the finished mirror.
Before installing the mirror, consider applying a backing to the frame. This provides a solid surface behind the mirror and prevents dust and debris from accumulating. Cut a piece of cardboard, plywood, or foam board to fit snugly inside the frame. Secure the backing to the frame with glue, nails, or screws. The backing material should be lightweight and durable, and it should be compatible with the adhesive used to secure the mirror. Ensure that the backing is clean and free of any sharp edges or protrusions that could damage the mirror.
Apply a specialized mirror adhesive to the back of the mirror. These adhesives are specifically formulated to be compatible with the reflective backing of mirrors and will not cause damage or discoloration over time. Apply the adhesive in vertical beads or dots, spaced evenly across the mirror's surface. Avoid applying the adhesive too close to the edges of the mirror, as this could cause it to squeeze out and be visible from the front. Carefully place the mirror into the frame, aligning it with the edges and pressing it firmly against the backing. Use shims or spacers to hold the mirror in place while the adhesive dries. Allow the adhesive to cure completely according to the manufacturer's instructions. Once the adhesive is fully cured, remove the shims and inspect the mirror for any signs of movement or looseness. Reinforce the mirror's attachment with mirror clips or brackets if necessary. Finally, clean the surface of the mirror with a glass cleaner to remove any smudges or fingerprints. Inspect the finished mirror for any imperfections, such as scratches or air bubbles. Address any issues promptly to ensure a flawless final product. The appropriate hanging hardware should be attached to the frame, considering the weight and size of the mirror to ensure safe and secure mounting.

Make A Diy Window Pane Mirror Fixthisbuildthat

Diy Window Pane Mirror Tutorial The Lettered Cottage

Diy Windowpane Mirror The Chronicles Of Home

Diy Windowpane Mirror The Chronicles Of Home

Easy Ways To Make A One Sided Mirror With Pictures Wikihow

How To Make A Window Wall Mirror Splendry

Mirrors Or Windows How To Make A Mirror Look And Feel Like Window

How To Make A Faux Mercury Glass Mirror Tidy Mo

How To Make A Window Wall Mirror Splendry

Easy Diy Windowpane Mirror For 35 Industrial Grid


