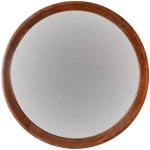
How To Make An Oval Frame For A Mirror
Creating a custom oval frame for a mirror offers a unique way to enhance its aesthetic appeal and complement specific interior design styles. This process involves several steps, requiring careful planning and execution for optimal results. This article will guide you through the necessary procedures and materials required to craft a beautiful and durable oval frame.
Planning and Measurements
Accurate measurements form the foundation of a well-constructed frame. Begin by carefully measuring the mirror's major and minor axes. These measurements will determine the dimensions of the frame's inner oval opening. Add the desired frame width to these measurements to calculate the outer oval dimensions. Document these figures precisely to avoid inaccuracies during subsequent stages.
Material Selection
Choosing the right material is crucial for achieving the desired aesthetic and structural integrity. Wood, such as oak, maple, or pine, offers classic elegance and can be carved or molded. Medium-density fibreboard (MDF) provides a smooth, consistent surface, ideal for painting or veneering. More elaborate options include plaster, resin, or even metal, depending on the intended style. The material’s thickness should be considered in relation to the mirror's size and weight, ensuring adequate support.
Creating the Oval Template
Creating accurate oval templates is essential for cutting the frame material precisely. One effective method involves using a string, two thumbtacks, and a pencil. Mark the focal points of the oval on a large piece of paper or cardboard. The distance between these points should be less than the major axis length. Place the thumbtacks at the focal points. Tie the string to the thumbtacks, ensuring the string's length equals the major axis. Holding the pencil taut against the string, draw a smooth, continuous curve, creating the oval shape. Two templates are required: one for the outer oval and one for the inner oval, using the previously calculated dimensions.
Cutting the Frame Material
Transfer the oval templates onto the chosen frame material. Precision cutting is paramount to achieving a professional finish. A jigsaw equipped with a fine-tooth blade is recommended for intricate curved cuts in wood or MDF. For harder materials, specialized cutting tools might be necessary. Ensure the blade is sharp to prevent splintering or tearing. Follow the traced lines carefully, maintaining a steady hand to achieve smooth, accurate cuts. Cut both the inner and outer ovals to create the frame ring.
Joining and Reinforcing the Frame
Joining the frame sections requires strong and reliable methods. Wood glue provides a secure bond when applied evenly to the mating surfaces. Clamps are essential to maintain pressure while the glue dries, ensuring a tight, seamless joint. Consider using wood joinery techniques like miter joints or biscuit joints for added strength and a more refined appearance. Metal frames can be welded or soldered. Reinforcement using corner braces or metal brackets further strengthens the frame structure, particularly for larger mirrors.
Finishing and Decorating
The finishing process adds the final aesthetic touches. Sanding the frame removes any imperfections and prepares the surface for painting, staining, or other decorative treatments. Multiple coats of primer and paint provide a durable and even finish. Staining enhances the natural wood grain and adds warmth. Decorative elements like gilding, carving, or applied moldings can further enhance the frame's design. Allow ample drying time between each coat or application to achieve a professional result.
Mounting the Mirror
Securely mounting the mirror within the frame is the final step. Mirror adhesive or clips provide reliable attachment points. Ensure the mirror is centered within the frame opening before applying adhesive or attaching clips. Apply adhesive evenly to the back of the frame or strategically position clips to distribute the mirror's weight. Allow the adhesive to cure completely before handling the framed mirror. For heavier mirrors, consider adding additional support mechanisms to prevent slippage or detachment.
Safety Precautions
Throughout the entire process, prioritize safety. Always wear appropriate safety glasses when cutting, sanding, or working with power tools. Gloves protect hands from splinters, glue, and other materials. A well-ventilated workspace is crucial when using paints, stains, or adhesives. Follow manufacturer instructions for all tools and materials to ensure safe and effective use. Proper safety precautions contribute to a successful and injury-free project.

Diy Oval Mirror Frame Domestically Speaking

Gold Plastic Oval Mirror Makeover Confessions Of A Serial Do It Yourselfer

Diresta Oval Frame And Mirror

Diy Oval Mirror Frame Domestically Speaking

Diy Mirror Frame Upcycle That

Diy Oval Mirror Frame Domestically Speaking

I Need An Idea To Frame My Oval Shaped Bathroom Mirrors Hometalk

How To Make A Mirror From Picture Frame Shabbyfufu Com

How To Make An Easy Mod Podge Fabric Mirror Frame Pillar Box Blue

Mica Hardware Make A Mosaic Mirror

