How to Make Antique Mirror Tiles
Creating antique mirror tiles offers a unique way to add character and vintage charm to any space. Whether used as a backsplash, wall accent, or decorative piece, these tiles bring a touch of old-world elegance. This article provides a comprehensive guide to creating antique mirror tiles, from selecting the right materials to achieving the desired aged effect.
Gathering the Necessary Materials
Before embarking on this project, gathering the necessary materials ensures a smooth and efficient process. The following items are essential:
- Mirror sheets or tiles
- Safety glasses and gloves
- Mirror cleaner
- Painter's tape
- Spray bottle
- Distilled water
- Various grits of sandpaper
- Mirroring spray paint (optional)
- Clear sealant or varnish
Preparing the Mirror Surface
Proper surface preparation is crucial for achieving a professional-looking antique finish. Cleaning and protecting the mirror ensures even application of the antiquing solution.
- Thoroughly clean the mirror surface with mirror cleaner and a lint-free cloth.
- Apply painter's tape to any areas of the mirror that should remain untouched by the antiquing process.
Creating the Antiquing Solution
The antiquing solution is key to achieving the desired aged effect. Experimenting with different ratios of vinegar and water allows for varying degrees of antiquing.
- Fill a spray bottle with distilled water.
- Add white vinegar to the spray bottle. Start with a small amount of vinegar and gradually increase until the desired level of antiquing is achieved. A common starting ratio is 1 part vinegar to 5 parts water.
- Shake the bottle well to combine the vinegar and water.
Applying the Antiquing Solution
The application process requires careful and even spraying to achieve a consistent antique effect. Working in a well-ventilated area is recommended.
- Lightly mist the mirror surface with the antiquing solution. Avoid saturating the mirror, as this can cause the backing to peel.
- Allow the solution to sit for a few minutes, observing the changes in the mirror's appearance. The longer the solution sits, the more pronounced the antiquing effect will be.
- For a more textured, aged look, dab the surface with a crumpled paper towel or sea sponge while the solution is still wet.
Distressing the Mirror (Optional)
Distressing the mirror adds another layer of authenticity to the antique look. This process involves strategically removing sections of the mirroring for a more timeworn appearance.
- Using various grits of sandpaper, gently rub areas of the mirror surface to create scratches and worn spots. Focus on edges and corners for a realistic aged effect.
- For a more dramatic effect, use a small scraper or razor blade to carefully remove sections of the mirroring, revealing the clear glass underneath.
Sealing the Antique Finish
Once the desired antique effect is achieved, sealing the mirror protects the finish and ensures its longevity. This step is vital for preventing further oxidation and preserving the desired look.
- Allow the mirror to dry completely before applying sealant.
- Apply a thin, even coat of clear sealant or varnish to the entire mirror surface, including the antiqued areas.
- Allow the sealant to dry completely according to the manufacturer's instructions. Multiple coats may be necessary for added protection.
Using Mirroring Spray Paint (Optional)
Mirroring spray paint can be used to restore reflectivity to areas where the mirror has been heavily distressed or to create a more subtle antique effect.
- Once the sealant has dried completely, apply mirroring spray paint to the desired areas of the mirror surface.
- Follow the manufacturer's instructions for application and drying times.
Cutting the Mirror into Tiles (If Necessary)
If working with large mirror sheets, cutting them into individual tiles may be necessary. This should be done after the antiquing and sealing process to avoid damaging the finished tiles.
- Use a glass cutter specifically designed for mirrors to score the mirror along desired lines.
- Carefully break the mirror along the scored lines using running pliers or a specialized mirror breaking tool.
- Wear safety glasses and gloves throughout the cutting process to protect against sharp edges.

How To Antique A Mirror Easy No Scratching The Navage Patch

How To Antique A Mirror From The Front With Paint Average But Inspired

How To Antique Mirrors The Easy Way Mirror Distressed Diy

How To Antique Mirror Using Paint Stripper And Bleach Decor Adventures

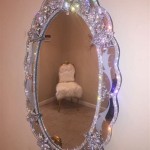
Antique Mirror Tiles Vintage Müller Designs

Inspiration Antique Mirror Tiles Mirrored Subway Tile Diy

Antique Mirror Tile Retro Reflections

Antique Mirror Splashback

Antique Mirrored Wallpaper Mad About The House

Antique Mirror Tiles Vintage Müller Designs