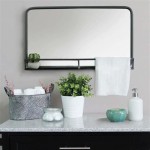
How to Make a Custom Mirror Frame
A custom frame elevates a simple mirror, transforming it into a personalized statement piece. Creating a custom frame allows for complete control over size, style, and finish, perfectly complementing existing décor. This article details the process of crafting a custom mirror frame, offering a step-by-step guide for various design options.
Planning and Preparation: The initial stage involves careful planning and gathering necessary materials. Accurate measurements of the mirror are crucial. Add extra length and width to these measurements, accounting for the frame's depth and desired overlap. This additional measurement determines the final dimensions of the frame's components.
Material Selection: The choice of frame material affects the overall aesthetic and construction process. Wood offers a classic, versatile option suitable for various finishes. Its workability makes it ideal for intricate designs. Alternatively, molded plastic provides a lightweight, cost-effective solution, readily available in various pre-finished styles.
Cutting the Frame Pieces: Precise cutting ensures a seamless frame. Using a miter saw provides accurate angled cuts for a professional finish. For wooden frames, a 45-degree angle on each end of the frame pieces creates a perfect corner joint. Ensure the lengths of opposite frame pieces match precisely. Plastic molding often requires specialized cutting tools recommended by the manufacturer.
Joining the Frame: Wood frames are typically joined using wood glue and reinforced with brad nails or staples. Applying glue to the mitered edges and clamping the pieces together creates a strong bond. Reinforcing with nails or staples provides extra stability. Plastic frames often utilize a snap-fit system or specialized adhesives designed for the material. Consult the manufacturer’s instructions for proper joining techniques.
Finishing the Frame (Wood): Wooden frames require finishing to enhance their appearance and protect the wood. Sanding the frame smooth creates a professional surface for paint or stain application. Applying a primer before painting ensures even color distribution. Staining highlights the natural wood grain, offering a rich, classic look. A sealant or topcoat adds durability and protects the finish.
Attaching the Mirror: Once the frame is dry and cured, the mirror can be attached. Mirror adhesive or clips provide secure mounting. Mirror adhesive offers a strong, permanent bond; ensure the mirror is centered and aligned within the frame before the adhesive sets. Clips, positioned along the inside edges of the frame, securely hold the mirror while allowing for easier removal if necessary.
Optional Decorative Elements: Enhance the frame's visual appeal with decorative elements. Molding, appliqués, or other embellishments can be added using wood glue or adhesive suitable for the chosen materials. This customization allows for personalized expression and creates a truly unique frame.
Adding Hanging Hardware: The final step involves attaching appropriate hanging hardware to the back of the frame. D-rings or wire hangers provide secure mounting options. Consider the weight of the framed mirror when selecting hardware. Ensure the hardware is securely attached and evenly spaced to provide balanced support.
Considerations for Different Frame Styles: While the basic process remains consistent, different frame styles require specific techniques. A floating frame, for instance, requires precise measurements and a specialized mounting system to create the illusion of a suspended mirror. Shadow box frames necessitate deeper construction to accommodate three-dimensional objects. Researching specific frame styles provides insights into necessary adjustments to the general process.
Safety Precautions: Throughout the frame-making process, prioritize safety. Wear appropriate eye protection when using power tools. Use caution when handling sharp objects like glass and blades. Ensure adequate ventilation when working with paints, stains, or adhesives. Following safety guidelines safeguards against potential hazards.
Troubleshooting Common Issues: Uneven joints can be addressed by carefully sanding or adjusting the miter cuts. Gaps between the frame and mirror can be filled with a color-matched sealant. Imperfections in the finish can be rectified through sanding and reapplication of the chosen finish. Addressing these issues ensures a professional-looking final product.
Maintaining the Frame: Regular dusting with a soft cloth keeps the frame clean. Avoid using harsh chemicals that can damage the finish. Regularly inspect the hanging hardware to ensure secure mounting. Proper maintenance preserves the frame's appearance and extends its lifespan.

How To Make A Custom Tiled Mirror The Stonybrook House

How To Easily Make A Custom Mirror Frame

Diy Stick On Mirror Frame Sawdust Sisters
:max_bytes(150000):strip_icc()/alahome1-a879d69e31be4a9a9ae522028c12926d.jpg?strip=all "20 Diy Mirror Frame Ideas To Inspire Your Next Project")
20 Diy Mirror Frame Ideas To Inspire Your Next Project

How To Easily Make A Custom Mirror Frame

Mirror Frame Diy How To Update A Basic Bathroom Our Faux Farmhouse

30 Diy Mirror Frames Scratch And Stitch
:max_bytes(150000):strip_icc()/kaylasimonehome-905941da7dd04a08af07c415df2a1fd8.jpeg?strip=all "20 Diy Mirror Frame Ideas To Inspire Your Next Project")
20 Diy Mirror Frame Ideas To Inspire Your Next Project

Mirror Frame Diy How To Update A Basic Bathroom Our Faux Farmhouse

How To Build A Mirror Frame