How To Make Wooden Mirror Frames
Creating a custom wooden mirror frame offers a rewarding woodworking project with the potential to enhance any living space. This guide outlines the process, providing detailed steps for crafting a beautiful and functional frame.
Planning and Material Selection
The initial stage involves careful planning and selecting appropriate materials. Begin by accurately measuring the mirror's dimensions. These measurements determine the frame's inner dimensions. Decide upon the desired frame width and depth, considering both aesthetic preferences and the mirror's size. A wider frame complements a larger mirror, while a narrower frame suits smaller mirrors.
Wood selection impacts the frame's appearance and durability. Hardwoods like oak, maple, or cherry offer durability and intricate grain patterns. Softwoods like pine or fir are more economical but may require more careful handling to avoid dents and scratches. Consider the surrounding décor when choosing the wood type. The wood should be free of knots and warps for optimal results.
Tools and Equipment
Gathering the necessary tools ensures a smooth and efficient workflow. Essential tools include a miter saw, measuring tape, wood glue, clamps, a drill with appropriate drill bits, sandpaper of varying grits, wood filler, and safety glasses. Additional tools like a router and table saw can enhance the project's precision and complexity but are not strictly required.
Cutting the Frame Pieces
Accurate cutting is crucial for a well-fitting frame. Using the mirror's dimensions and the chosen frame width, calculate the length of each frame piece. A miter saw allows for precise 45-degree angle cuts, essential for creating neat corners. Mark the cut lines carefully on the wood, double-checking measurements before cutting. Cut each piece slowly and steadily to ensure clean, accurate cuts.
Assembling the Frame
Once the pieces are cut, the assembly process begins. Apply wood glue to the mitered edges of each piece, ensuring even coverage. Join the pieces together, forming a rectangular frame. Utilize clamps to hold the pieces securely in place while the glue dries. Follow the glue manufacturer's instructions for drying time. Remove excess glue with a damp cloth before it hardens.
Securing the Mirror
Several methods exist for securing the mirror within the frame. One method involves using mirror clips. These small clips are attached to the inside edge of the frame and hold the mirror in place. Another method utilizes a backing board, slightly smaller than the frame's inner dimensions. The mirror rests on the backing board, and small brackets secure the board to the frame. Choose the method that best suits the frame's design and the mirror's size and weight.
Finishing the Frame
The finishing stage enhances the frame's appearance and protects the wood. Begin by sanding the frame with progressively finer grits of sandpaper. This process smooths the wood and prepares it for finishing. Wood filler can be used to fill any gaps or imperfections. Once the filler dries, sand the area smooth.
A variety of finishes can be applied. Paint offers a wide range of color options, while stain enhances the wood's natural grain. Apply the chosen finish according to the manufacturer's instructions. Multiple coats may be required for optimal coverage and durability. Allow sufficient drying time between coats. A final coat of clear sealant protects the finish and adds a layer of durability.
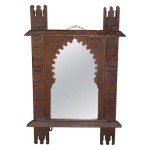
Adding Decorative Elements (Optional)
Decorative elements can further personalize the frame. Consider adding embellishments such as carvings, inlays, or decorative molding. These additions can complement the surrounding décor and enhance the frame's visual appeal. Apply these elements before the finishing stage to ensure proper adhesion and a cohesive finish.
Installation
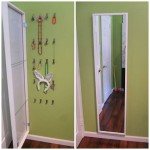
Once the frame is complete and the finish has dried, the mirror can be installed. Depending on the wall type and the mirror's weight, appropriate hanging hardware should be selected. D-rings and wire are a common choice for lighter mirrors, while heavier mirrors may require more robust mounting hardware. Ensure the hardware is rated for the combined weight of the mirror and frame. Follow the hardware manufacturer's instructions for proper installation.

Diy Farmhouse Wood Frame Mirror She Gave It A Go

Diy Farmhouse Wood Frame Mirror She Gave It A Go

Diy Framed Mirror Jaime Costiglio

Easy Driftwood Mirror The Wood Grain Cottage

Diy Farmhouse Wood Frame Mirror She Gave It A Go

Diy Reclaimed Wood Frames The Space Between

20 Easy Creative Diy Mirror Frame Ideas

How To Make A Wood Mirror Frame

Diy Reclaimed Wood Frames The Space Between

Diy Full Length Mirror Frame