How To Mount A Mirror Flush To The Wall
Mounting a mirror flush against a wall requires careful planning and execution to ensure a secure and aesthetically pleasing result. This guide provides a comprehensive overview of the process, encompassing necessary tools, materials, and step-by-step instructions.
Tools and Materials: Several tools and materials are essential for this project. These include a stud finder, measuring tape, pencil, level, safety glasses, drill with appropriate drill bits (including a masonry bit if dealing with brick or concrete walls), screwdriver, suitable wall anchors and screws (depending on the wall type and mirror weight), mirror adhesive, and optional mirror clips or J-channels.
Assessing the Wall and Mirror: Before beginning, it's crucial to assess both the wall and the mirror. Locate and mark the wall studs using a stud finder. This is important for ensuring the mirror is securely mounted, especially for heavier mirrors. Measure and weigh the mirror to determine the appropriate mounting hardware and adhesive.
Choosing the Right Mounting Method: Several methods exist for mounting mirrors flush to the wall. The chosen method depends on the mirror's weight and size, as well as the wall type. Lightweight mirrors can often be mounted using adhesive alone. Heavier mirrors will require a combination of adhesive and screws or specialized hardware like mirror clips or J-channels. For very large or heavy mirrors, consulting a professional installer is recommended.
Preparing the Wall: Once the mounting method is selected, the wall must be prepared. Ensure the wall surface is clean and dry. If mounting over wallpaper, consider removing it in the area where the mirror will be placed to create a stronger bond. For textured walls, it may be necessary to lightly sand the area to create a flatter surface.
Marking the Mirror Placement: Accurate marking is crucial for a flush mount. Use a measuring tape and pencil to mark the desired position of the mirror on the wall. Use a level to ensure the markings are perfectly horizontal and vertical. Double-check measurements to avoid misplacement.
Applying Adhesive (If Applicable): If using adhesive, apply it to the back of the mirror according to the manufacturer's instructions. Typically, adhesive is applied in a grid pattern or vertical stripes. Avoid applying adhesive too close to the edges of the mirror to prevent it from squeezing out during installation.
Drilling Pilot Holes (If Applicable): If using screws or other hardware, carefully drill pilot holes through the wall at the marked locations. Ensure the drill bit size is appropriate for the chosen anchors and screws. If drilling into a masonry wall, use a masonry bit and appropriate anchors designed for concrete or brick.
Installing Wall Anchors (If Applicable): If the mirror will not be mounted directly to wall studs, insert wall anchors into the drilled pilot holes. Gently tap the anchors until they are flush with the wall surface. Ensure the anchors are securely in place.
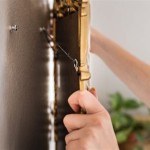
Mounting the Mirror: Carefully lift the mirror and position it against the wall, aligning it with the marked placement. If using adhesive only, press the mirror firmly against the wall for the duration recommended by the adhesive manufacturer. If using screws, drive them through the pre-drilled holes in the mirror and into the wall anchors or studs. Avoid overtightening the screws, which could crack the mirror.
Installing Mirror Clips or J-Channels (If Applicable): Mirror clips or J-channels provide additional support and help secure the mirror to the wall. Install these according to the manufacturer’s instructions after the mirror is mounted with adhesive or screws. These provide a more finished look and prevent the mirror from shifting over time.
Cleaning and Finishing: Once the mirror is securely mounted, clean any excess adhesive that may have squeezed out from behind the edges. Wipe the mirror surface clean with a glass cleaner. Inspect the installation to ensure the mirror is flush against the wall and securely in place.
Safety Precautions: Throughout the entire process, prioritize safety. Wear safety glasses when drilling or working with adhesives. Handle the mirror carefully to avoid dropping or breaking it. If unsure about any step of the process, consult a professional installer for assistance.
Variations for Different Wall Types: Different wall types require specific considerations. For drywall, using appropriate drywall anchors is essential. For masonry walls, specialized masonry anchors and drill bits are required. For tiled walls, it's often best to mount the mirror directly to the studs or use heavy-duty toggle bolts.

How To Hang A Heavy Mirror With Flush Mount Wall Hangers Hanging Mirrors Entryway

How To Hang A Frameless Mirror On The Wall With Pictures

Gatco Cameo 19 1 2 X 24 Frameless Flush Mount Wall Mirror 39t14 Lamps Plus

How To Hang A Frameless Mirror On The Wall With Pictures

Quebec Chrome 24 1 2 X 32 Flush Mount Wall Mirror 39t05 Lamps Plus

Pin On Powder Room

Picture Fixings Flush To Wall Mirror Hanging Kit Picturehangingdirect Co

Flush Mirror Front Inset Medicine Cabinets Wall Mount Sink Faucets Large Bathroom Mirrors Modern Decor Farmhouse Design

Flush Mount 25 H Framed Rectangle Mirror Satin Nickel Com

Gatco Flush Mount 25 In X 20 5 Framed Rectangle Mirror Satin Nickel 1833 The Home Depot