How to Put Trim Around Bathroom Mirrors
Adding trim around a bathroom mirror is a simple yet effective way to elevate the design of your bathroom. It can create a polished and sophisticated look, complementing the existing decor and adding a touch of visual interest.
Choosing the Right Trim
The first step is to choose the right type of trim for your bathroom mirror. Consider the style of your bathroom and the overall aesthetic you want to achieve. For a modern look, opt for clean lines and minimalist trim, such as a simple molding or a narrow frame. For a traditional bathroom, consider ornate trim with decorative details. Here are a few trim options to consider:
- Moulding: This is a popular choice for trim around mirrors. It comes in various styles and sizes, from simple and basic to more elaborate designs.
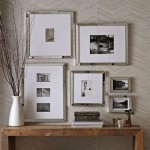
- Frame: A frame can provide a more defined look, especially if you choose a contrasting color or material.
- Wainscoting: Wainscoting can be used to create a more elaborate and decorative trim around a mirror.
Once you have chosen the trim, measure the mirror carefully to determine the necessary length for each piece. It is essential to ensure that the trim pieces are cut accurately to create a seamless and professional finish.
Preparing for Installation
Before you begin installing the trim, make sure the surface around the mirror is clean and free of debris. You may need to remove any existing caulk or sealant around the mirror before proceeding. It is also essential to have the right tools for the job, including a measuring tape, a pencil, a saw, a miter saw (if necessary), a level, and a nail gun or hammer.
Installing the Trim
Start by attaching the bottom piece of trim to the wall using a nail gun or hammer. Ensure that the trim is level and flush with the wall. If necessary, use shims to adjust the position of the trim. Connect the trim at the corners, if necessary, using a miter saw at a 45-degree angle. Once the bottom piece is secured, attach the side pieces and top piece using the same methods. You may need to add a small piece of trim at the top corner of the mirror to create a complete look.
After all the trim pieces are installed, check for any gaps or unevenness and make necessary adjustments. Once you are satisfied, you can apply a bead of caulk around the edges of the trim to create a seamless seal.
Finishing Touches
After the caulk has dried, you can paint or stain the trim to match the existing décor or create a contrasting accent. You can also apply a clear sealant to protect the trim from moisture and humidity.
Adding trim around a bathroom mirror is a relatively simple DIY project that can significantly enhance the overall aesthetic of your bathroom.

Easy Diy Tutorial Adding Trim Around A Giant Mirror For Ers

Easy Diy Tutorial Adding Trim Around A Giant Mirror For Ers

How To Frame Out That Builder Basic Bathroom Mirror For 20 Or Less

Diy Bathroom Mirror Frame With Molding The Happier Homemaker

How To Frame A Mirror

The Kids Bathroom Mirror Gets Framed House Of Hepworths

Easy Diy Tutorial Adding Trim Around A Giant Mirror For Ers

Mirror Frame Diy How To Update A Basic Bathroom Our Faux Farmhouse

How To Frame Out That Builder Basic Bathroom Mirror For 20 Or Less

How To Frame A Bathroom Mirror