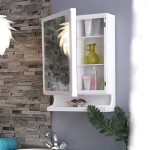
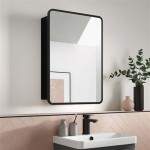
How To Replace Vanity Mirror Light
Replacing a vanity mirror light fixture can significantly enhance the bathroom's aesthetic and functionality. This guide provides a comprehensive step-by-step process for replacing a standard vanity light fixture. While this guide offers general instructions, consulting a qualified electrician is recommended for complex installations or if uncertainty arises during any stage of the process.
Essential Tools and Materials: Before commencing, gather the necessary tools and materials. These typically include a new vanity light fixture, a voltage tester, wire strippers, wire connectors, a screwdriver (Phillips and flathead), pliers, safety glasses, and electrician's tape. Having these readily available will streamline the replacement process.
Step 1: Safety First – Disconnecting Power: Safety is paramount. Locate the circuit breaker corresponding to the bathroom lighting circuit. Turn off the breaker completely. This critical step prevents electrical shocks during the replacement process. Verify power disconnection by switching the existing vanity light on and off. If the light does not illuminate, the power is successfully disconnected.
Step 2: Removing the Old Fixture: Begin by carefully examining the existing fixture. Most vanity lights are attached to the wall with screws concealed beneath decorative caps or the fixture base itself. Remove these caps or loosen the screws securing the fixture to the wall. Gently lower the fixture, supporting its weight while disconnecting the wires.
Step 3: Disconnecting the Wiring: Before completely detaching the old fixture, carefully disconnect the wires connecting it to the house wiring. Typically, there will be three wires: black (hot), white (neutral), and green or bare copper (ground). Use a voltage tester to double-check that the power is off before touching any wires. Unscrew the wire connectors joining the fixture wires to the house wires. Carefully separate the wires, ensuring they do not touch.
Step 4: Preparing the New Fixture: Unpack the new vanity light fixture and review the manufacturer's instructions. These instructions often provide specific guidance for the particular model. Identify the wires on the new fixture, which should be color-coded similarly to the old fixture (black, white, and green/bare copper).
Step 5: Connecting the New Fixture: Connect the wires of the new fixture to the corresponding wires from the electrical box. The black wire from the fixture connects to the black (hot) wire from the house wiring, the white wire from the fixture connects to the white (neutral) wire, and the green or bare copper wire from the fixture connects to the green or bare copper (ground) wire. Use appropriate wire connectors to secure each connection and ensure a tight fit. Wrap each connection with electrical tape for added security.
Step 6: Mounting the New Fixture: Carefully tuck the connected wires into the electrical box and align the new fixture with the mounting holes on the wall. Secure the fixture to the wall using the appropriate screws and hardware provided with the new fixture. Replace any decorative caps or covers that were removed earlier.
Step 7: Restoring Power and Testing: Once the fixture is securely mounted, return to the circuit breaker and turn the power back on. Switch on the new vanity light to confirm its functionality. If the light illuminates, the installation is successful. If the light does not function, double-check all connections and ensure the power is restored to the circuit.
Variations in Fixture Types: Some vanity light fixtures might have different mounting systems or wiring configurations. For instance, some fixtures might require mounting to a backplate first. Refer to the manufacturer's instructions for specific guidance related to the purchased fixture.
Integrated LED Fixtures: Many modern vanity lights incorporate integrated LED modules. These fixtures often require direct wiring to the electrical box and may have different connection methods. Carefully follow the manufacturer’s instructions for proper installation of LED fixtures.
Working with Sconces: Vanity lights can also take the form of wall-mounted sconces. Installing sconces often involves mounting a backplate to the wall and then attaching the sconce to the backplate. Wiring procedures are similar to standard vanity lights, but the mounting process might differ slightly. Consult the manufacturer's instructions for specific guidance on sconce installation.
Addressing Common Issues: If the light does not work after installation, check the following: ensure the circuit breaker is on, verify all wire connections are secure, and consult the manufacturer's troubleshooting guide. If the problem persists, consider consulting a qualified electrician.

Replacing A Light Fixture On Vanity Mirror

Replacing A Light Fixture On Vanity Mirror

How To Install A Bathroom Vanity Mirror Light

Vanity Mirror Light Bulb Replacement How To Replace On A Sunter Lighted

How To Replace The Led Bulbs For Vanity Mirror With Lights

Bathroom Lighting How To Replace A Vanity Light The Home Depot

How To Install Change Vanity Mirror Light Bulb 74 Led Jeep Compass

How To Replace The Led Bulbs For Vanity Mirror With Lights

Equinox Terrain Vanity Mirror Bulb Change

How To Replace A Hollywood Light With 2 Vanity Lights