Installing a Magic Mirror on Raspberry Pi 3
A magic mirror is a captivating technological project that transforms a regular mirror into an interactive display. It can display information like the weather, news, calendar events, and even play music. This article will guide you through the process of installing a magic mirror on a Raspberry Pi 3, a popular and cost-effective single-board computer.
Project Setup
Before embarking on the installation process, ensure you have the following materials readily available:
- Raspberry Pi 3
- MicroSD card (8GB or larger)
- Power supply for Raspberry Pi
- HDMI cable
- USB keyboard and mouse
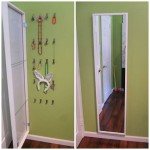
- Two-way mirror (or a regular mirror with a reflective film)
- Frame for the mirror
- Monitor (optional, for initial setup)
Once you have gathered the necessary components, follow these steps to start your magic mirror journey:
- Prepare the SD card: Download and install the Raspberry Pi Imager software to your computer. Use it to flash the Raspberry Pi OS image onto the SD card.
- Connect the Raspberry Pi: Connect the power supply to the Raspberry Pi, connect the HDMI cable to the monitor (optional) and connect the keyboard and mouse via USB ports.
- Access the Raspberry Pi: Once the Raspberry Pi boots up, you can access its desktop environment.
- Install Magic Mirror software: This involves setting up the necessary software packages and configuring the mirror's appearance and features.
Magic Mirror Software Installation
The magic mirror software is a collection of scripts and modules that allow you to customize the mirror's functionality and appearance. The Magic Mirror software relies on Node.js, a JavaScript runtime environment, and npm, a package manager for Node.js.
To install the Magic Mirror software, follow these steps:
- Install Node.js and npm: Open a terminal window on your Raspberry Pi and run the following commands to install Node.js and npm:
sudo apt-get update sudo apt-get install nodejs npm - Clone the Magic Mirror repository: Use the following command to clone the Magic Mirror repository from GitHub to your Raspberry Pi:
git clone https://github.com/MichMich/MagicMirror.git - Install dependencies: Navigate to the Magic Mirror directory and run the following command to install the necessary dependencies:
    cd MagicMirror
    npm install
Configuring the Magic Mirror
Once the Magic Mirror software is installed, you can configure it to display the information you want. The configuration is handled through a JSON file named config.js located in the Magic Mirror directory. You can edit this file to customize the appearance and functionality of your Magic Mirror.
Here are some of the key settings you can adjust in the config.js file:
Modules:
You can enable or disable various modules, such as the weather forecast, calendar, news feed, and more.Layout:
You can control the position and size of the modules on the mirror's display.Appearance:
You can customize the colors, fonts, and backgrounds of the mirror.Language:
You can set the language for the displayed information.Credentials:
You may need to provide API keys or login credentials for certain modules to function correctly.
To run your Magic Mirror, simply navigate to the Magic Mirror directory in the terminal and run the following command:
npm start
The magic mirror will start displaying the information you configured. You can then adjust the settings further to create the perfect display for your needs.

How To Build A Super Slim Smart Mirror Raspberry Pi

Magic Mirror On Raspberry Pi Complete Installation Guide Raspberrytips

Complete Raspberry Pi Magic Mirror Tutorial Newbie Friendly Central

How To Install Magic Mirror On Your Raspberry Pi Howchoo

Magic Mirror On Raspberry Pi The Ultimate Guide For Part Of This Project

Raspberry Pi Smart Mirror How To Make A Magic All3dp

Raspberry Pi Magicmirror Without The Mirror Part 1 Basic Setup

How To Setup Build A Magic Mirror With Raspberry Pi Beginners Guide Okdo

How To Make A Magic Mirror With Raspberry Pi Sparkfun Learn

Homemade Smart Mirror Tutorial Raspberry Pi Magicmirror