Installing a Wall Mirror for Your Home Gym: A Comprehensive Guide
Creating a home gym is a significant investment in personal health and well-being. Among the essential equipment and accessories, a wall mirror plays a crucial role in enhancing workout effectiveness and safety. A large, strategically placed mirror allows individuals to monitor their form, ensuring proper technique and minimizing the risk of injury. This article provides a detailed guide on installing a wall mirror in a home gym, covering essential considerations, necessary tools, step-by-step instructions, and safety precautions.
Key Considerations Before Installation
Before commencing the installation process, several factors must be carefully evaluated to ensure the mirror is installed correctly and safely. These considerations include wall suitability, mirror size and weight, and mounting options.
Wall Suitability: Identifying the type of wall is paramount. Walls typically fall into three main categories: drywall (also known as sheetrock or gypsum board), plaster, and concrete/masonry. Drywall is the most common type in residential construction, but it has limited weight-bearing capacity. Plaster walls, while sturdier than drywall, can be brittle and require special handling. Concrete or masonry walls are the strongest but necessitate specific drilling techniques and hardware. Determining the wall type will dictate the appropriate anchoring methods and hardware required to support the mirror's weight.
For drywall, it is crucial to locate wall studs. These vertical framing members provide the most secure attachment points. Stud finders, readily available at hardware stores, can assist in locating studs. If studs are not ideally positioned for the desired mirror placement, heavy-duty drywall anchors may be necessary. However, these anchors have weight limitations, so selecting an anchor rated for the mirror's weight is essential.
Plaster walls require a similar approach to drywall, but with added caution. Drilling into plaster can cause cracking or crumbling. Using a slow drill speed and appropriate drill bit is crucial. Furthermore, using longer screws to reach the underlying studs is generally recommended.
Concrete or masonry walls require the use of a hammer drill and masonry drill bits. These walls will provide the most secure mounting surface, but the installation process is more involved and may require specialized expertise.
Mirror Size and Weight: The dimensions and weight of the mirror directly impact the installation method and hardware selection. Larger and heavier mirrors require more robust support. It is imperative to accurately measure the mirror's dimensions and weigh it before proceeding. This information will guide the selection of appropriate hanging hardware and the determination of whether additional support, such as a Z-bar system, is necessary.
The weight of the mirror should be well within the weight limits of the chosen anchors or stud attachments. Exceeding these limits poses a significant safety risk, potentially leading to the mirror falling from the wall.
Mounting Options: Several mounting options are available for wall mirrors, each with its own advantages and disadvantages. The choice depends on factors such as the mirror's size and weight, the desired aesthetic, and the wall type.
Direct Screw Mounting: This method involves drilling holes directly through the mirror and into the wall. It is a secure option for smaller, lighter mirrors, but it can be aesthetically less appealing as the screw heads are visible. Rubber washers are typically used between the mirror and the wall to protect the glass and prevent cracking.
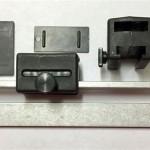
Mirror Clips: Mirror clips are small metal or plastic brackets that secure the mirror to the wall. They are available in various styles and finishes and offer a relatively discreet mounting solution. Mirror clips are suitable for mirrors of moderate size and weight, and they allow for easy removal of the mirror if needed.
Z-Bar System: A Z-bar system consists of two interlocking metal brackets, one mounted to the wall and the other to the back of the mirror. This system provides a very secure and level installation, particularly for large and heavy mirrors. The Z-bar system distributes the weight of the mirror evenly across the wall, reducing stress on individual attachment points. The interlocking design also makes the mirror virtually impossible to accidentally dislodge.
Adhesive Mounting: While adhesive mounting may seem like a simple option, it is generally not recommended for large or heavy mirrors, especially in a home gym environment where vibrations and impacts are possible. Adhesive can fail over time, leading to the mirror falling. If adhesive is used, it should be a high-quality mirror mastic specifically designed for this purpose.
Essential Tools and Materials
Having the right tools and materials is crucial for a successful and safe mirror installation. This section outlines the necessary items:
Stud Finder: Used to locate wall studs behind drywall or plaster.
Level: Ensures the mirror is hung straight and level.
Measuring Tape: Used for accurate measurements of the mirror and wall.
Drill: Required for drilling pilot holes and installing screws or anchors (a hammer drill is needed for concrete/masonry walls).
Drill Bits: Selection depends on the wall type (wood, drywall, plaster, concrete/masonry).
Screwdriver: For tightening screws (both Phillips head and flathead may be needed).
Anchors/Screws: Choose appropriate anchors and screws based on the wall type and mirror weight.
Mirror Clips/Z-Bar System: Select the chosen mounting hardware.
Safety Glasses: Protects eyes from debris during drilling.
Gloves: Provide grip and protect hands.
Pencil: For marking hole locations.
Mirror Mastic (Optional): For added adhesion, if desired, but not as a primary mounting method for heavy mirrors.
Clean Cloth: For cleaning the mirror surface.
Step-by-Step Installation Guide
The installation process will vary slightly depending on the chosen mounting method, but the following steps provide a general guideline:
1. Preparation:
* Clear the area where the mirror will be installed. Protect the floor with a drop cloth or old blanket.
* Gather all necessary tools and materials.
* Carefully unpack the mirror and inspect it for any damage.
2. Wall Preparation:
* Locate and mark wall studs using a stud finder. If using drywall anchors, determine the appropriate anchor placement based on the mirror's dimensions.
* Use a level and measuring tape to mark the desired location of the mirror on the wall. Ensure the marked area is level and centered.
3. Mounting Hardware Installation:
* Direct Screw Mounting:
* Drill pilot holes through the marked locations on the wall, ensuring the drill bit is appropriate for the wall type.
* Carefully position the mirror against the wall, aligning the holes in the mirror with the pilot holes.
* Insert screws through the holes in the mirror and into the pilot holes. Tighten the screws until snug, but avoid overtightening, which could crack the mirror.
* Mirror Clips:
* Position the bottom clips first, ensuring they are level. Mark the screw locations for the bottom clips.
* Drill pilot holes at the marked locations and install the bottom clips using screws.
* Carefully place the mirror onto the bottom clips.
* Position the top and side clips and mark their screw locations.
* Remove the mirror and drill pilot holes at the marked locations for the top and side clips.
* Install the top and side clips using screws, securing the mirror in place.
* Z-Bar System:
* Attach one Z-bar bracket to the back of the mirror using screws or adhesive (as recommended by the manufacturer).
* Locate studs and attach the other Z-bar bracket to the wall, ensuring it is level. If studs are not aligned with the desired mirror location, use heavy-duty drywall anchors.
* Carefully lift the mirror and align the Z-bar brackets. Interlock the brackets to hang the mirror on the wall.
4. Final Adjustments:
* Use a level to ensure the mirror is perfectly level. Make any necessary adjustments to the mounting hardware.
* Clean the mirror surface with a clean cloth to remove any fingerprints or smudges.
Safety Precautions
Safety is paramount during the installation process. Following these safety precautions is crucial to preventing injuries and ensuring a successful installation:
Wear Safety Glasses: Protect eyes from dust and debris during drilling.
Wear Gloves: Provide a better grip and protect hands from sharp edges.
Use Appropriate Drill Bits: Using the wrong drill bit can damage the wall and potentially cause the drill to slip.
Avoid Overtightening Screws: Overtightening screws can crack the mirror or strip the screw heads.
Get Help Lifting Heavy Mirrors: Large and heavy mirrors should be lifted by two or more people to prevent strain or injury.
Inspect Hardware Regularly: Periodically inspect the mounting hardware to ensure it is secure. Tighten any loose screws or replace any damaged anchors.
By carefully considering the wall type, mirror size and weight, and mounting options, homeowners can successfully install a wall mirror in their home gym. Proper installation ensures the mirror is securely mounted, providing a safe and effective tool for monitoring form and enhancing the workout experience.

Exercising At Home Add A Wall Mirror To Your Gym Alderfer Glass

A Mirror Wall For Your Home Gym Dick S Rancho Glass

Custom Home Gym Mirrors Creative Mirror Shower

Custom Home Gym Mirrors Creative Mirror Shower

Home Gym Mirrors Your Essential Guide Abc Glass Mirror
Home Gym Mirrors Your Essential Guide Abc Glass Mirror

Custom Home Gym Mirrors Creative Mirror Shower
Home Gym Mirrors Your Essential Guide Abc Glass Mirror

Gym Mirrors Pars Glass

Fab Glass And Mirror Hd Tempered Wall Kit For Gym Studio 48 X 72 Inches With Safety Backing Gm48x72 The Home Depot

