LED Backlit Mirror DIY: A Comprehensive Guide
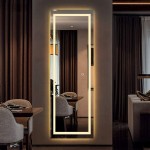
Creating a custom LED backlit mirror elevates any bathroom or vanity space, adding a touch of modern elegance and functional lighting. This project, while requiring some electrical know-how, is achievable for the dedicated DIY enthusiast. This guide provides a step-by-step approach to constructing a stunning LED backlit mirror.
Planning and Material Gathering: Accurate planning is crucial. Begin by measuring the mirror precisely to determine the required materials. Key materials include the mirror itself, LED strip lights, a power supply, wiring, mounting hardware, a diffuser, and safety equipment such as safety glasses and gloves.
Mirror Selection: The mirror serves as the foundation of the project. Standard mirrors are suitable, but consider those with a polished edge for a cleaner finished look. The thickness of the mirror will influence framing and mounting options.
LED Strip Light Selection: LED strip lights offer flexibility and even illumination. Consider factors like color temperature (warm white, cool white, or RGB), brightness (measured in lumens), and density (LEDs per meter). Waterproof (IP67 rated) strips are recommended for bathroom applications.
Power Supply Selection: The power supply must match the voltage and wattage requirements of the chosen LED strips. Calculate the total wattage of the LED strips and select a power supply with slightly higher wattage for optimal performance and longevity.
Diffuser Selection: A diffuser creates a soft, even glow, hiding the individual LED points. Opal acrylic or frosted glass are popular choices, offering varying degrees of light diffusion.
Framing Options: A frame provides structural support and a finished aesthetic. Aluminum channels specifically designed for LED strip mounting are readily available and offer a sleek, professional look. Wood frames can also be adapted but require more intricate routing and wiring management.
Construction Process: Begin by preparing the mirror and frame. If using an aluminum channel frame, cut it to the mirror's dimensions. For wooden frames, route channels for the LED strips and wiring.
Attaching the LED Strips: Peel back the adhesive backing on the LED strips and carefully adhere them to the inner edge of the frame or the designated channels. Ensure the strips are evenly spaced and oriented correctly for consistent illumination.
Wiring the LED Strips: Connect the LED strips following the manufacturer's instructions. Soldering provides secure connections, especially in humid environments. Use appropriate connectors for power input and ensure proper polarity.
Connecting the Power Supply: Connect the wiring from the LED strips to the power supply, again observing proper polarity. Position the power supply in a safe, accessible location, away from direct water exposure. Use wire connectors appropriate for the gauge of wire being used.
Mounting the Diffuser: Secure the diffuser over the LED strips. This can involve using adhesive, clips, or incorporating it into the frame design. Ensure a snug fit to prevent light leakage and maintain a uniform glow.
Mounting the Mirror: The mounting method depends on the mirror's weight and the wall's construction. Use appropriate wall anchors and screws to ensure secure mounting. Consider using mirror adhesive in conjunction with mechanical fasteners for added stability, particularly for larger mirrors.
Testing and Adjustments: Once the mirror is mounted, connect the power supply and test the lighting. Check for any uneven illumination, loose connections, or flickering. Make adjustments as needed before finalizing the installation.
Safety Precautions: Throughout the process, prioritize safety. Wear safety glasses to protect eyes from debris and flying particles. Disconnect the power supply before making any wiring connections. Consult local electrical codes and regulations to ensure compliance.
Customization Options: The basic design can be customized with features like a dimmer switch for adjustable brightness, a touch sensor for on/off control, or even integrating the mirror into a smart home system. These additions enhance functionality and personalize the final product.
Maintenance and Troubleshooting: Regularly clean the mirror surface with a suitable glass cleaner. If the LEDs fail to illuminate, check the power supply, wiring connections, and the LED strips themselves. Replace any faulty components as needed.
Building an LED backlit mirror is a rewarding project that combines practical lighting with aesthetic enhancement. By following these guidelines and paying careful attention to detail, a custom-made illuminated mirror can become a striking focal point in any space.

25 Beautiful Diy Vanity Mirror That Is Easy And To Do Most Of This Projects Can Be Bathroom Makeover Small Mirrors

How To Diy Vanity Mirror With Led Strip Lights

Bathroom Remodel Diy Backlit Mirror Leah And Joe Home Projects Crafts

Acrylic Framed Led Backlit Wall Mirror For Diy Bathroom Hotel China Fogless Made In Com

How To Diy Vanity Mirror With Led Strip Lights

Diy Led Framed Mirror Modern Builds Ep 74

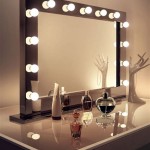
Popular Framed Diy Led Lights Makeup Mirror Desktop Hollywood Vanity With Light Bulbs In Customized Mirrors

Custom Led Backlit Bathroom Mirror Diy Project

Es Diy 84 In W X 32 H Rectangular Frameless Led Light Anti Fog Wall Bathroom Vanity Mirror Rgb Backlit Front Lighted Cjfxbm8432rgb The Home Depot

Bathroom Remodel Diy Backlit Mirror Leah And Joe Home Projects Crafts

