Make Your Own Hollywood Vanity Mirror
A Hollywood vanity mirror, with its iconic row of glamorous lights, is a staple in many makeup artists' studios and increasingly popular in homes. While purchasing a pre-made mirror can be expensive, crafting one is a surprisingly achievable DIY project. This article will guide you through the steps of creating your own custom Hollywood vanity mirror.
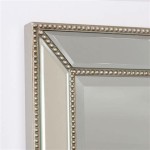
Choosing the Right Mirror
The foundation of any vanity mirror is, of course, the mirror itself. Several factors influence this selection:
- Size: Consider the available space and desired mirror dimensions. Larger mirrors offer a broader view, while smaller ones suit compact areas.
- Shape: Rectangular, square, and round mirrors are common choices. The shape should complement the overall aesthetic of the room.
- Frame: A frameless mirror provides a sleek, modern look, while a framed mirror can add a touch of classic elegance. Consider the existing décor when making this decision.
- Type: Opt for a high-quality, clear mirror for accurate reflection. Avoid distorted or low-quality mirrors that may hinder makeup application.
Gathering Necessary Materials
Once the mirror is selected, gather the following materials:
- Light Bulbs: Globe-style LED bulbs are the standard for Hollywood vanity mirrors, offering even, diffused lighting. Choose a warm white or daylight color temperature for optimal makeup application.
- Light Sockets: Purchase light sockets designed for the chosen bulb type. Ensure compatibility with the wiring plan.
- Wiring: Determine the necessary wiring length and gauge based on the number of lights and power source.
- Power Supply: A power cord and plug are required to connect the mirror to an electrical outlet.
- Mounting Hardware: Screws, anchors, and brackets are essential for securing the lights and the mirror itself.
- Dimmer Switch (Optional): A dimmer switch allows for adjustable light intensity, offering greater control over the lighting environment.
- Frame Material (Optional): If adding a frame, choose wood, metal, or plastic based on personal preference and skill level.
Planning the Light Placement
Careful planning is essential for even light distribution. Consider these points:
- Spacing: Evenly space the lights around the perimeter of the mirror. A typical spacing is between 4-6 inches.
- Number of Lights: The number of lights depends on the mirror's size and desired brightness. Larger mirrors require more lights.
- Symmetry: Maintain symmetry for a balanced and professional appearance. Mark the light positions carefully before drilling.
Assembling the Mirror
The assembly process involves several key steps:
- Attaching Light Sockets: Securely attach the light sockets to the mirror frame or the mirror itself, if frameless, using appropriate mounting hardware.
- Wiring the Lights: Carefully wire the light sockets together, ensuring correct polarity and secure connections. Follow a wiring diagram for complex setups.
- Connecting the Power Supply: Connect the wiring to the power cord and plug. Ensure all connections are safe and insulated.
- Installing the Bulbs: Once the wiring is complete, install the chosen light bulbs into the sockets.
- Adding the Dimmer Switch (Optional): If using a dimmer switch, wire it in series with the lights according to the manufacturer’s instructions.
- Mounting the Mirror: Securely mount the completed mirror to the wall using appropriate anchors and brackets.
Safety Precautions
Working with electricity requires caution. Adhere to these safety measures:
- Disconnect Power: Always disconnect the power supply before working with any electrical components.
- Proper Grounding: Ensure proper grounding to prevent electrical shocks.
- Consult an Electrician: If unsure about any electrical aspect of the project, consult a qualified electrician.
Customization and Finishing Touches
Personalize the vanity mirror with custom details:
- Painting the Frame: Paint the frame to match the room's décor or add a pop of color.
- Adding Decorative Elements: Embellish the frame with decorative elements like crystals, beads, or molding.
- Smart Features: Consider integrating smart features like Bluetooth speakers or a built-in magnifying mirror.
Maintenance and Care
Regular maintenance ensures the longevity of the Hollywood vanity mirror:
- Cleaning: Regularly clean the mirror surface with a glass cleaner and a soft cloth. Avoid abrasive cleaners.
- Bulb Replacement: Replace burnt-out bulbs promptly to maintain even lighting.
- Wiring Inspection: Periodically inspect the wiring for any damage or loose connections.

Diy Light Up Vanity Mirrors You Can Make Ohmeohmy Blog

10 Diy Vanity Mirror Projects That Show You In A Diffe Light

How To Make A Diy Hollywood Style Mirror Sarah Thain

Diy Light Up Vanity Mirrors You Can Make Ohmeohmy Blog

10 Diy Vanity Mirror Projects That Show You In A Diffe Light

Diy Light Up Vanity Mirrors You Can Make Ohmeohmy Blog

Vanity Makeup Mirror With Lights Dream House Diy Decoración De Unas Mesa Maquillaje

10 Diy Vanity Mirror Projects That Show You In A Diffe Light

How To Make A Diy Makeup Vanity With Hollywood Lighted Mirror

Diy Light Up Vanity Mirrors You Can Make Ohmeohmy Blog