Make Your Own Wall Mirror: A DIY Guide
Mirror, mirror on the wall, who's the fairest of them all? That might be a question for a fairy tale, but in the realm of interior design, mirrors are undeniable assets. They amplify light, create the illusion of space, and add a touch of elegance to any room. But with so many options available, it can be difficult to find the perfect mirror to complement your style and budget. Why not take matters into your own hands and create a unique wall mirror that reflects your personal taste? This guide will walk you through the process of making your own wall mirror, empowering you to design a statement piece that elevates your home decor.
Choosing the Right Materials
The first step in creating your own wall mirror is selecting the right materials. This involves considering the size, shape, and style of the mirror you envision. For the mirror itself, you have several options:
- Plain glass: This is the most affordable option and provides a clear reflection. You can find plain glass sheets at hardware stores or online.
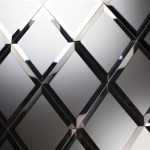
- Beveled glass: Beveled glass has edges that are cut at an angle, creating a more decorative and elegant look. It is available in different sizes and levels of beveling.
- Antiqued glass: Antiqued glass has a distressed, aged appearance, adding a vintage touch to your mirror. It can be found in various shades and patterns.
Once you've chosen your mirror glass, you'll need to select a frame. Frames can be constructed from various materials, such as:
- Wood: Wood frames are durable and versatile. They can be stained, painted, or left natural to complement different styles.
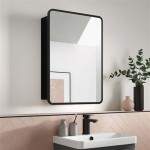
- Metal: Metal frames offer a sleek and modern look. They come in various finishes like gold, silver, brass, or black.
- Plastic: Plastic frames are lightweight and affordable. They are available in a wide range of colors and styles.
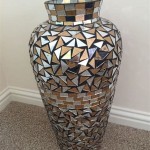
Beyond the frame, you might also want to incorporate embellishments to personalize your mirror. Consider using decorative elements like rope, fabric, beads, or mosaic tiles. Remember that the choice of materials should align with your desired aesthetic and the overall décor of your space.
Essential Tools and Supplies
To create your own wall mirror, you'll need a few basic tools and supplies that are readily available at most hardware stores or online retailers. These essential items include:
- Measuring tape: To determine the size of your frame and mirror glass.
- Saw: For cutting wood or metal frames to size. A miter saw will provide precise cuts for angled corners.
- Screwdriver or drill: To assemble the frame and secure the mirror glass.
- Wood glue or construction adhesive: To bond the frame pieces and attach embellishments.
- Sandpaper: To smooth any rough edges on the frame and prepare surfaces for painting or staining.
- Paints or stains: To customize the color of your wooden frame.
- Brushes or rollers: For applying paints or stains evenly.
- Mirror clips or adhesive: To attach the mirror glass to the frame securely.
- Safety glasses and gloves: For protection during cutting and assembly.
The specific tools and supplies you need will depend on the materials you choose, the complexity of your design, and your personal preferences. It's always a good idea to have additional supplies on hand, such as screws, nails, and extra adhesive, in case of unexpected needs.
Steps to Make Your Own Wall Mirror
Now that you have gathered the necessary materials and tools, you're ready to embark on the creative journey of making your own wall mirror.
Step 1: Measure and Cut the Frame
Begin by measuring the dimensions of your mirror glass. Based on these measurements, calculate the size of your frame. If you're using wood or metal, cut the frame pieces to length using a saw. Ensure that the angles are precise, especially for corners. You can use a miter saw for accurate cuts, or use a measuring tape and pencil to mark the cuts carefully.
Step 2: Assemble the Frame
Once all frame pieces are cut, begin the assembly process. This involves joining the pieces using wood glue, construction adhesive, or screws. If using wood glue or construction adhesive, clamp the frame together for a secure bond. If using screws, pre-drill pilot holes to prevent the wood from splitting. Make sure the frame is square and stable.
Step 3: Sand and Finish the Frame
After the frame is assembled, sand down any rough edges or imperfections to create a smooth finish. This will ensure a professional look and make it easier to apply paint or stain. If using wood, you can apply a wood stain to enhance the natural grain or paint it in your desired color. Choose paint or stain colors that complement your interior design and personalize your mirror. Apply multiple coats for better coverage and durability.
Step 4: Attach the Mirror Glass
The final step is to attach the mirror glass to the frame. You can use mirror clips or adhesive for this purpose. If using mirror clips, choose clips that are appropriate for the size and weight of your mirror glass. Attach the clips to the frame, ensuring they are evenly spaced and aligned. If using adhesive, apply a strong and durable adhesive specifically designed for glass. Securely attach the mirror glass to the frame, ensuring it is centered and level. Make sure the adhesive has adequate time to dry completely before hanging the mirror.
Step 5: Add Embellishments (Optional)
Once the mirror glass is attached, you can personalize your mirror by adding embellishments. This could include decorating the frame with rope, fabric, beads, or mosaic tiles. Use your creativity to design a unique and eye-catching addition. Remember to choose embellishments that complement the overall style of the mirror and your space.
After the embellishments have dried completely, your custom-made wall mirror is ready to be hung. Choose a location that maximizes its reflection and complements your décor.
Tips for a Successful Project
Creating your own wall mirror is a rewarding DIY project that allows you to express your creativity and enhance your home's aesthetics. Here are some tips to ensure your project is a success:
- Plan ahead: Before starting the project, create a detailed plan of your desired mirror design, including dimensions and materials. This will help you gather the necessary tools and supplies and prevent any surprises down the line.
- Choose the right materials: Select materials that are sturdy, durable, and suitable for your chosen design. Consider factors like weight, stability, and moisture resistance.
- Measure twice, cut once: Accurate measurements are crucial for a well-proportioned and structurally sound mirror. Double-check your measurements before making any cuts.
- Work safely: Always wear safety glasses and gloves, especially when working with sharp tools or potentially hazardous materials.
- Take your time: Creating a beautiful mirror takes time and patience. Don't rush the process; enjoy the journey of bringing your design to life.

Learn How To Easily Make A Decorative Home Wall Mirror Hometalk

Diy Gold Industrial Mirror Tutorials Never Skip Brunch

Diy Fluted Wall Mirror Persia Lou

Diy Sunburst Mirror 4 Wall Art

Diy Fluted Wall Mirror Persia Lou

Make Your Own Mirror Diy Spoon Colorful Girls Bedroom

Learn How To Easily Make A Decorative Home Wall Mirror Hometalk

How To Make Your Own Mirror A Rustic Diy Project Ideas For The Home

Diy Mirror Shanty 2 Chic

Make Your Own Custom Framed Mirrors Mirror Frame Diy Wall