DIY Makeup Mirror with Light Bulbs: A Comprehensive Guide
A well-lit makeup mirror is an essential tool for achieving a flawless makeup application. While pre-made lighted makeup mirrors are readily available, creating a DIY version offers a customizable and often more affordable alternative. This article provides a comprehensive guide to constructing a DIY makeup mirror with light bulbs, covering the necessary materials, tools, and step-by-step instructions.
Choosing the Right Mirror
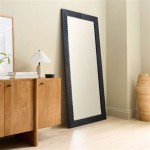
The foundation of any lighted makeup mirror is, of course, the mirror itself. Consider the size and shape that best suits individual needs. A larger mirror offers a broader view, while a smaller, more compact mirror is ideal for limited spaces. Frameless mirrors offer a sleek, modern aesthetic, while framed mirrors can add a decorative touch. The mirror's weight should also be considered, especially if it will be mounted on a wall. Opt for a mirror with a smooth, distortion-free surface for accurate reflection.
Selecting the Ideal Lighting
Proper lighting is crucial for achieving a precise makeup application. LED bulbs are a popular choice due to their energy efficiency, long lifespan, and minimal heat output. They are also available in various color temperatures, measured in Kelvins (K). A color temperature of around 5000K to 6000K mimics natural daylight and provides the most accurate color rendering for makeup application. Incandescent bulbs, though less energy-efficient, offer a warm, inviting glow. Consider the desired aesthetic and the amount of light required when choosing bulbs.
The number of bulbs needed depends on the size of the mirror. For smaller mirrors, five to ten bulbs may suffice, while larger mirrors may require more. Ensure the bulbs are evenly spaced around the mirror's perimeter for uniform illumination. Dimmable bulbs provide further control over the brightness level, allowing adjustment based on ambient lighting conditions and individual preferences.
Essential Materials and Tools
Gathering the necessary materials and tools before starting the project ensures a smooth and efficient process. The following list provides a comprehensive overview of the essential items:
- Mirror (size and shape of choice)
- Light bulbs (LED or incandescent)
- Light bulb sockets
- Wiring
- Power supply (plug or battery operated)
- Mounting hardware (if wall-mounting)
- Drill
- Screwdriver
- Wire strippers/cutters
- Measuring tape
- Safety glasses
Step-by-Step Assembly Instructions
Once all materials and tools are assembled, follow these steps to construct the lighted makeup mirror:
- Plan the Bulb Placement: Measure the perimeter of the mirror and mark the desired locations for the light bulb sockets. Ensure equal spacing for uniform illumination.
- Attach the Sockets: Securely attach the light bulb sockets to the mirror frame or the mirror itself using appropriate adhesive or mounting hardware. If attaching directly to the mirror surface, ensure the adhesive is compatible with the mirror material.
- Wire the Sockets: Connect the wires from each socket, creating a parallel circuit. This ensures that if one bulb burns out, the others remain functional. Consult a wiring diagram if necessary.
- Connect the Power Supply: Connect the wiring from the sockets to the power supply, ensuring proper polarity. If using a plug-in power supply, ensure the voltage is compatible with the bulbs. If using a battery-operated power supply, install the batteries according to the manufacturer's instructions.
- Test the Lights: Before finalizing the assembly, test the lights to ensure all connections are secure and the bulbs are functioning correctly. Address any wiring issues before proceeding.
- Mount the Mirror (Optional): If desired, mount the completed mirror to the wall using appropriate mounting hardware. Ensure the mounting is secure and can support the weight of the mirror and the lighting components.
Safety Precautions
Safety should always be a primary concern when working with electrical components. Always disconnect the power supply before working on the wiring. Use appropriate safety glasses to protect eyes from debris during drilling or other construction steps. If unsure about any aspect of the wiring or electrical connections, consult a qualified electrician.
Customization and Finishing Touches
The DIY nature of this project allows for extensive customization. Consider adding a dimmer switch for adjustable brightness control. Decorative elements, such as a frame or embellishments, can personalize the mirror and complement existing decor. The frame can also be painted or stained to match the surrounding environment. Explore different options to create a unique and functional lighted makeup mirror that reflects individual style and needs.

Diy Make Up Mirror With Lights Instructables

10 Diy Vanity Mirror Projects That Show You In A Diffe Light

Vanity Lights For Mirror Diy Hollywood Lighted Makeup With Dimmable St Led

Diy Vanity Mirror With Lights Only 40

Diy Light Up Vanity Mirrors You Can Make Ohmeohmy Blog

Vanity Makeup Mirror Diy Bulb Replacement It S So Corinney

10 Diy Vanity Mirror Projects That Show You In A Diffe Light

10 Led Bulbs Style Diy Vanity Makeup Mirror Usb Dimmable Lights Kit Com

Diy Light Up Vanity Mirrors You Can Make Ohmeohmy Blog

15 Frosted Bulb Hollywood Mirror With Crisp White Finish Diy Vanity Lights Beauty Room

