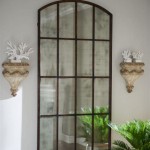
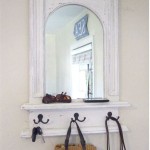
Oval Mirror Glass Replacement: A Comprehensive Guide
Mirrors, particularly those with an oval shape, add a touch of elegance and sophistication to any space. They serve both functional and decorative purposes, enhancing the aesthetics of bathrooms, bedrooms, hallways, and living rooms. However, mirrors are susceptible to damage. Accidental bumps, improper cleaning, or simply the passage of time can lead to cracks, chips, or complete shattering of the glass. When this occurs, oval mirror glass replacement becomes necessary to restore the mirror's original beauty and functionality.
Replacing oval mirror glass is a task that can be approached in several ways, ranging from DIY solutions for straightforward cases to professional installation for more complex projects. The best approach depends on the extent of the damage, the complexity of the mirror's design, and the individual's skill level and comfort with handling glass and adhesives. Neglecting a damaged mirror can pose safety risks and detract from the overall appearance of the room. Moreover, continued use of a damaged mirror can lead to further deterioration, making future replacement more difficult and costly.
This article provides a comprehensive guide to oval mirror glass replacement, covering the necessary tools and materials, step-by-step instructions for both DIY and professional approaches, and essential safety precautions. Understanding these aspects will empower homeowners and individuals to make informed decisions about their mirror replacement needs.
Evaluating the Damage and Choosing a Replacement Method
The first step in oval mirror glass replacement is to thoroughly assess the damage. Determine the severity and extent of the cracks, chips, or shattered areas. Minor chips or small cracks might be repairable with specialized epoxy or glass repair kits. However, larger cracks, significant shattering, or damage that affects the reflective surface necessitates complete glass replacement. Replacing the entire glass ensures a seamless and aesthetically pleasing result.
Once the damage is assessed, the homeowner must decide whether to pursue a DIY replacement or hire a professional. DIY replacement is suitable for mirrors with simple frames, easily accessible glass, and minimal intricate details. It requires careful planning, precise measurements, and meticulous execution to avoid further damage or injury. Professional replacement is recommended for complex mirror designs, mirrors with intricate frames, large-sized mirrors, or when the individual lacks the necessary skills or confidence to perform the task safely. Professionals possess the experience, tools, and expertise to handle delicate glass and ensure a proper installation.
When choosing a replacement method, consider the type of mirror glass required. Standard mirror glass is readily available and suitable for most applications. However, for areas with high humidity, such as bathrooms, moisture-resistant mirror glass is recommended to prevent corrosion and delamination. Additionally, the thickness of the replacement glass should match the original glass to ensure a proper fit within the frame and maintain structural integrity.
Obtaining accurate measurements is crucial, regardless of the chosen method. Measure the length and width of the existing glass (or the opening in the frame if the glass is completely shattered) with precision. Double-check the measurements to avoid errors that could result in an ill-fitting replacement. These measurements will be used to order the new glass, whether from a local glass supplier or an online retailer specializing in mirror glass.
DIY Oval Mirror Glass Replacement: A Step-by-Step Guide
If the decision is made to tackle the oval mirror glass replacement as a DIY project, following a structured approach is essential. This section outlines a step-by-step guide to ensure a successful and safe replacement.
Step 1: Gather Necessary Tools and Materials: Before starting the replacement process, gather all the necessary tools and materials. This includes: a new precut piece of oval mirror glass (based on accurate measurements), safety glasses, work gloves, a putty knife or scraper, a heat gun (optional), a glass cleaner, a soft cloth, mirror mastic or adhesive, shims (if needed), and painter's tape.
Step 2: Prepare the Work Area: Select a well-lit and ventilated workspace. Cover the work surface with a drop cloth or protective sheet to prevent scratches or damage. Ensure there is ample space to maneuver the mirror frame and safely handle the old and new glass.
Step 3: Remove the Old Glass: Wearing safety glasses and work gloves, carefully remove any remaining shards of broken glass from the frame. Use the putty knife or scraper to gently loosen the old mirror from the frame. Apply heat from a heat gun (on a low setting) to soften the adhesive if necessary. Work slowly and patiently to avoid damaging the frame. Once the old glass is loosened, carefully lift it out of the frame and dispose of it properly (wrap it securely in cardboard and label it as "broken glass").
Step 4: Clean the Frame: Thoroughly clean the inside of the frame to remove any remaining adhesive residue, dirt, or debris. Use the putty knife or scraper to scrape away stubborn adhesive. Wipe the frame clean with a glass cleaner and a soft cloth. Ensure the frame is completely dry before proceeding.
Step 5: Apply Mirror Mastic: Apply a thin, even layer of mirror mastic or adhesive to the inside of the frame where the new glass will rest. Follow the manufacturer's instructions for the specific adhesive being used. Avoid applying excessive adhesive, as this can squeeze out from the edges of the glass and make cleanup difficult.
Step 6: Install the New Glass: Carefully position the new oval mirror glass into the frame, ensuring it is centered and aligned properly. Gently press the glass into the adhesive, applying even pressure across the surface. Use shims, if needed, to hold the glass in place while the adhesive dries.
Step 7: Secure the Glass: Use painter's tape to secure the glass to the frame while the adhesive cures. Apply the tape around the perimeter of the glass, ensuring it is firmly attached to both the glass and the frame. This will prevent the glass from shifting or moving during the drying process.
Step 8: Allow the Adhesive to Cure: Allow the adhesive to cure completely according to the manufacturer's instructions. This may take several hours or even overnight. Avoid disturbing the mirror during this time.
Step 9: Remove the Tape and Clean: Once the adhesive is fully cured, carefully remove the painter's tape. Clean any excess adhesive from the edges of the glass with a glass cleaner and a soft cloth. Inspect the mirror for any imperfections or gaps. If necessary, apply a thin bead of clear silicone caulk around the perimeter of the glass to seal any gaps and create a watertight seal.
Professional Oval Mirror Glass Replacement: What to Expect
Hiring a professional mirror replacement service offers several advantages, particularly for complex mirror designs or large-scale projects. Professionals possess the expertise, tools, and experience to handle the task efficiently and safely, ensuring a high-quality result.
The process typically begins with an on-site assessment. The professional will evaluate the damage, measure the mirror, and discuss the available replacement options. They will also provide a detailed quote outlining the cost of materials and labor. It's important to obtain quotes from multiple professionals to compare prices and services.
Once a professional is selected, they will order the replacement glass based on the precise measurements. Depending on the complexity of the mirror, they may need to custom-cut the glass to ensure a perfect fit. When the glass arrives, the professional will schedule a time to perform the replacement.
The replacement process is similar to the DIY approach, but professionals often use specialized tools and techniques. They will carefully remove the old glass, clean the frame, apply the appropriate adhesive, and install the new glass. They may also use specialized clamps or suction cups to secure the glass in place while the adhesive cures.
Professionals are also equipped to handle any unexpected issues that may arise during the replacement process. For example, if the frame is damaged or warped, they can often repair it before installing the new glass. They also have the experience to handle delicate or intricate mirror designs without causing further damage.
After the replacement is complete, the professional will thoroughly clean the mirror and the surrounding area. They will also inspect the installation to ensure it is secure and aesthetically pleasing. They may offer a warranty on their work, providing added peace of mind.
Choosing a qualified and reputable professional is essential. Look for companies with positive reviews, a strong track record, and proper licensing and insurance. Ask for references and inquire about their experience with oval mirror glass replacement specifically.
Safety Precautions for Handling Mirror Glass
Handling mirror glass, whether during a DIY replacement or under professional supervision, requires strict adherence to safety precautions. Glass shards are inherently sharp and can cause serious cuts and injuries. Following these guidelines minimizes the risk of accidents and ensures a safe working environment.
Personal Protective Equipment (PPE): Always wear safety glasses to protect the eyes from flying glass shards. Work gloves made of sturdy material (such as leather or thick fabric) provide a barrier against cuts and abrasions. Long sleeves and pants offer additional protection for the arms and legs. Consider wearing a dust mask to avoid inhaling glass dust particles.
Careful Handling: Handle mirror glass with extreme care. Avoid dropping or bumping the glass. When lifting or carrying glass, use both hands and keep the edges away from the body. Never attempt to force glass into a frame or opening; this can cause it to shatter.
Proper Disposal: Dispose of broken glass properly to prevent injuries. Wrap the glass securely in cardboard or newspaper and label it clearly as "broken glass." Dispose of the wrapped glass in a designated container or trash receptacle. Avoid leaving broken glass lying around the work area.
Cleaning Up Spills: Immediately clean up any glass shards or dust that accumulate during the replacement process. Use a vacuum cleaner with a hose attachment to remove small pieces of glass. Wipe down surfaces with a damp cloth to collect any remaining dust. Dispose of the vacuum bag or filter properly.
First Aid: In the event of a cut or injury, clean the wound thoroughly with soap and water. Apply antiseptic and cover the wound with a sterile bandage. Seek medical attention if the cut is deep, bleeds excessively, or shows signs of infection.
Children and Pets: Keep children and pets away from the work area during the mirror replacement process. Their curiosity can lead to accidents and injuries.

For Bmw E46 M3 E39 M5 Oval Car Rear View Mirror Replacement Glass Cell Lens M9j1

Oval Auto Dimming Rear View Mirror Glass Replacement Fit For Bmw M3 M5 E46 E39

Oval Mirror Glassupply Com

For Bmw E46 E39 M5 Oval Rear View Mirror Auto Dimming Replacement Glass Cell Ca

Acrylic Oval Mirror Sheet Flat Tile No Hardware Adhesive Perfect Glass Replacement Plastic

Oval Auto Dimming Rear View Mirror Replacement Glass For Bmw E46 M3 E39 M5 H4d6

Oval Mirror Custom Cut 11 25 5 75 High Replacement For Photo Frames Makerplace By Michaels

Unique Bargains Right Side Rh Mirror Glass Adhesive For Bmw Mini Cooper 07 15 51162755626 Com

40 Pcs Scrapbooking Mirror Replacement Tile Craft Glass Oval

Mid Century Cristal Art Oval Wall Mirror With Blue Glass Frame Italy 1960s For At Pamono