Removing Bathroom Wall Mirror Clips
Bathroom mirrors, often secured with specialized clips, can become damaged or outdated, necessitating removal. While seemingly a straightforward task, improper technique can lead to broken mirrors, damaged walls, and potential injury. This article provides a detailed guide on safely and effectively removing common types of bathroom mirror clips.
Identifying the Clip Type
The first step involves identifying the type of clips securing the mirror. Common types include J-clips, L-clips, spring clips, and decorative clips. J-clips and L-clips typically have a visible screw or fastener. Spring clips utilize tension to hold the mirror in place. Decorative clips often incorporate a combination of mechanisms and may require specialized tools for removal.
Gathering the Necessary Tools
Once the clip type is identified, gather the necessary tools. Common tools include a screwdriver (Phillips or flathead, depending on the clip), pliers, putty knife, safety glasses, work gloves, and a drop cloth or old towel. For stubborn clips, a heat gun or hair dryer can be helpful in softening adhesives. A helper can also be beneficial for supporting the mirror during removal, especially with larger mirrors.
Preparing the Work Area
Before beginning the removal process, prepare the surrounding area. Lay down a drop cloth or old towel to protect the sink, countertop, and floor from falling debris. Remove any items near the mirror that might interfere with the process. Wearing safety glasses and work gloves is highly recommended to protect against sharp edges and broken glass.
Removing J-Clips and L-Clips
J-clips and L-clips are typically secured with screws. Using the appropriate screwdriver, carefully loosen and remove the screws holding the clip in place. Once the screws are removed, gently pry the clip away from the mirror. If the clip is resistant, a putty knife can be used to carefully leverage it away from the mirror surface. Support the mirror during this process to prevent it from falling.
Removing Spring Clips
Spring clips require a different approach. These clips rely on tension to hold the mirror against the wall. Using a putty knife or a thin, flat tool, carefully insert the tool between the clip and the mirror. Gently pry the clip away from the mirror, releasing the tension. Work slowly and methodically around the perimeter of the mirror, releasing each clip one at a time. Have a helper support the mirror to prevent it from falling once the clips are released.
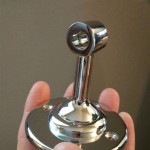
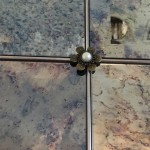
Removing Decorative Clips
Decorative clips can vary significantly in design. Some may have concealed screws, while others utilize a combination of mechanisms. Carefully examine the clip to determine the best method of removal. Consult the manufacturer's instructions if available. If the clip is secured with screws, carefully remove them. If adhesive is present, a heat gun or hair dryer can be used to soften the adhesive before attempting to remove the clip. Exercise caution when working with decorative clips, as they may be fragile.
Dealing with Adhesive Residue
After removing the clips, adhesive residue may remain on the wall or the back of the mirror. A putty knife can be used to carefully scrape away the adhesive. For stubborn residue, adhesive remover can be used, following the manufacturer's instructions. Test the adhesive remover on an inconspicuous area first to ensure it does not damage the wall surface.
Handling and Storing the Mirror
Once the mirror is free from the wall, handle it with care. Wear gloves to protect hands from sharp edges. If storing the mirror, place it in a safe location where it won't be damaged. Leaning the mirror against a wall at a slight angle is generally safer than laying it flat, which increases the risk of breakage.
Repairing Wall Damage
Removing mirror clips may leave small holes or blemishes on the wall. These can be filled with spackle or joint compound. Allow the filler to dry completely, then sand the area smooth before repainting or applying new wall coverings. This ensures a smooth and even surface for future installations.

How To Remove A Bathroom Mirror Lowe S

Removing A Bathroom Mirror Mounting Clips Or Brackets

Mirror Clips Hometalk

How To Remove A Frameless Mirror Like Nervous Grandma

Taking Down A Bathroom Mirror

Diy Bathroom Mirror Frame Without Removing Clips Her Happy Home

How To Safely And Easily Remove A Large Bathroom Builder Mirror From The Wall Site Title

Diy Bathroom Mirror Frame Without Removing Clips Her Happy Home

How To Install A Mirror Without Frame Merrypad

How To Safely And Easily Remove A Large Bathroom Builder Mirror From The Wall Site Title