Rope Framed Mirror DIY: A Comprehensive Guide
The incorporation of nautical or coastal themes into interior design has seen a resurgence in popularity. One effective and relatively simple way to achieve this aesthetic is through a DIY rope-framed mirror. This project allows for customization to suit individual preferences and existing décor, creating a unique and visually appealing focal point within a room. The process involves selecting appropriate materials, meticulously applying the rope, and ensuring a secure and aesthetically pleasing finish. This article provides a detailed guide outlining the steps involved in creating a rope-framed mirror, catering to both beginners and experienced crafters.
Materials Required for Rope Framed Mirror
The success of any DIY project hinges on the selection of appropriate materials. For a rope-framed mirror, the primary components include the mirror itself, a suitable rope, adhesive, and optionally, a backing board. Each component contributes to the overall aesthetic and structural integrity of the finished product. The mirror's size and shape dictate the scale of the project and the amount of rope required. The type of rope influences the overall aesthetic and the ease of application. The adhesive ensures a secure bond between the rope and the mirror surface. A backing board provides additional stability and can be used to conceal the mirror's edges and any imperfections in the rope application.
The mirror selection should consider the desired size, shape, and style. Mirrors can be readily purchased in various sizes and shapes from craft stores, home improvement centers, or online retailers. Frameless mirrors are generally preferred for this project as they provide a clean surface for the rope to adhere to. However, mirrors with existing frames can also be used, provided the frame is compatible with the desired aesthetic and the rope can be securely attached. The size of the mirror will determine the length of rope needed. It is advisable to measure the perimeter of the mirror and add at least 20% to account for overlaps, curves, and potential errors during application.
The rope is arguably the most crucial element in this project. The type of rope selected directly impacts the overall aesthetic and the ease of application. Natural fiber ropes, such as manila or sisal, are popular choices for their rustic and authentic nautical appearance. Synthetic ropes, such as nylon or polypropylene, offer greater durability and resistance to moisture, making them suitable for use in bathrooms or other high-humidity environments. The thickness of the rope is also an important consideration. Thicker ropes create a bolder and more substantial frame, while thinner ropes offer a more delicate and refined look. The chosen rope should be pliable enough to be easily manipulated and adhered to the mirror surface.
Adhesive selection is critical to ensuring a secure and long-lasting bond between the rope and the mirror. Construction adhesive, specifically formulated for use with glass and porous materials, is generally recommended. This type of adhesive provides a strong and permanent bond without damaging the mirror's reflective surface. Hot glue can also be used, particularly for securing the rope ends and filling any gaps. However, hot glue may not provide the same level of long-term adhesion as construction adhesive, especially in humid environments. Always test the adhesive on a small, inconspicuous area of the mirror before applying it to the entire surface.
A backing board provides additional support and stability to the mirror, particularly for larger projects. Plywood or MDF (medium-density fiberboard) are common choices for backing boards. The backing board should be slightly larger than the mirror to allow for a secure attachment and to conceal the mirror's edges. The backing board can be painted or stained to complement the overall design aesthetic. The mirror can be attached to the backing board using mirror clips, construction adhesive, or a combination of both.
Beyond the primary materials, additional tools and supplies may be required to complete the project. These include a measuring tape, scissors or a utility knife for cutting the rope, a caulking gun for applying construction adhesive, sandpaper for smoothing any rough edges on the backing board, and paint or stain for finishing the backing board. Safety glasses and gloves are recommended to protect the eyes and hands during the project.
Step-by-Step Guide to Creating a Rope Framed Mirror
The creation of a rope-framed mirror involves a series of carefully executed steps, from preparing the mirror surface to securing the final rope embellishments. The following guide provides a detailed breakdown of each step, ensuring a successful and visually appealing outcome.
Preparation: The first step involves preparing the mirror surface and the rope. The mirror should be thoroughly cleaned with a glass cleaner to remove any dirt, dust, or fingerprints. This ensures optimal adhesion of the adhesive. The rope should be uncoiled and straightened, if necessary. Any loose fibers or frayed ends should be trimmed to prevent unraveling. If using a natural fiber rope, consider applying a sealant to prevent shedding and to enhance its durability. If using a backing board, it should be cut to the appropriate size and sanded smooth. Any desired paint or stain finish should be applied to the backing board and allowed to dry completely.
Applying the Adhesive: The adhesive should be applied to the mirror surface in a consistent and controlled manner. Using a caulking gun, apply a bead of construction adhesive along the perimeter of the mirror, approximately one inch from the edge. The bead should be thick enough to provide a strong bond but not so thick that it oozes out from underneath the rope. If using hot glue, apply small dabs of glue along the perimeter of the mirror, working in small sections to prevent the glue from cooling and hardening before the rope is applied.
Attaching the Rope: The rope should be carefully and precisely applied to the adhesive-covered perimeter of the mirror. Starting at one corner, press the rope firmly into the adhesive, ensuring that it makes full contact with the mirror surface. Continue applying the rope along the perimeter, maintaining a consistent alignment and spacing. Overlap the rope slightly at the corners to create a more secure and visually appealing finish. If necessary, use masking tape to hold the rope in place while the adhesive dries. Allow the adhesive to dry completely according to the manufacturer's instructions.
Adding Additional Layers (Optional): For a more substantial and textured frame, additional layers of rope can be added. Repeat the process of applying adhesive and attaching the rope, layering the rope on top of the previous layer. Varying the thickness and type of rope can create a more dynamic and visually interesting effect. Ensure that each layer is securely bonded to the underlying layer and to the mirror surface.
Finishing Touches: Once the adhesive has dried completely, remove any masking tape and inspect the frame for any imperfections. Trim any loose fibers or frayed ends of the rope. Fill any gaps or seams with hot glue, if necessary. If desired, embellishments such as seashells, starfish, or decorative knots can be added to the frame to enhance the nautical theme. If using a backing board, attach the mirror to the backing board using mirror clips, construction adhesive, or a combination of both. Ensure that the mirror is securely attached to the backing board before hanging it on a wall.
Customization and Design Considerations
The beauty of a DIY project lies in its customizability. The rope-framed mirror offers ample opportunities for personalization, allowing individuals to tailor the design to their specific tastes and décor. Several factors can be adjusted to achieve a unique and personalized look.
Rope Variations: Different types of rope can significantly alter the aesthetic of the finished product. Manila rope offers a classic nautical look with its natural color and texture. Sisal rope provides a similar aesthetic but is often more affordable and readily available. Synthetic ropes, such as nylon or polypropylene, offer greater durability and resistance to moisture, making them suitable for use in bathrooms or other high-humidity environments. Braided ropes create a more intricate and refined look, while twisted ropes offer a more rustic and textured appearance. Experimenting with different rope types and thicknesses can create a wide range of design possibilities.
Frame Embellishments: Adding embellishments to the rope frame can further enhance its visual appeal and personalize its design. Seashells, starfish, and other nautical-themed items can be glued onto the frame to create a coastal-inspired look. Decorative knots can be tied and attached to the frame to add a touch of elegance and sophistication. Painting or staining the rope can also alter its appearance and complement the existing décor. Consider incorporating elements that reflect personal interests and experiences to create a truly unique and personalized piece.
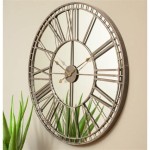
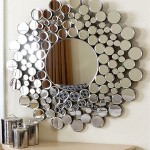
Mirror Shape and Size: The shape and size of the mirror can also contribute to the overall design aesthetic. Round mirrors create a softer and more organic feel, while square or rectangular mirrors offer a more structured and formal look. Larger mirrors can create a dramatic focal point in a room, while smaller mirrors can be used to add subtle accents. Consider the size and shape of the mirror in relation to the surrounding space and choose a mirror that complements the overall design.
Backing Board Options: The backing board, while primarily functional, can also be incorporated into the design aesthetic. Painting or staining the backing board can complement the rope frame and the surrounding décor. The backing board can also be covered with fabric or wallpaper to add texture and pattern. Consider using reclaimed wood for the backing board to create a rustic and eco-friendly look.
By carefully considering these customization options, individuals can create a rope-framed mirror that reflects their personal style and enhances the overall aesthetic of their home. The DIY approach allows for complete control over the design process, resulting in a truly unique and personalized piece of art.

How To Make A Rope Mirror Ropes Direct

Diy Nautical Rope Mirror Artsy Rule

Diy Rope Mirror Salvaged Inspirations

Diy Rope Mirror Tutorial Nautical Style Bathroom Southern Revivals

Diy Coastal Rope Mirror Makeover Challenge

Make A Boho Rope Mirror For Less Than 40 This Copycat Diy Is An Easy Weekend Project

How To Frame A Bathroom Mirror Lowe S Diy Rope Makeover Frames

Diy Rope Mirror Tutorial Nautical Style Bathroom Southern Revivals

Diy Nautical Rope Mirror Artsy Rule

Nautical Coastal Vertical Rectangle Rope Mirror Home Decor